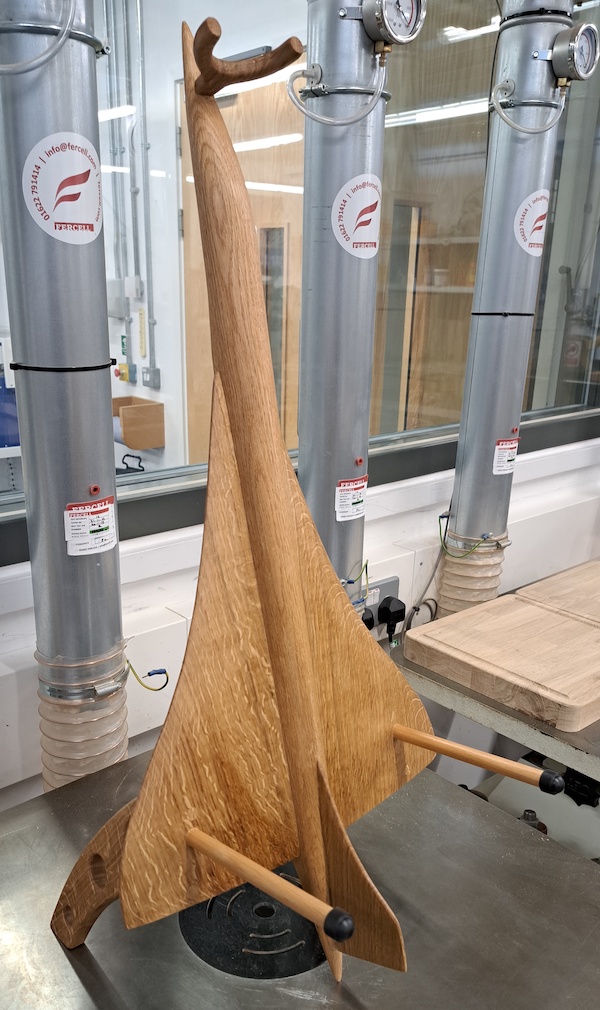
Concorde guitar stand
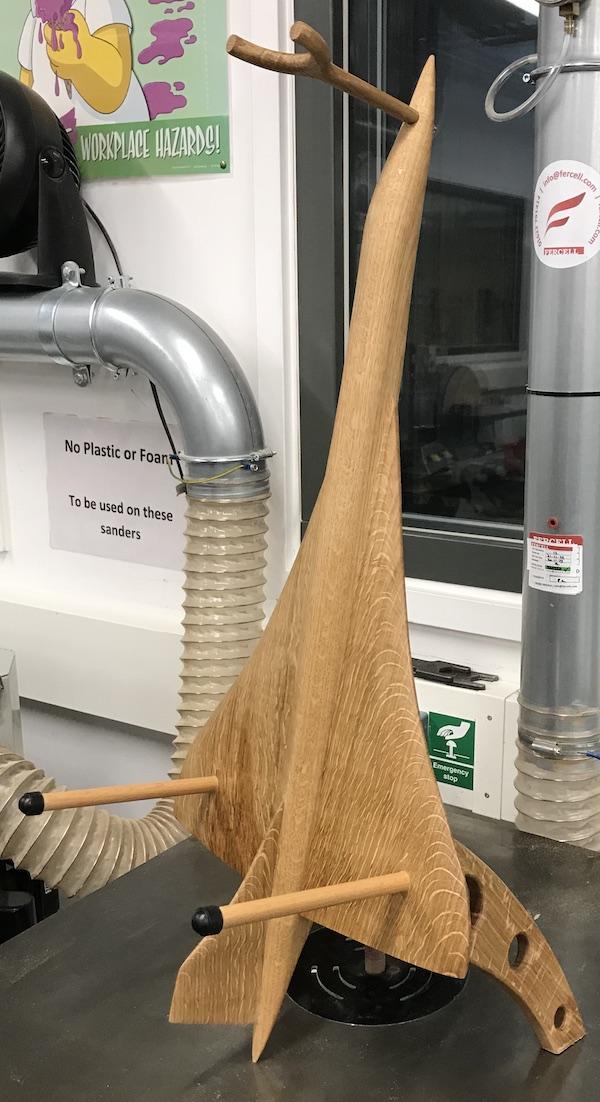
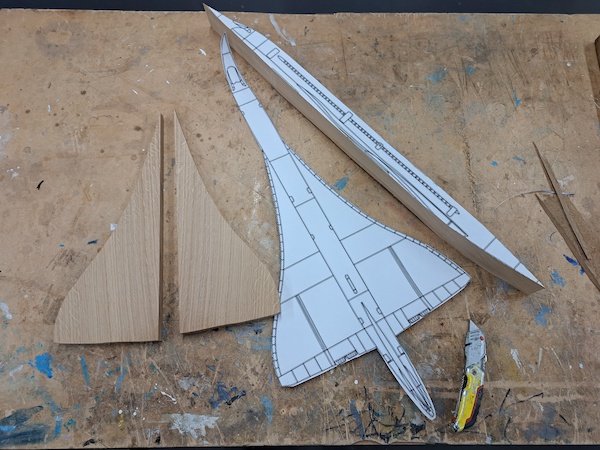
I’ve been asked to make some strange things over the years, but this one is up there with the more unusual. A customer asked for a guitar stand in the shape of a Concorde! A few measurements of a typical acoustic guitar provided a starting point and an online search gave me an outline of the iconic supersonic aircraft. I printed the drawing out on large format plotter paper, which I then stuck to some oak offcuts.
Winging it
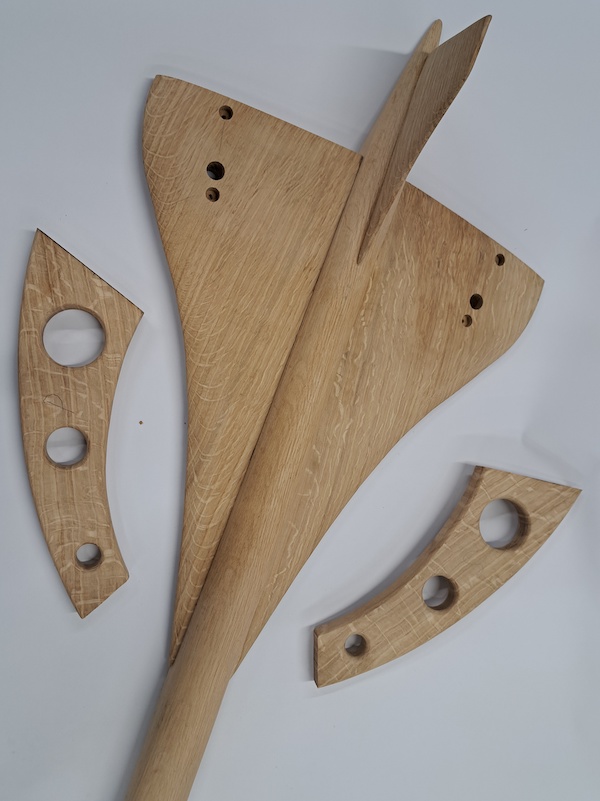
I started with the wings, which I cut out on the bandsaw (photo 1), before sanding to something resembling an aerofoil section. Next was the fuselage: I first cut out the profile, then after rotating it 90°, the plan view. The fuselage was carved to approximately a circular section using a combination of hand plane and spokeshave.
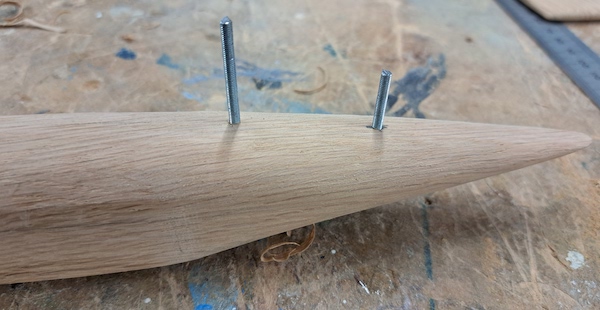
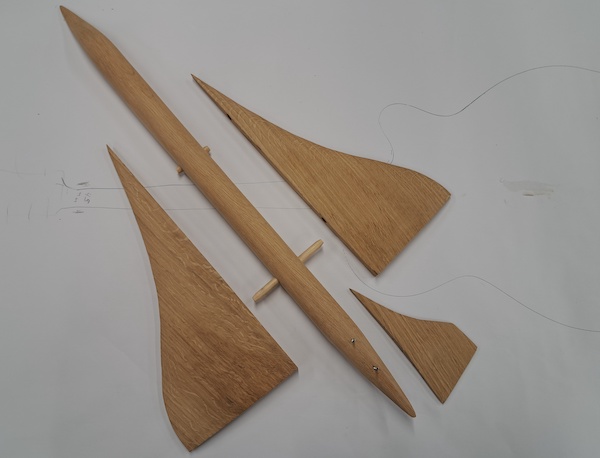
The tailfin was next, which I thought would be easily broken, so I reinforced the joint with 3mm steel threaded studding screwed into the fuselage and glued into the fin holes with epoxy (photo 2). The wings were then attached to the fuselage with 10mm dowels along with PVA glue (photo 3).
Making a stand
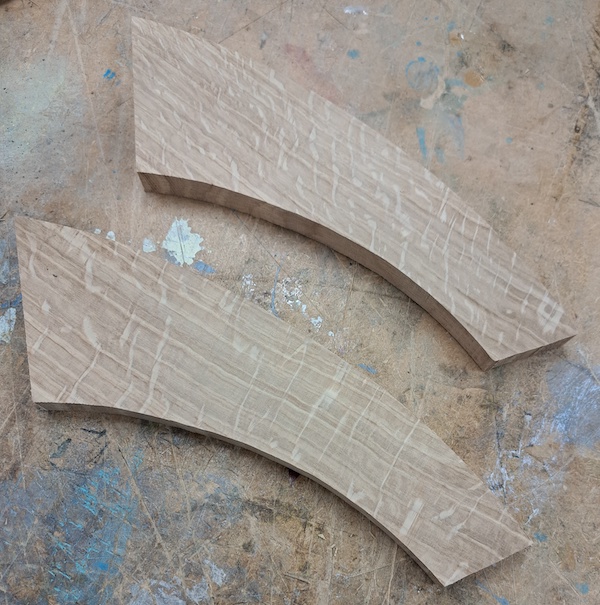
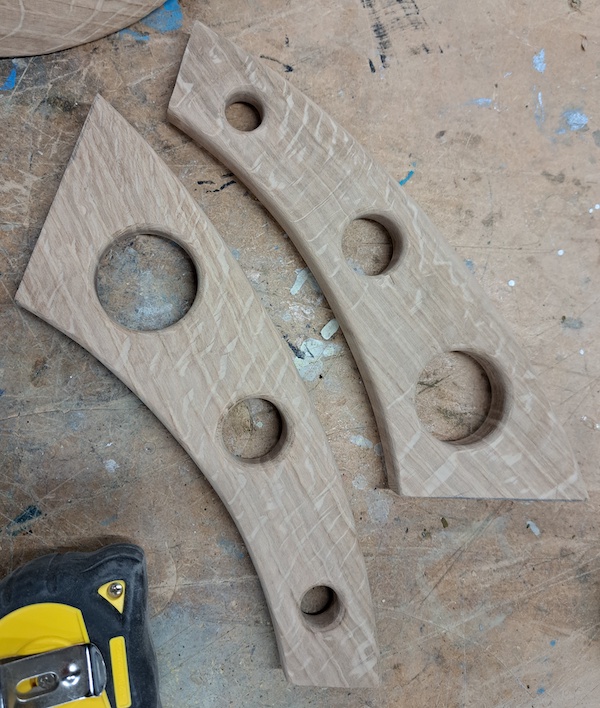
The angle of the guitar stand is quite important to ensure the centre of mass falls between three points of contact with the floor. I took a guess as to the approximate angle and double checked it with a commercial stand – it turned out pretty close. I made a cardboard template of the legs and cut them out on the bandsaw (photo 4). I thought they’d have a more ‘aerospace’ feel if I added lightening holes (photo 5); this also improved the appearance.
I routed the outside of the legs and edges of the holes with a roundover bit. The legs were glued and screwed to the wings and the screws counterbored, before filling the holes with cross-grain plugs. The 13mm holes for the guitar support dowels were drilled at the same time on the same centreline as the screws (photo 6); they’re a tight push fit – no glue just in case they need to be modified at a later date.
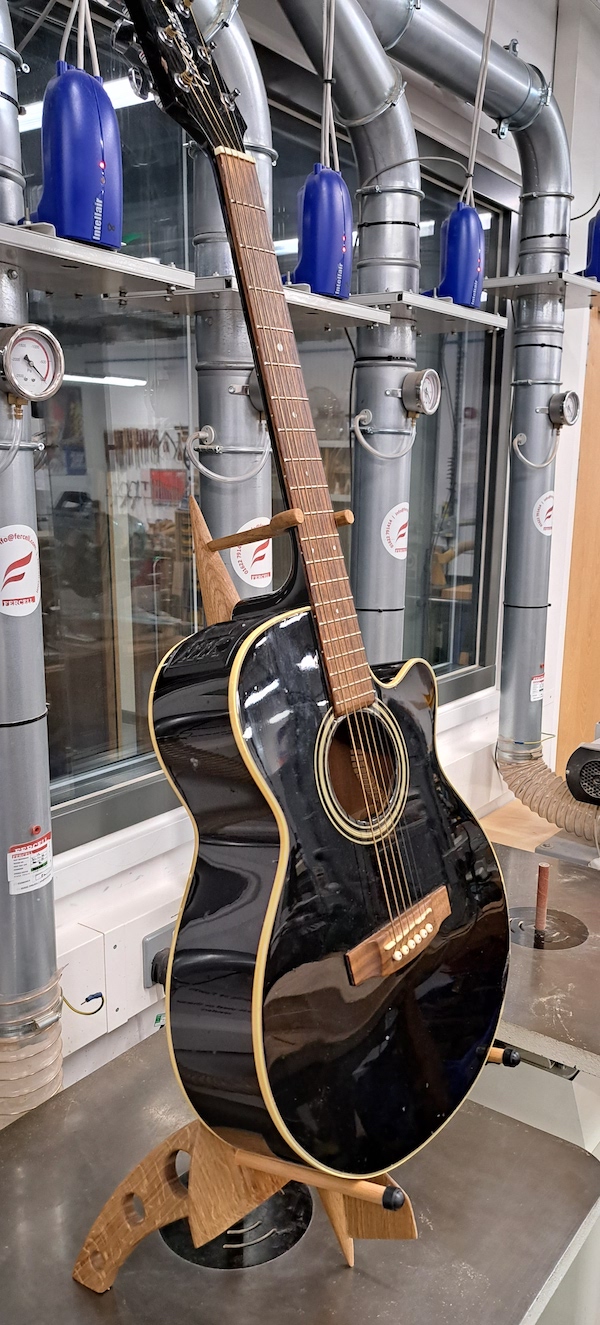
No yoke
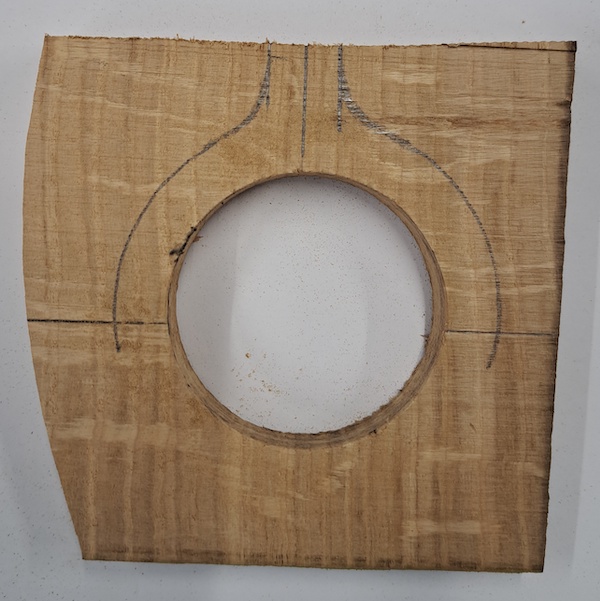
The guitar neck needs to be supported to prevent it tipping over, so I made a yoke to do the job. I started by drilling a 60mm hole in a piece of 10mm thick oak (photo 7). I cut the shape on a bandsaw and routed it to a circular cross-section. It could then be screwed to the fuselage just where the cockpit would be. When I tried the guitar in place, the yoke was too short due to the acoustic guitar’s body depth, although it would’ve been OK for a solid body electric guitar.
I remade it 75mm longer but figured it would be a tad fragile, so instead of screwing it in place, I drilled a 4mm hole along its length and epoxied a length of studding into it. Next, I fixed it to the fuselage by means of a stainless steel dome nut and washer.
Breaking the sand barrier
The whole airframe, including the legs, was sanded to 240 grit followed by three coats of Danish oil and the same of beeswax, which buffed to a lovely soft sheen (photo 7). With the guitar in place, the owner exclaimed that Concorde was going to take pride of place on her landing!

- Log in or register to post comments


| Articles | Articles | Articles | More | Subscriptions | Resources |

