Anatomy lesson
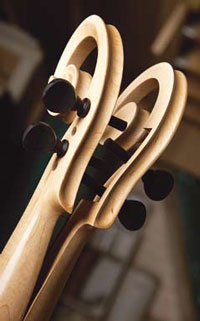
The story so far: “I wanted to make something eye-catching,” said Carl Handy, “so that people would stop and look beyond their superficial assumptions about what they’re seeing, and actually see the materials and the way they’ve been worked.” Last time, then, Carl’s luthier skills brought us his surreal violin sculptures, that were apparently wilting with exhaustion after a night in the orchestra pit. This time, his vision cuts a little deeper.
What's it all about, Carl?
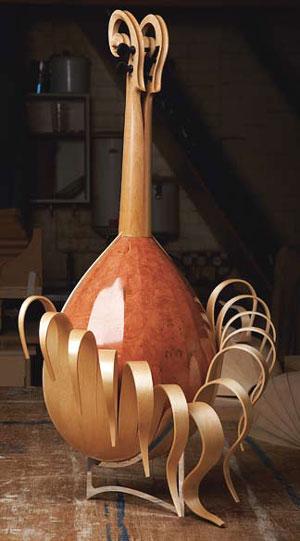
The starting point was a plan to make a mandolin. However, instead of asking us to go beyond those superficial assumptions and imagine an interior life for the instrument, as he did with the violin, he wanted to literally strip back the layers. So the body of the mandolin has been flayed: the pale maple veneer of the almond-shaped back has been peeled away to reveal the fleshy layer of richly coloured madrona beneath.
The metaphor is open to being read in all sorts of ways. Strip away the dusty workaday surface of Carl Handy the Cabinetmaker, I might suggest, and you find Carl Handy the Sculptor-by-night, an artist (fuelled by mind-altering sawdust, perhaps) who believes that woodwork should be about more than just a means to an end; who sees working wood as a creative lifestyle that’s a source of inspiration and something to be admired.
There are other, less comfortable layers to be found in that image of flayed flesh, though. “When I made the violin,” Carl recalls, “I thought of it as a nice way to live, almost as a hobby. The mandolin, however, had to be made to a deadline and I could feel work-like pressures creeping in.” In fact, there are 180 hours of labour layered up in this sculpture, packed around a full-time job and into a window of just six weeks.
It isn’t terribly helpful to talk about ‘packing’, of course. In keeping with the spirit of the sculpture we should really be unpacking that glib and superficial ‘180 hours of work’ by peeling back the layers and asking Carl what lies beneath. “Carving,” he replies, “laminating, steaming, veneering, turning, and lots and lots of jig-making!”
A little trickonometry
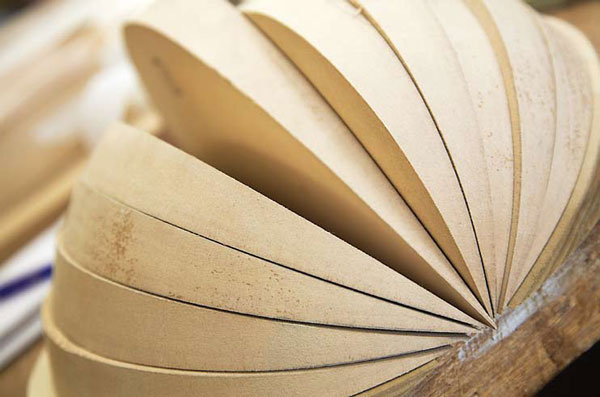
The build began with the segmented MDF former that was used to create the shape of the body. The difficulty here is that the almondshape of the mandolin clearly isn’t hemispherical, so the 13 segments of the former aren’t uniform. It’s actually made up of six pairs of segments and a central ‘keystone’, each of which was made by planing slabs of MDF into wedges. In fact, in section the six pairs are right-angled scalene triangles which, as you’ll know from your school trig’, have sides of different lengths and no two angles the same. Anyway, the net result is that when the pairs are assembled on either side of the keystone, the progressive reduction in the length of their hypontenuses (longest sides) gives the slightly flattened, almond shape of the back.
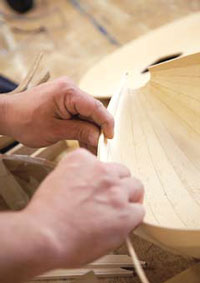
The next step was to veneer the edges of the formers with madrona to create the facets of the body’s shell. In Pic.3, you can see one of the jigs that Carl used to hold the working face of each segment vertical so that it could be cramped squarely to apply an even pressure while the veneer dried.
The madrona itself was built up in four 0.7mm-thick layers, and once dry you’d have thought that Carl would use the face of the segment as a shooting board to trim the veneer to shape, wouldn’t you? Well, he could have done, but instead he used an industrial belt sander. By transferring the end points and widest points of each facet from the former to the workpiece, he was able to offer them up to the belt; when the three points on each side touched the belt, Carl knew that the facets were not only the correct shape but that the mating faces were also chamfered at the right angle to be glued to their neighbours.
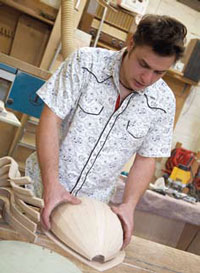
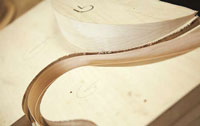
1] The almond-shaped body of the mandolin was made using MDF formers and some trigonometry to create the curves...

2] ...that were translated into four layers of madrona...
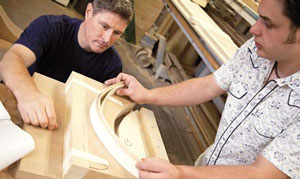
3] ...using one of Carl’s cunning jigs that held the segments square for cramping
The gluing process provided a surprise of its own: considering that the mating faces are only 3mm wide, the resulting shell is remarkably strong. Even so, Carl attached linings to the edges of the body to increase the gluing area to which the front would be attached, and a block with a carved mortise was fitted to the top of the body ready to receive the neck.
The front itself was made of sycamore veneered with bird’s eye maple on the outside and beech on the inside; it was also reinforced by struts glued to the inside face. The ends of these struts, incidentally, are delicately tapered – just one of the small touches that were lost to sight once the front had been glued on (“It’s knowing that they’re there,” Carl reassured me, “that’s what matters.”)

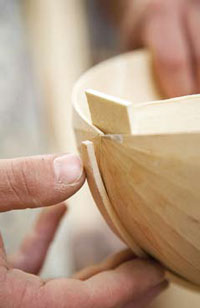
4] The segments glue together to produce a surprisingly strong body
5] Stringing gives a glue face for the front
Carving the neck
The neck started life as a baulk of 4 x 4in maple and was carved in one piece, including the partially unfurled scroll, whose short grain made for some tricky moments. Only after he’d overcome these did Carl realise that he’d have to cut the neck in half in order to carve out the interior of the peg box. Doh! Sawing it in two, of course, left Carl with the problem of the kerf, which reduced the size of the tenon for which he’d cut the mortise in the body. The lost material was eventually replaced with a piece of cherry veneer, which was chosen for its colour, which is halfway between the madrona and maple.
Knowing the small touches are there, that’s what matters
6] The strips of peeled maple were formed using three-part jigs...
The fretboard was made from ebony (if you’re looking for a supplier, Bob Smith at Timberline in Tonbridge is the chap) which was planed and sanded down to 5mm, glued and trimmed. The critical detail here, apparently, is the small ledge underneath the bottom end of the fretboard that stops it snapping when the frets are driven into their grooves.
A touch of Dali
The sequence of the veneer’s curling strips, meanwhile, was designed to capture the motion of their unfurling, an illusion that depends in part upon their close fit to the body. This was achieved by shaping their lower part around a former of the same shape as that used to make the corresponding facet of the back. Pic.6 shows one of the three-part jigs used to shape the laminations. The packing pieces you can just see are cushioned lino’, and serve not only to protect the maple, but also to make up the difference between the curve of the former and that of the mandolin’s back.
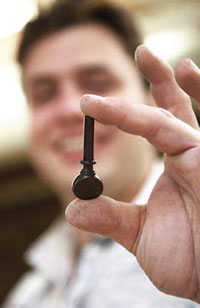
All the parts were finished separately with an acid catalyst lacquer prior to assembly. The finishing touch was the turning of the ebony pegs, which apparently make Carl’s sculpture one of a Milanese mandolin. Or rather, if you look beneath the sculpture you’ll find a Milanese mandolin. Because, just like Carl’s violins, which could be played if it were possible to bend them straight and string them, this sculpture has exactly the same anatomy as the traditional instrument.
Footnote from Carl
“When we first talked about my grand plan of making my pieces create sound, I was at the stage of replacing the speaker with something to replicate the vibration of the strings and make the body resonate. Well, I’ve found a way! They’re called sonic impact sound pads; they turn any surface you fix them to into a speaker. I ordered them from the US last week and they arrived today. I temporarily fixed one to the sound board of the mandolin and it sounds amazing - live, warm and, for want of a better word, whole.”

- Log in or register to post comments


| Articles | Articles | Articles | More | Subscriptions | Resources |