Building kitchen cabinets
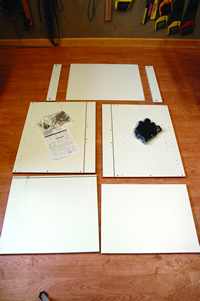
I bought this base unit from B&Q, it’s a 600mm unit and, unusually, it comes without a door. Lay all the pieces out and check for damage. It’s not uncommon to find a damaged edge. If it’s at the back and not going to show I generally leave it. This one has a dark scuff mark on the base panel which I couldn’t completely remove.
I was surprised at the quality of this unit (see left), the side panels are made from 16mm MFC, the base panel and top rails from 20mm MFC; the back is 4mm faced fibreboard. At £29 it’s very good value for money. The melamine-faced chipboard is reasonably dense and took screws well. Carefully made and looked after this unit should last at least ten years, probably very much longer. The weak points are the joins between the base panel and the sides, using an adhesive/sealer eliminates the risk of getting moisture in this joint. The only other potential problem is the front edge of the base panel. If the edge gets damaged, any moisture that gets into the join can swell the chipboard. If a unit is going to be liable to hard wear, fit some sort of protection. B&Q sell rubberised matting which, although it is designed to fit in drawers, should work well.
There are three main types of kitchen cabinet:
Stand alone: More a piece of furniture than a kitchen unit; a complicated construction if you want to make one yourself and astronomically expensive to buy. Inefficient use of space makes them more suited to larger rooms although making one stand alone cupboard to fit in a standard fitted kitchen can look very effective.
European: Features ‘lay-on’ doors fitted with Blum-style concealed hinges. Each unit is of modular construction, fitted together to form a run of units with a separate worktop. Economic, efficient and easy to build and fit.
Modular face frame: Cabinets built in a very similar way to Euro-style cabinets, but a face frame is fitted to the front, into which the door is inset. Individual units are connected together to form runs, with mouldings applied to cover the joins between the units. These give a traditional look without the disadvantages of stand alone furniture.
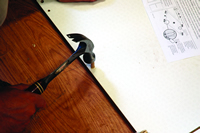
1] Following the instructions, glue the dowels into the pre-drilled holes in the sides. If the dowels need lightly tapping in place, support the rear face to prevent the dowel breaking through the other side.
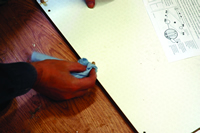
2] Clean up any glue residue from around the dowels, it can set surprisingly quickly and form a mass that stops the join closing.
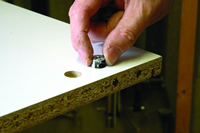
3] Screw in the metal cam dowels. Insert the dowel cams in the base and both top rails, making sure the arrow points to the raw edge of the board, toward the dowel pin insertion hole.
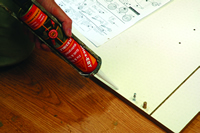
4] Apply glue to the wooden dowels and run a bead of sealant/adhesive along the bottom edge of the face where the base panel will fit.
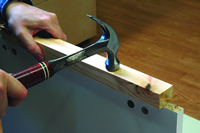
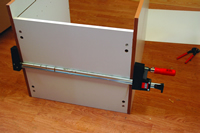
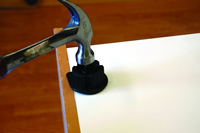
5] Fit the base onto the side, the sealant may need compressing but don’t pull it together with the cams. Use a block of wood to protect the edge, lightly tap the base down. If the sealant is a bit thick and won’t squeeze out, put a couple of clamps on to squeeze it together and tighten the cams to fix.
6] Fix the two smaller top rails in the same way , glue the five dowels on the remaining side, run a bead of sealant along the exposed chipboard edges of the base and two top rails and fit the side. As there are no cams in the centre of the base, the sealant may prevent the sides from fitting - use a clamp to squeeze the join together.

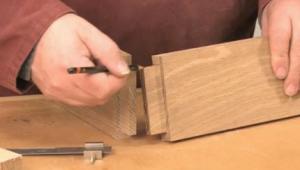
7] The melamine edge strip covers the groove for the back panel. Carefully cut it away.
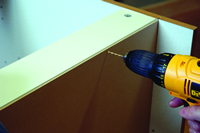
8] Apply sealant to the bottom groove only, before sliding the back in place. Drill two 3mm holes through the back into the top rail. Apply a bead of sealant/adhesive between the back and the top rail.
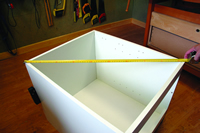
9] Before screwing the back in place check the unit is square by measuring across the diagonals.
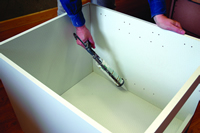
10] Screw the back in place with two 15mm screws then run a bead of sealant along the joins between the back and the sides.
11] The legs come in two sections. The housing piece has a moulding that fits into the pre-drilled holes in the base. This should overlap the sides for support but make sure the screw holes don’t align with the panel join or the cam. Tap the plastic lug home, this expands the moulding and fixes the fitting. Drill 3mm pilot holes and screw the leg mouldings on with the 15mm screws provided. Fit adjustable leg.
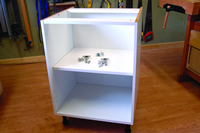
12] The finished base unit. The hinges and brackets come with the pack.
Richard Russell
http://www.richardrussell.co.uk/
Silverman http://www.silverman.co.uk/index.php
W.T Eden
http://www.edens.co.uk/
Arnold Laver
http://www.laver.co.uk/
- Log in or register to post comments


| Articles | Articles | Articles | More | Subscriptions | Resources |