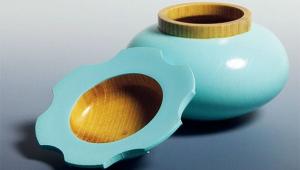
Closed Segmented Vase
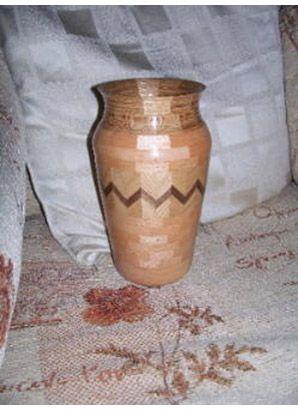
Pic.1 – This vase is 7.5 X 4.5in
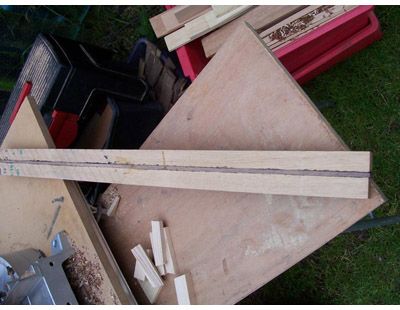
I’m going to make this vase using oak and steamed beach strips with a solid base. The first step is to cut all the strips to an approximate size and then plane and thickness them. Now you need to establish what exact size the segments should be. This can be done using a chart such as the one shown below:
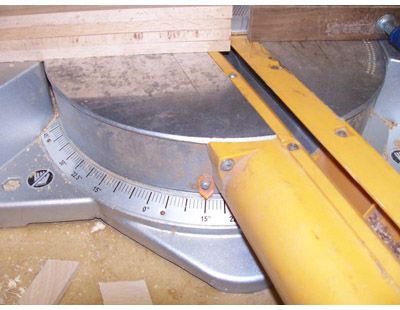
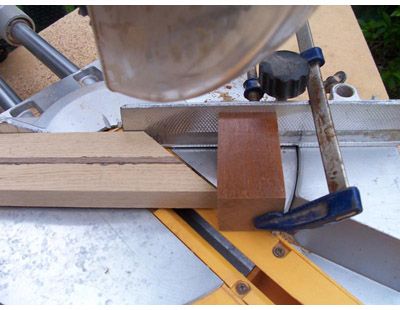
This vase will have 13 segmented rings with 12 segments per ring. To cut the segments I’m going to use a chop saw set to cut at 15°. To work out the cut angle you will need to divide the number of segments required by 180.
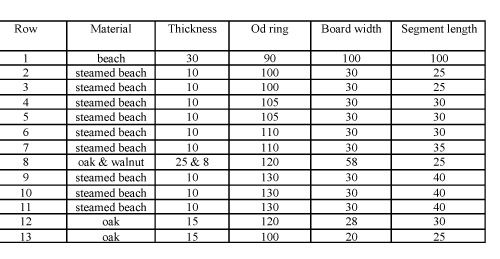
Chart 1 – All sizes are in millimetres
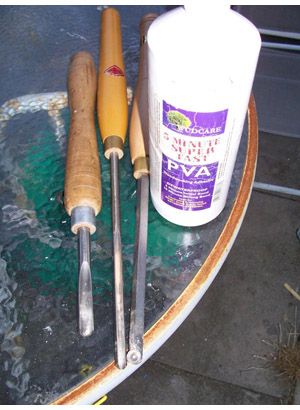
Pic.2 – Here are the tools and glue that I used
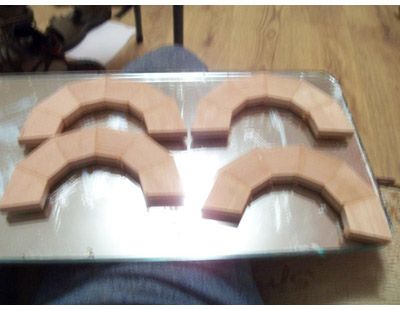
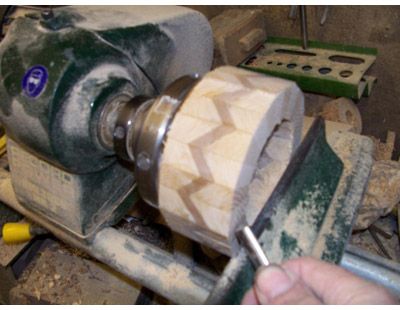
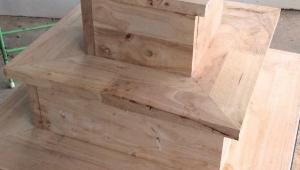
Cutting and sanding the segments
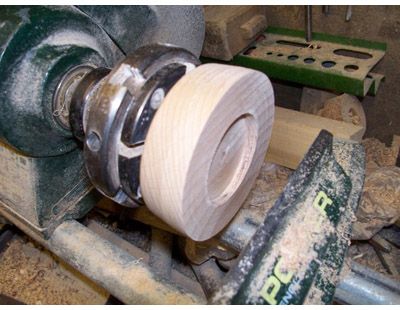
Pic.3
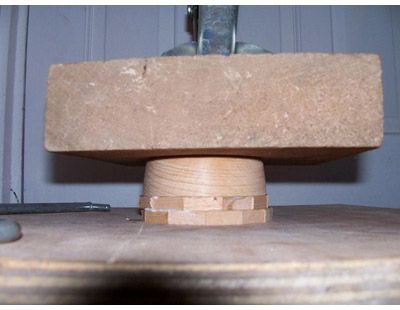
The base is part turned to form a starting point which you can glue the segmented rings to. You will need to cut the segments for each individual ring and keep them separate from each other. Cut the first angle and then turn the wood over and move it up to a stop block set to your desired segment length.
Pic.4
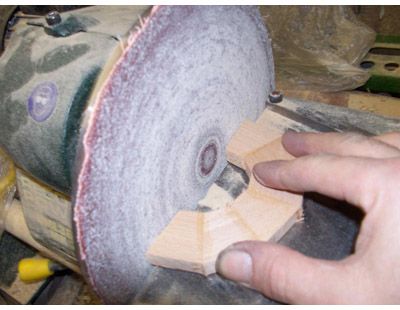
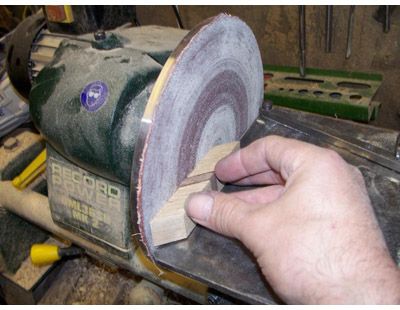
This is repeated till you have all 12 segments for that ring. You will need to repeat this process of setting the block and cutting segments for all your other rings. When you have the segments cut you need to sand the joints to ensure a good fit.
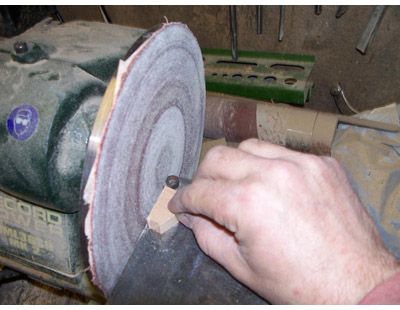
Pic.5
I use the sanding disc on my lathe, and a table with the angle set to 15°. The segments are now ready to be glued.
Gluing the segment rings
The segments are glued in pairs, then in fours and finally into half circles.
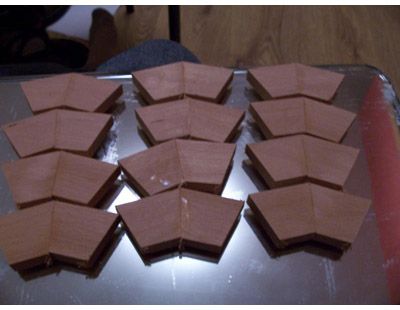
Pic.6
Pic.7
Pic.8
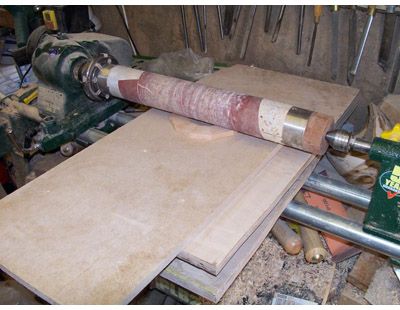
When gluing the segments apply the glue to one face and rub the joint together till it grabs. Use a flat surface to keep it level (I use a mirror as it’s easy to scrape off any excess glue when you’ve finished). Concentrate on one ring at a time and when you’ve finished the two halves lay them on the side to dry. Repeat this for all the other rings.
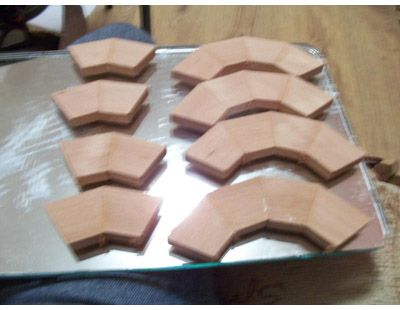
When all the rings are glued and dry you can sand the halves on a sanding disk to ensure a good fit for the joint.
Pic.9
Mate your two halves together and check the joint is a good fit. Repeat the process with all the rings and then glue them together as you did with the segments.
The rings now need to be sanded on their faces, which can be done in several ways. You can sand them by hand, use a sanding disk or a drum sanding attachment (see Pic.10)
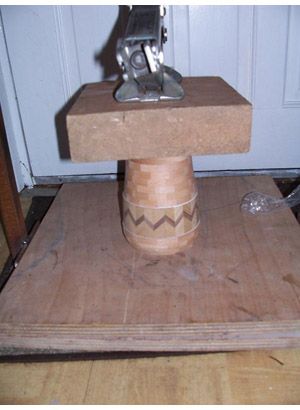
Pic.10
The next step is to glue the segmented rings together. Glue the rings one at a time – I use a car jack and a frame to put pressure on the joints:
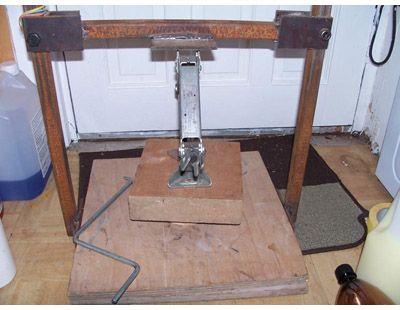
Pic.11
Pic.12
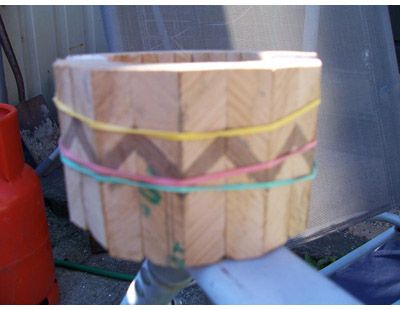
But you can use any form of clamping device you have available. The rings are offset by half their length, which gives the vase a brickwork effect. Glue the bottom six rings together and leave them to dry, ready to be turned to a rough shape and fitted to the chevron ring.
Pic.13
Chevron Ring
You will need two lengths of 1in by ¾in oak, and one length of ¼in by ¾in walnut to make the ring. Plane and thickness them as you did with the other material and glue them up, sandwiching the walnut between the oak.
Pic.14
Once the glue has dried you can cut the segments to length. Cut 24 segments to 1in at a 45° angle.
Pic.15
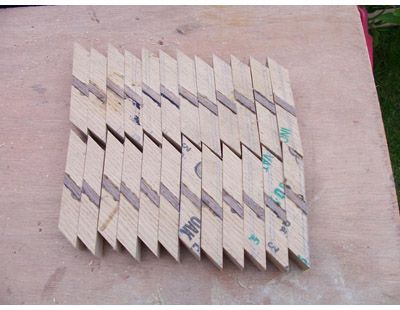
Pic.16
Pic.17
Sand all the joints so that they fit together neatly. Now you need to turn every other segment over to get the chevron shape. Glue them in pairs and leave to dry.
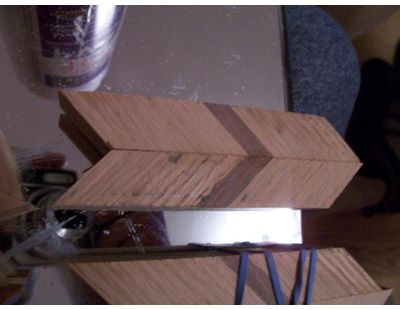
Pic.18
You now need to cut a 15° angle into the segments using a table saw. Set the saw to 15° and set the fence so that only the edges of the segments are removed. All the segments then need to be sanded so the joints meet neatly. Glue this ring as you did the others then sand the half rings and glue them so that all the chevrons fit together.
Pic.19
The chevron ring has to be turned:
Pic.20
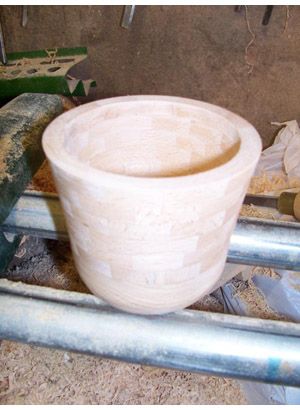
Ready for fitting to the bottom section of the vase. The top and bottom sections of the vase will now need to be sanded so the vase can be glued together.
Pic.21
All parts of the vase are now glued together and left to dry. You can then remount the vase on the lathe and finish turning it to your desired shape. When you’re happy with it you then need to sand and finish it. I used two coats of sand sealer and finished it off with canuber wax.
- Log in or register to post comments


| Articles | Articles | Articles | More | Subscriptions | Resources |