Cutting & Jointing MFC (Melamine Faced Chipboard)
Modular cabinet construction follows the same, or very similar, steps whatever material is being used. Some jointing methods suit one material more than another; for instance biscuit joints particularly suit MDF, and pocket-hole screws work particularly well with plywood. MFC (melamine-faced chipboard) is probably the most difficult material to joint strongly and so I’ve tried making a few sample joints and testing them to destruction.
Whatever material you use remember that if you want to make standard width units, it’s the outside dimension that’s important. If you use different thicknesses of board material for the sides you will need to compensate for that, by adjusting the width of the internal components.
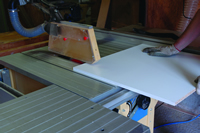
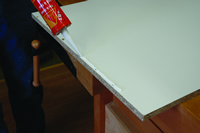
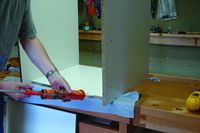
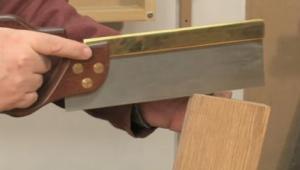
I’ve used a Festool saw and guide rail system to cut the boards to length, later in the article I look at different ways of cutting MFC without chipping the boards too much (see Cutting MFC).
2] The sides and back need cutting down to 570mm wide and the base panel to 500mm; the off-cut is used for the top rail. The base panel is cut to 500mm depth to give some clearance at the back for services.
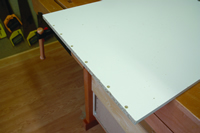
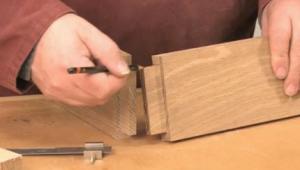
3] Mark the centre line of the base panel along the lower edge of the side panels. This gives a line to drill and countersink the screw holes.
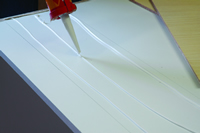
4] Run a bead of sealant along the bottom face of the sides.
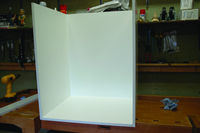
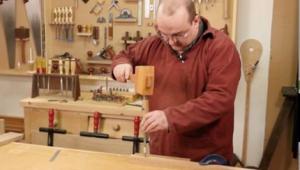
5] Resting the front faces on a flat surface, offer the sides and base panel together. Put a couple of clamps on to hold them in place. One advantage of the Bessey clamps is that they naturally pull the work together reasonably square. Make sure the sides are square to the base then drill pilot holes into the base panel before screwing the sides to the base.
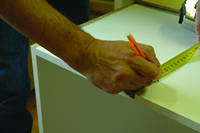
6] Once the base is fixed, stand the cabinet up and mark the centre line of the back panel on the sides. I use a marking guage for this. Drill pilot holes and countersink; this doesn’t need as many screws as the base. Make a mark on the top edge of the sides as a guide to positioning the back.
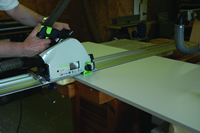
1] Cut lengths for the sides and back
2] Sides and back are cut down to 750mm wide
3] Drill screw holes along side panels
4] Run a bead of sealant along the side bottom
5] Clamp the sides and base on a flat surface
6] Mark the back panel centre line
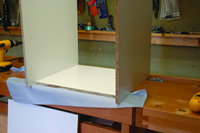
8] …before applying sealant to the sides and rear edge of the base panel to keep out any moisture when the unit is fitted.
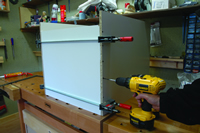
9] The back is screwed into the base panel and through the sides. Clean off any sealant squeeze out; the advantage of using a white sealant is that it covers any small chips in the edge of the melamine panels. It’s a good idea to stop now and wait for the sealant to ‘tack off’ otherwise wood chips will spoil the finish.
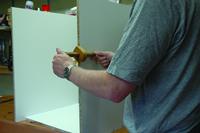
10] If a clamp is fitted across the top it will help hold the top rail in place while the pilot holes are drilled. Apply sealant and screw in place, I used two 50mm chipboard screws each side. Make sure the screws are countersunk. If they are proud they will stop the units fitting tightly.
11] To support the feet, and to give a more secure fixing to the screws, fit a couple of off-cuts of 6mm ply to the base. The ply needs to be fitted 60mm in from the front edge to allow room to fit the plinth.
12] Mark the extent the ply covers the base and apply adhesive, the ply is pressed on and a few screws driven into the bottom edge of the sides to hold.
7] Protect your bench from all the sealant
8] Seal the sides and rear edges against moisture
9] Screw the back to the base panel
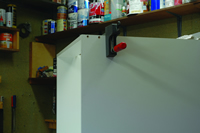
10] Fit the top rail with two 50mm screws per side
11] Mark the base for ply strengtheners
12] Use a generous amount of glue for the ply
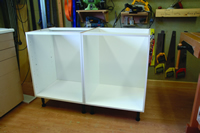
13] The leg housings are screwed in place through the ply and into the chipboard overlapping the projection over the sides to give them support.
14] Push the legs into the housing.
15] Any raw chipboard edges should be thoroughly sealed by painting or rubbing adhesive/sealant into the edge.
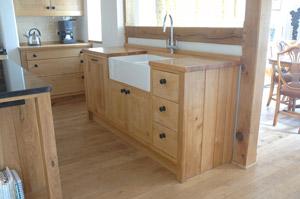
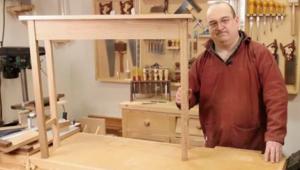
16] The finished cabinet nest to last month’s flat pack.
13] Screw in the leg housings
14] Add the legs
15] Smear sealant over any raw chipboard edges
16] The Woodsmith’s unit cost £20 using Wickes board compared to a thinner flat pack unit cost of around £29
- Log in or register to post comments


| Articles | Articles | Articles | More | Subscriptions | Resources |