Getting a grip

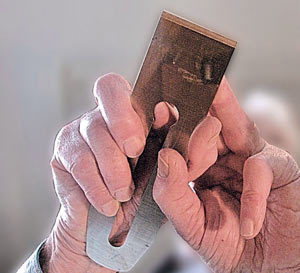
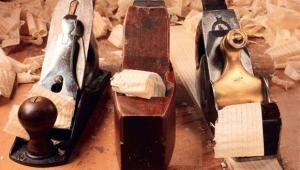
However, sore fingers after some heavy bouts of planing have made me wonder why we are told to point the index finger like this? Perhaps it adds magic. I’ve heard some people say that it transmits vibrations that put the worker in harmony with the soul of the plane (yeah, yeah). Maybe it helps to avoid the cramp that beginners can get if their determination makes them squeeze the tote as though their lives depend on it. Whatever the reason, my preference is to do it until it gets uncomfortable. I also think about my thumb when wearing a buttoned-up workshop coat, as painful experience has taught me that I must see that it doesn’t catch in the opening. Pic.1 offers a few examples of what I call the three-one-one grip, where the third, fourth and fifth fingers work together, while the index finger and thumb work independently. However, there are lots of different configurations I use for other tasks, most of which I can explain.
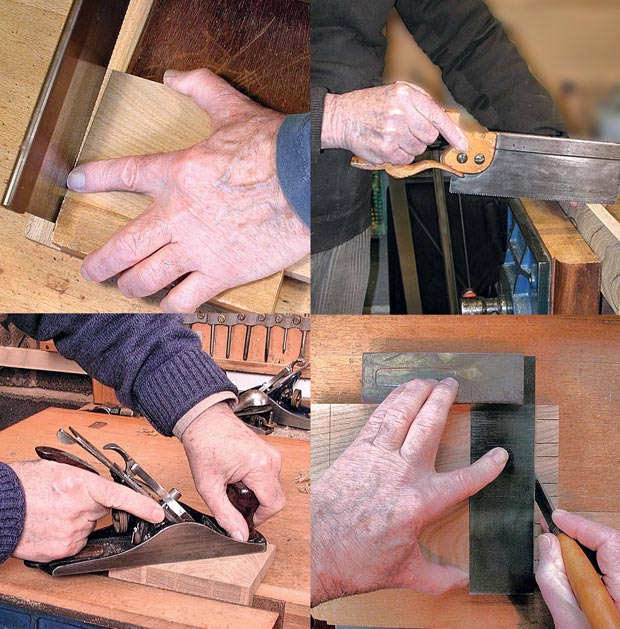
Pic 1: Jeff explains the reasons - both logical and otherwise - for employing the index finger
At the start of a more delicate operation, I would employ something similar to the three-one-one hold, where the thumb and index finger pinch together to support and direct the chisel, while the other three fingers provide extra support (bottom left). Here the edge gains extra cutting power as the handle jigs sideways while it pushes forwards. Again, please note how the broad top of the vice jaw offers a comfortable and firm support to the other three fingers.
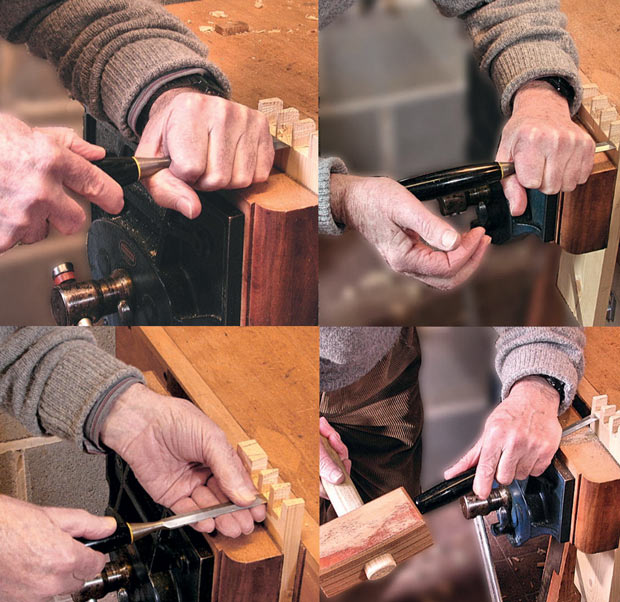
Pic 2: Gripping a hand chisel while applying different kinds of force
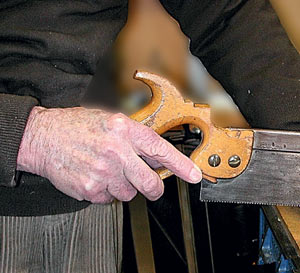
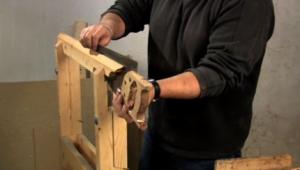
Also, with such an action, the extra weight of the forward hand will tend to bend the already tightly stretched and fragile blade. Some people justifiably say that for efficiency and blade durability, the teeth should point towards the handle, but since I don’t want to have a ragged faced kerf that would obscure the line, I join many others by having the teeth inefficiently pointing away from the handle. I well remember, and with some embarrassment, how as a pre-teenager trying to re-fit a blade, I desperately struggled against the frame’s spring before I realised that the handle could be unscrewed!
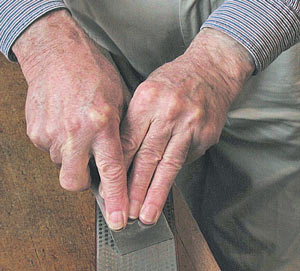
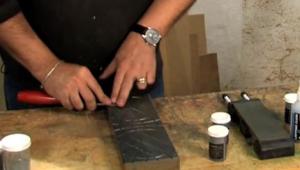
Now, this is not the time to argue about the virtues or vices of sharpening with or without artificial aids, but tough guys might like to see the two-handed grip I use when freehand sharpening, Pics.4 and 5. I aim to maintain the angle between the blade and the stone by first locking the right wrist, and hold this angle by also concentrating on trying to lock the angle of my elbow, while using my shoulder as a pivot. This leaves the left hand to do the hard work of pushing the blade along the stone.
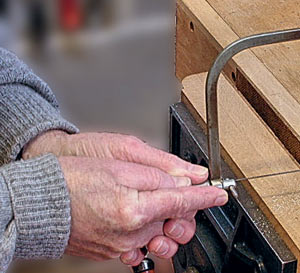
Pic 3: Holding hands when using a coping saw
Pic 4: Two hands are essential when honing
Pic 5: Here's a stone's eye view of the grip
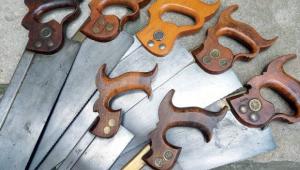
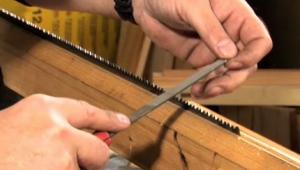
Pic 6: For light cuts, this way of holding a dovetail saw works for Jeff
Kerf - The groove made by the passage of a saw blade
Tote - The rearmost handle of a plane
By getting my arm and the line of action more in line with the saw’s teeth, I gain better control. I don’t own, and have never used, a round, low-set handled dozuki saw, but this does help me to understand why some people like them. Now, I’m not recommending that you try this grip for your dovetail saw — if you do have a go, don’t experiment on an important job! But ultimately, it’s worth trying some of the standard and less than standard grips to discover what works best for you.
- Log in or register to post comments


| Articles | Articles | Articles | More | Subscriptions | Resources |