Mantel clock
It’s always satisfying when circumstances contrive to create a pleasing result, especially when things may initially look less than perfect. This philosophical start is an attempt to explain the position in which I found myself towards the end of last year.
Out of work and with no immediate prospects of finding it, I joked at the time that I’d be making everyone’s Christmas presents rather than buying them. As the year progressed, however, I started thinking about this more seriously, and not just because of the job prospects!
With the resulting free time, I’d enjoyed creating my first project using hardwood – the construction of two ash and cherry canoe paddles. These had travelled with us to Sweden and performed pleasingly well during a week-long canoeing holiday.
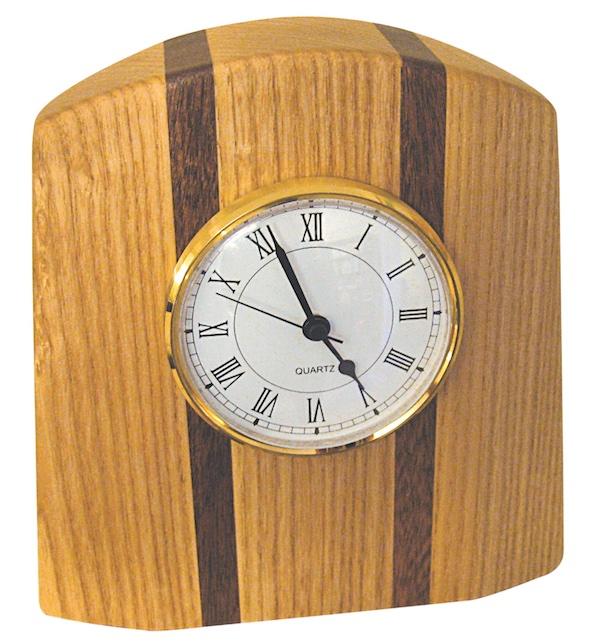
Buoyed up by this success, I came across an old magazine article showing how to make, and containing plans for, various mantelpiece clocks. Intrigued by the design and inspired by the challenge, I decided to make one of these for my parents as a Christmas gift. They’ve always enjoyed handmade things, especially items of furniture or paintings, and pieces created by family members are usually held in fond regard. So I knew that if I made a good job of it, everyone would be satisfied by the result!
Doing it with hand tools
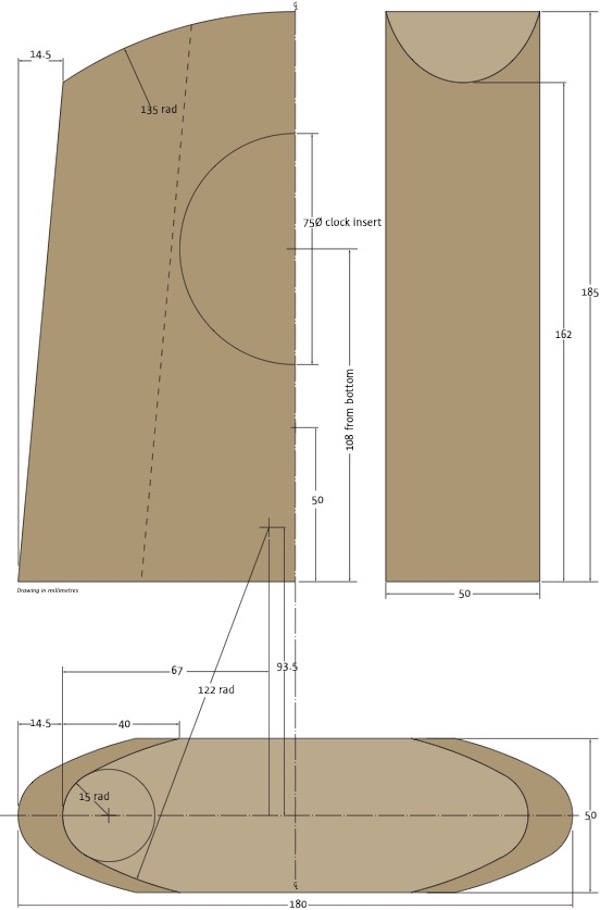
Having studied both designs shown in the article, I decided that the more rounded of the two would better suit their décor and style. However, while I’d keep the design as close to the plans as possible, the method of construction would be very different.
To some extent, the design shown had been created to facilitate the use of machines to size and shape the wood. My workshop, which doubles as a garden shed and bicycle storage facility, neither contains nor has the space for such tools. I do, however, have a Japanese saw that I find myself using more and more frequently, plus a couple of decent planes that I bought for making the canoe paddles.
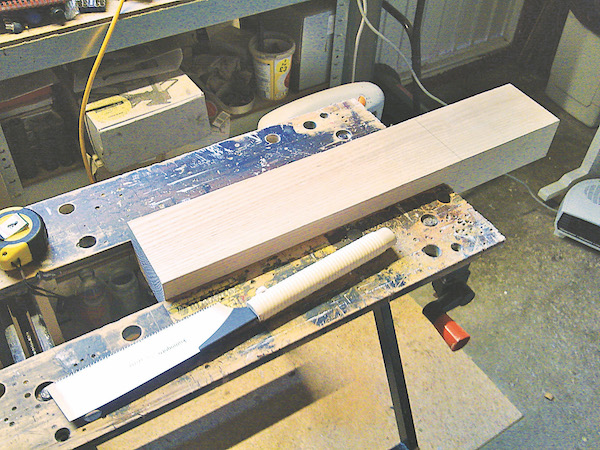
Because I can’t process large blanks when undertaking woodworking projects, I’ve become rather fond of the laminating technique; that is, building up workpieces using smaller pieces of timber. This worked for the paddles and I thought it’d be just the trick for making an interesting body for the clock. A trip to my local timber yard furnished me with a nice block of ash and an offcut strip of sapele.
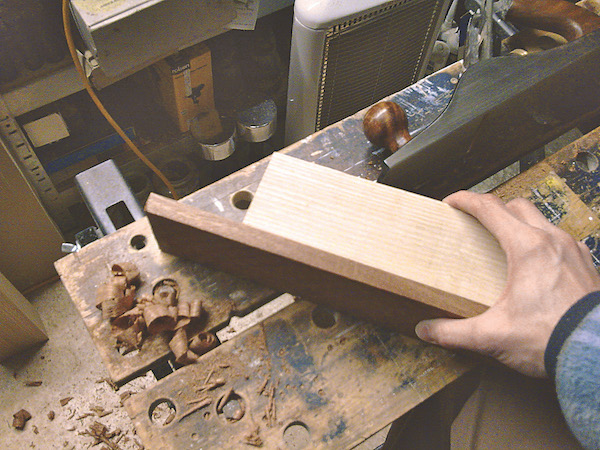
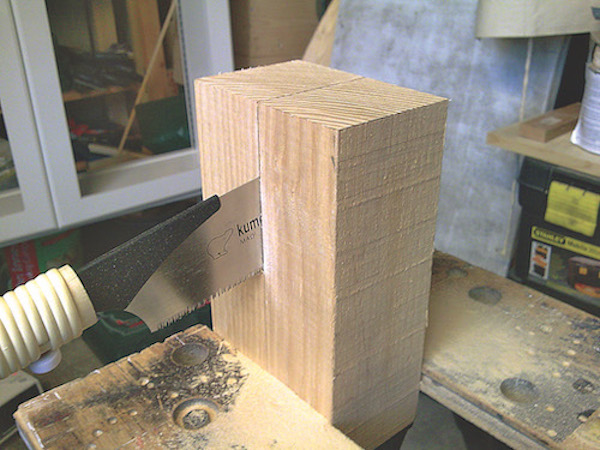
Working out the minimum number of cuts required to give me the correct-sized blocks, I set to work with the saw. Hand-sawing a 50mm-thick block of ash requires a lot of patience, several breaks and even more cupsof tea, but if done carefully, I knew I’d save myself a lot of time at the finishing stage. Similarly, carefully cutting and planing the strips of sapele would make my life easier later on. Finally, the five pieces of wood were ready for laminating and I used the remainder of the Gorilla glue that I’d bought for the paddles.
I love this stuff: it’s easy enough to work with and when dry, strong and invisible in a good join. Once dry, I used a router to cut the rebate for the clock movement – my one concession to using power tools in this project.
Shaping up
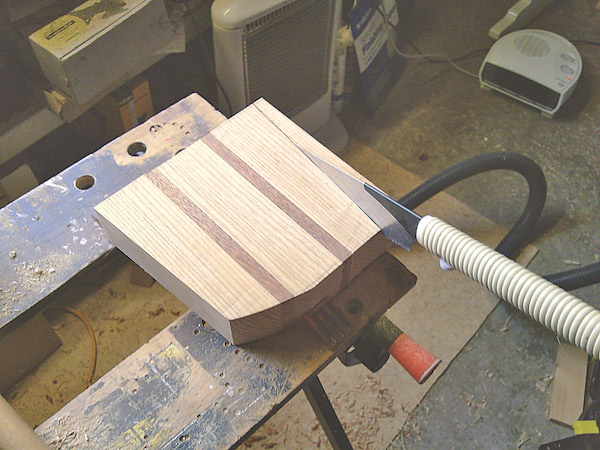
Next, I needed to finalise the clock’s shape. To remove waste from the bevelled front and back, I decided that rough-sawing followed by some plane work would be the best approach. This worked well enough, but with the amount of wood that still had to be removed, regular sharpening of the plane blade was essential.
It really showed that you only notice how blunt a tool is having sharpened it! The curved top, however, required a different approach. I started the process by sawing off the top corners, but then found that a rasp, spokeshave and fine file achieved a smooth radius, as per the design.
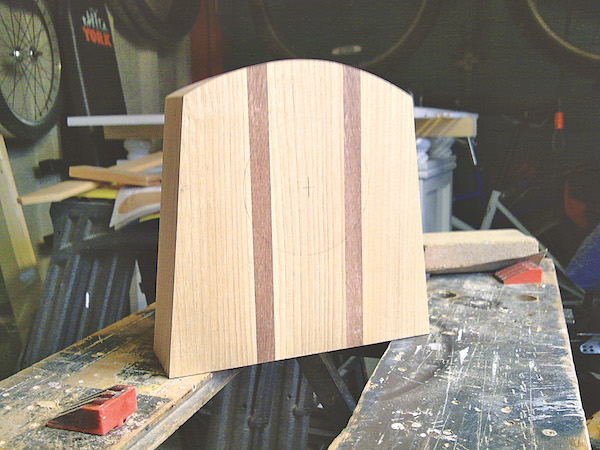
After sanding the entire piece to round all edges and remove any file marks, the piece was then ready for oiling. A thinned coat of Danish oil was followed by another few coats of undiluted oil with buffings in between each. Next, I glued a pad of dark brown felt to the base with SprayMount, then finally inserted the clock movement into the rebate. It was then time to stand back and enjoy the result!
- Log in or register to post comments


| Articles | Articles | Articles | More | Subscriptions | Resources |