Mint & boxed
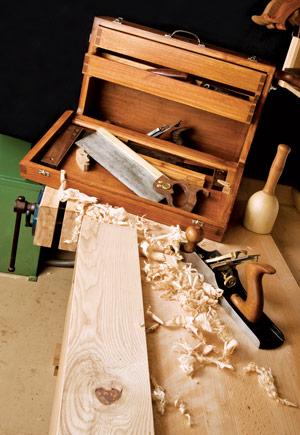
Many years ago as a boy apprentice, most of the men I trained under had large tool chests neatly placed at the foot of their benches. Their airtight lids stayed firmly shut except when a special tool was needed for a particular job.
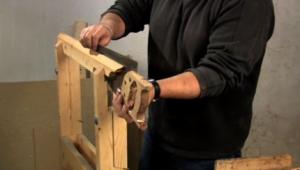
Next to (or on top of) these chests stood their traveling tool boxes, which were more compact than the larger lift-lidded chests. Through the years I’ve designed and made many such boxes. Here’s a simple version that can be made in a day using hand tools or machines.
This type of tool box was traditionally painted matt black and several of mine are, but I chose Ronseal’s water-based Woodstain because of its quick-drying yet durable waterproof qualities. I also like the warm colour and feel of the antique pine in a satin finish. You can of course make it from hardwood, or stain a less attractive wood such as spruce or pine if you wish. Typically these chests were made from pine because weight was important – no one wants a box that’s heavy even when empty.
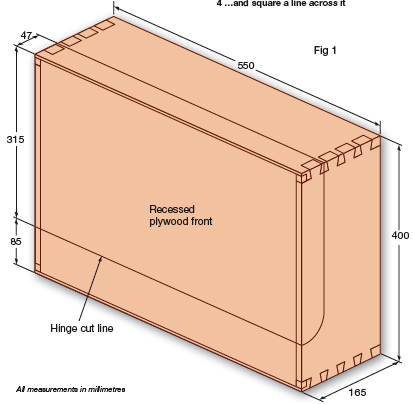
Fig 1.
In earlier times, the front and back facings of the box were made from frames that enclosed loose panels of solid wood. These fl oating panels allowed for the shrinkage and expansion caused by changes in the moisture content. The panel rested in a groove around the inside rim of the frames.
Back in the late 1950s, as plywood gained popularity, many woodworkers began to skin their boxes with plywood. Rough joiners would simply glue and nail the facings on; others would screw the facings on and then fill the screw heads with Brummer stopper before sanding and painting the boxes. They also painted their names in the top right-hand corner in old English script.
These toolboxes are as useful today as they ever were, and I still use mine for working in customer’s homes and for traveling to do demonstrations. Often my students copy mine, or write to me for plans, so here’s how to make your own.
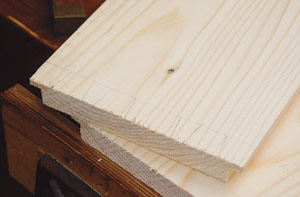
I’ve made this box from spruce because of its strength-to-weight ratio, which is the highest of any known wood. It’s still relatively inexpensive and is easy to work with. I’ve picked out fairly straight-grained material to make it easier for hand planing. Redwood would be fine too.

1. Cut the two rebates first…
2. …then cut the parts to length
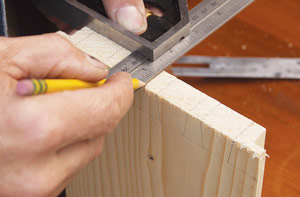
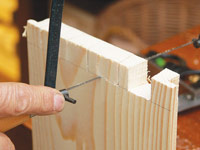
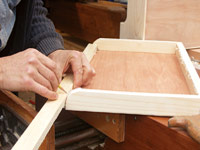
3. Measure in 22mm from each end…
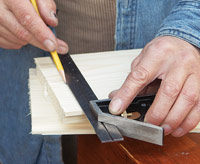

4. …and square a line across it
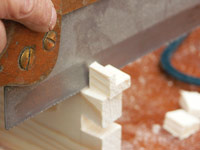
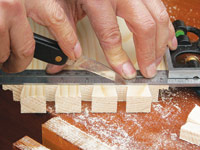
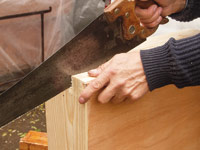
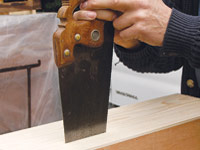
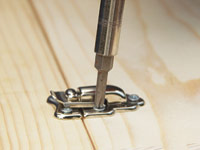
Prepare the stock for the box frame to the cross-section given in the cutting list (165 x 20mm). Then form a 12 x 9mm rebate on each edge along the length of the board, photo 1. I find it easier to rebate the whole length and then to cut the pieces to final length afterwards, photo 2. You can of course use power tools for these jobs if you prefer, and this applies to every stage throughout the project.
5. Mark up the dovetails on each end
6. Extend the lines onto the faces
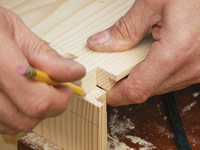
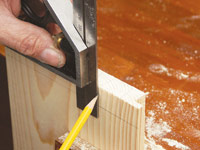
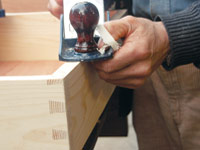
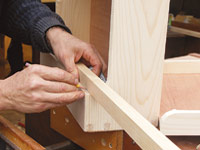
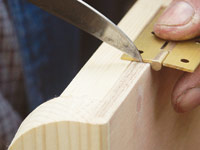
On all four pieces, measure in 22mm from each end, photo 3, and mark a line across the work with a square, photo 4. This line represents the depth of the dovetail pins and tails. Use a sharp pencil for the initial marking out. These lines will later be redefined using a marking knife, which will give a perfect seating for the corresponding joint part. Mark out the dovetails on the ends of both the short pieces (see figs 1 and 2 and photos 5 and 6).
Cut down the lines to the shoulder line as shown. Leave the pencil line in by cutting just on the waste side of the lines, photo 7.
Remove the bulk of the waste between the tails with a coping saw, taking care to cut just above the shoulder depth line, photo 8.
It’s best to remove the outside sections next to the dovetails with a dovetail saw. Here you can cut exactly to the line, again just on the waste side, photo 9.
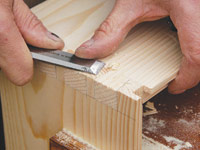
Using a sharp knife and square, mark the shoulder line on both faces of the board and trim out any remaining discrepancies with a sharp chisel to create a perfect shoulder, photo 10.

7. Cut down to the shoulder line
8. Trim out the waste with a coping saw
9. Cut off the outer sections with a dovetail saw
10. Mark the shoulder line for final trimming
11. Use the tails to mark out the pins…
12. …and extend the lines onto the faces
Transfer the shape of the tails to the top pieces using a very sharp, long-pointed pencil, photos 11 and 12. I prefer a pencil to a knife on pine because pencil shows up better, and the pine recesses can be cut slightly ‘fat’ because pine compresses more than most hardwoods. In harder, more dense-grained woods I always use a knife because hard grains take a knife mark well and of course the denser woods are less tolerant of tight-fitting joints.
Cut down the lines with a tenon or dovetail saw, staying just on the waste side of the line, and then remove the bulk of the waste using a coping saw, photo 13.
Using a sharp knife and square, mark the shoulder line on both faces of the board, photo 14, and trim out any discrepancies with a sharp chisel as before. Test the joint dry to make sure it fits well, photo 15. If any trimming is needed, use a sharp chisel to get a perfect finish, photo 16.
13. Again trim out with a coping saw…
14. …and square off the shoulder line
15. Test-fit the joint dry
16. …and trim the pins if necessary
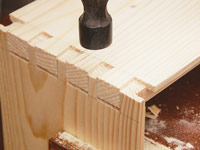
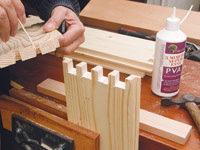
17. Glue up the frame corner by corner
18. Tap the joints together one by one
Repeat the joint-making process for the other three corners, labeling each pair of components (A-A and so on) so you don’t get in a muddle. Then assemble the box for a dry fit to make sure all of the components fit together well. It’s easier to make any adjustments now rather then when you have glue on everything.
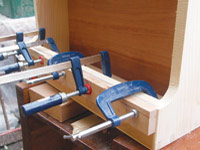
When you’re happy with the fit, glue up the box corner by corner, photo 17, and drive the glued joints together with a hammer and scrap of wood, photo 18. Clamp the assembly if necessary and check that the box is square by measuring from corner to corner.
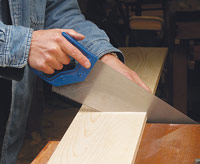
With the dovetails completed, you’re now ready to fit the 9mm plywood skins into the recesses you rebated earlier. Begin with the back skin. Cut the plywood with the saw and test its fit, photo 19. Trim and fit if necessary with the plane, photo 20.
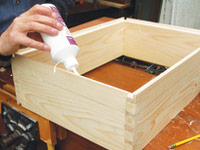
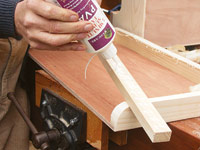
Glue the panel into the recess, photo 21, and nail or screw it in place. It’s better to screw it, but 25mm panel pins will work fine too, photo 22, and they’re easier to punch and fill than the screws, which must be countersunk and filled.
19. Cut the rear skin and test its fit
20. Trim it if necessary with a plane
21. Apply glue all round the rebate
22. Pin the panel into the recess
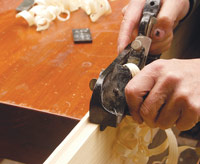
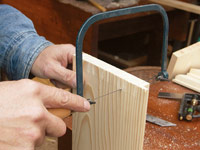
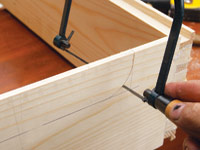
23. Make the curved cuts in the frame sides
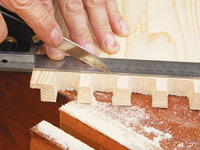
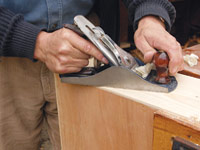
24. Trim all the frame edges with a plane
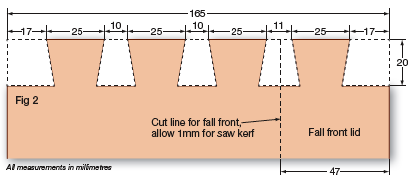
Fig 2.
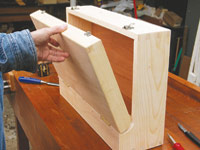
It’s now time to mark the cut lines of the fall-front box lid (see fig 1 again). You must cut the internal round corners on each of the sidepieces with a coping saw before you skin the front of the box. So go ahead and cut the rounds now, photo 23, but leave the straight line cuts until after the panel is glued and screwed in place.
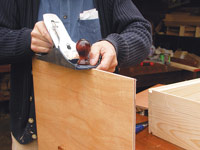
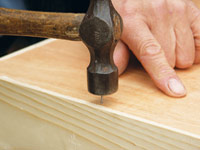
Cut the plywood front panel to size and trim it for a perfect fit. Glue and pin it in place and leave it to dry. Then trim the box with the plane, photo 24, fill and screw and nail heads, photo 25, and sand all the surfaces smooth, photo 26.
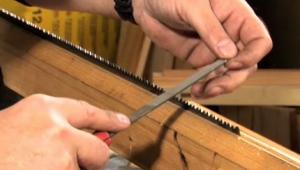
Extend all of the layout lines for the fall front onto the plywood face and cut through it with a tenon saw, photo 27 and panel saw, photo 28. I used an older saw because the saw kerf is thinner, but if you don’t have a thin-kerfed saw any saw will work as long as it’s not too thick. The saw kerf thickness is usually just enough to leave the exact size gap need to prevent the lid from binding, so don’t worry too much about this.
Follow the lines all the way through to the rounded corners from both the front face and the top line of the box lid and the two will soon be separated, photo 29. Reverse the saw direction as necessary
Trim up any saw marks with the hand plane, photo 30, or a file, followed by sandpaper, photo 31. Try not to take too much off the curves, as a large gap will be unsightly.
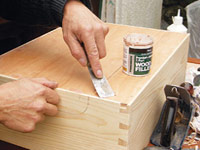
25. Fill all the nail or screw heads…
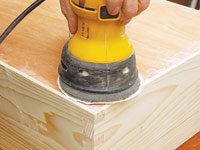
26. …and sand the surfaces smooth
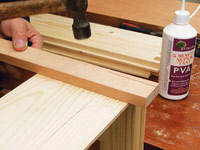
You can now add two 30 x 19mm hinge rails to take the hinges and stiffen the plywood edges. Mark their lengths directly from the box, photo 32 and the lid, photo 33, in case there are any minor discrepancies in the box construction.
Cut the pieces to length and glue them to the edges of the plywood on both the lid and the box, photo 34. I also screwed and clamped these rails in place, photo 35, to add to their strength because these edges are subjected to a lot of stress when the box lid is opened and closed. Countersink the screw heads, fill them after the screws are driven in and sand flush when dry.
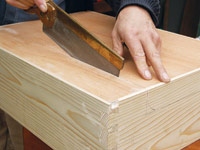
27. Start the separation with a tenon saw
28. Switch to a panel saw at the corners…
29. …and complete the cut to separate the lid

30. Remove the saw marks with a plane
31. Sand the curved cuts to a smooth radius
32. Mark one hinge rail to fit the box
I use 60mm brass hinges, but any hinge around that size will do. I set my hinge 60mm from the end of my box, the same distance as the hinge length. That way you can use the hinge to set the starting point of the recess, and to position the second mark.
Mark the hinge position with the lid in place on the main box so you can mark both the box and the lid at the same time, photo 36. Place the hinge in position on the box lid and mark both sides of the hinge with a sharp knife, photo 37.
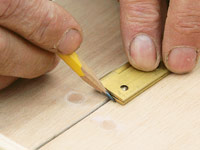
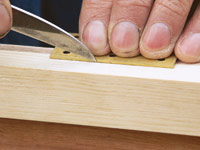
Instead of setting up a gauge to mark the front-to-back width of the hinge flap onto the door, I use the hinge itself and run my knife along the edge of the hinge as shown, photo 38.
Set a marking gauge to the thickness of one of the fl aps and mark it onto the face of the box lid. I am actually using a cutting gauge because it cuts through the layers of plywood and sets a lip to guide my chisel, photo 39. Remove the waste wood with a chisel to form the recess, photo 40.
33. and the other to fit the lid
34. Apply glue along each hinge rail
35. Screw and clamp it in place
36. Mark the hinge positions on box and lid
37. Mark both sides of the hinge with a knife
38. Then run the knife along the hinge edge
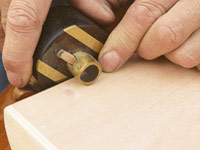
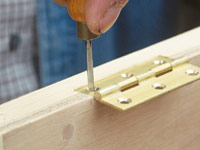
With the lid hinge recesses completed, use a bradawl to start the screw holes, photo 41, and drive in the screws. Remember when using slotted screws that you should always line the slots up length-ways with the direction of the grain.
Set the lid in position in the box and, using a sharp knife, mark on either side of both the hinges as before. Remove the lid and cut the recesses into the rail using the same procedure as before.
Screw the hinges into the recesses, fit the catches, photo 42, and open and close the lid to check its action. Adjust the hinges to make sure that the lid and box align perfectly without you having to force the catches, photo 43.
39. Mark the recess depth with a cutting gauge
40. Remove the waste wood with a sharp chisel
41. Use a bradawl to start the screw holes
42. Attach the two catches so you can…
43. …check that the lid closes accurately
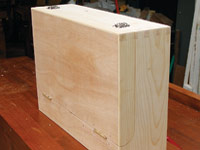
44. Your tool box is now ready for finishing
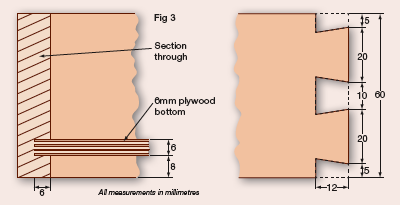
Fig 3.
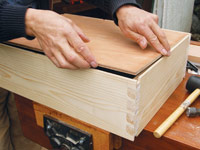
I usually have two tills in my box, but one may be all you need. I often make my top till narrower to hold my chisels and other such long, narrow tools, but in this case I made the till 60mm deep because it doesn’t have very much depth from front to back. Mark the long till pieces to length by marking directly from the inside faces of the main box. Mark the shorter till sides directly from the inside face of the back of the box to the front edge of the box sidepieces.
Cut the pieces to length using a fi ne-toothed tenon or dovetail saw. Mark out the dovetails, fig 3, and cut them following the procedures detailed for the main box earlier.
With all of the dovetails prepared, run a 6mm groove around the inside bottom edge of the till pieces, 8mm up from the bottom and 6mm deep. Fit the 6mm plywood bottom and dry-fit the till together with the plywood in place to make sure all the joints seat together well.
If they do, glue up the dovetails and cramp up the till if the joints are at all loose. When the glue has set, sand all the surfaces smooth and apply a matching finish
Finally, screw the two softwood cleats that support the till to the inside faces of the box sides, allowing 1mm for clearance between all of the components.
Paint the box if you want to. This helps to keep the box looking presentable. This is where I keep my cuppa during the day, and the inevitable mug rings will soon disfigure bare wood. When you’re done, replace the catches, add the handles and install your precious tools in their new home.
- Log in or register to post comments


| Articles | Articles | Articles | More | Subscriptions | Resources |