Routing finger joints
I like finger joints. I find their symmetry more attractive than through dovetails for the corners of boxes. Admittedly they don’t have the inherent strength of the locking pins and tails of a dovetail, but the castellations give a very long glue line that, with modern adhesives, is more than strong enough for boxes, chests, and carcases. Finger joints can be cut in various ways, including by hand. With a router, it isn’t too difficult to make a home-made jig for use with either a hand-held or table-mounted router, but this article will concentrate on three popular commercial methods.
Sticky Fingers
Finger joints present a few problems that you don’t get with dovetails:
1. The fit of a dovetail is achieved by setting depth of cut exactly right with basic jigs, or making pins fit tails with the more sophisticated jigs. With finger joints, most jigs are of the fixed template kind. The cutter is moved twice the width of the cut to make the next cut; for example, with a 1⁄2in jig, the template moves the cut 1in to position it for the next cut. You can have the world’s most precise template, but if your cutter isn’t exactly 1⁄2in in diameter the joint won’t be a good fit. The WoodRat overcomes this problem by not having a template and guide bushes at all, and the Leigh jig by using a very highly engineered (and expensive) system of adjustable guide bushes.
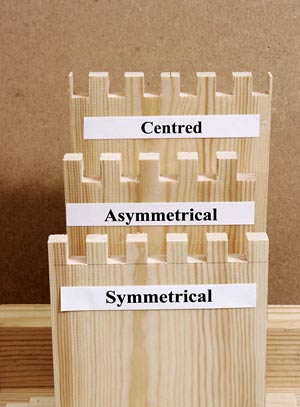
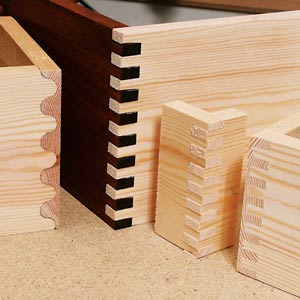
2 You’re more at the mercy of your board width, even with the Leigh jig. With a fixed template you can’t take just any width of board and guarantee an acceptable-looking joint. In general you have three choices, as shown in the picture (left).
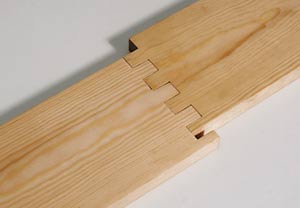
● Symmetrical joints have full fingers at both ends of one board and full sockets at both ends of the mating board.
● Asymmetrical joints have a full finger at one end and a full socket at the other end of each board.
● Centred joints have a finger or a socket in the centre of each board, with further equally-spaced cuts moving out towards the edges of the boards.
With the WoodRat you can accommodate any width of board by having a centre cut wider or narrower than the outer cuts, but with jigs, you’re well advised to prepare your boards to one of the widths specified by the manufacturer.
Choosing a jig system
The simplest form of jig is the basic fixed template dovetail jig. With some of these it’s possible to cut finger joints with the standard dovetail template and appropriate straight cutter; more often though a separate template, cutter and guide bush need to be bought.
Buying extra bits for basic jigs can be an expensive pastime; it’s quite easy to add various accessories and end up spending more than if you’d gone for one of the more versatile jigs in the first place.
At the top end of the jig market is the Leigh. You have to add the finger joint template, guide bushes and cutters to the cost of the original dovetail jig, which runs up a formidable bill. What you get for this is a template with four different comb sizes, and a set of adjustable guide bushes to ensure that the fingers and sockets fit well.
Also at the top end of the market is the WoodRat. This isn’t strictly a jig, since there are no templates or guide bushes involved. Among its many capabilities, however, is an unrivalled ability to produce finger joints of almost any size or spacing, in any width of board. All the setting up, marking out and positioning the cut has to be done by the user, unlike with a fixed comb jig where the settings are built into the jig.
Finally, there are one or two table-based finger jointing systems. Probably the best known is the Incra jig, which enables finger joints to be made by moving the fence between successive cuts.
The Triton system also provides for cutting finger joints with a special finger jointing attachment. This is available as an accessory, which fits on the Triton table and operates rather like the Incra jig. These will both be covered in a subsequent article.
Basic jigs
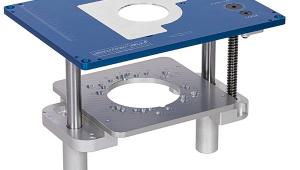
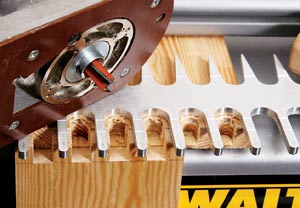
With most basic jigs the finger joint templates have to be bought as an accessory. An exception to this is the recently-introduced DeWalt DE 6212 jig which comes with two templates, one of which caters for finger joints. The appropriate guide bush is also included.
With all basic jigs the finger and socket boards are cut separately in the vertical position, with a backing board clamped behind them in the horizontal position to prevent breakout. For safety, the backing board should be thicker than the box boards to avoid cutting into the body of the jig.
Right: The template slid and pinned for the corresponding socket cuts

Left: The guide bush being adjusted for the best fit
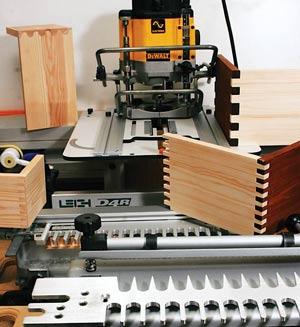
Right: A selection of finger joints cut on the Leigh Jig
Maintaining symmetry by working from both
sides of the board towards the middle
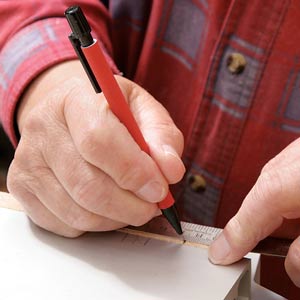
Marking out the first
pin board on the WoodRat
The Leigh works by positioning the comb for, say, the finger cuts, cutting all the finger boards then sliding the comb along the mounting bar to the socket position and cutting all the socket boards. The comb is held in each position with a metal pin. The correct fit for the joint is set by adjusting the height of the guide bush in its holder.
Apart from the range of sizes for the joints, the Leigh enables half-blind finger joints to be cut. These can be square or rounded. Square joints can also be cut on the WoodRat, though not as easily, but round ones are, I believe, unique to the Leigh. Half-blind finger joints require the finger boards to be routed in the horizontal position with a stopped cut. Square socket boards are routed vertically. Rounded stopped joints are more complex, but are made clear in the Leigh Owners Manual.
The WoodRat The WoodRat is superb as a dovetail and finger-jointing device but the user has to do all the work of setting up, choosing the size and style of joint, and positioning the cut.There are three main requirements for accurate finger joints on the WoodRat:
1 Accurate marking out of the first board. I use a ruler and a 0.5mm clutch pencil.
2 Using a cutter narrower than the width of the sockets. This gives scope for fine-tuning the socket widths.
3 Keeping the joint symmetrical by twisting and turning the first board for each cut. Effectively you’re working from both sides towards the middle, and the board will be symmetrical with regard to both ends and both faces.
With the first board cut in this manner you clamp it in the marker position and use it as your pattern for all subsequent boards, both finger and socket. Whatever the size and spacing of your first finger board, you cut all other boards, both finger and socket, with the original board in the marker position. This particular exercise has helped many of my course students to grasp the principles of WoodRat operation.
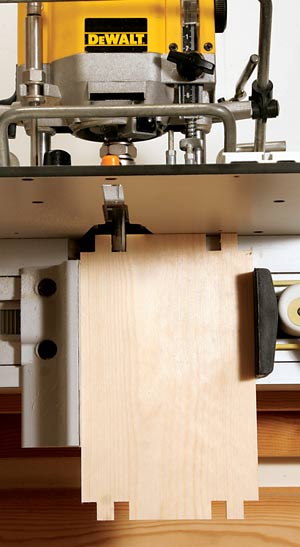
One of the features of WoodRat cutting is that you can cut part way through the thickness of the board then leap-frog over it and cut from the other side; i.e. you cut both sides towards the middle. This is a very useful trick to reduce breakout and is particularly easy if you fit a PlungeBar to your router.
A socket board being cut using the first finger board as the ‘template’
Making a choice Finger joints can be strong and attractive, used in the right situation. For best results the expensive devices such as the Leigh Jig and the WoodRat are streets ahead of the basic jigs, but their cost is also on a different level. My personal favourite is the WoodRat, but if you want to cut exotic halfblind finger joints the Leigh Jig is the one.
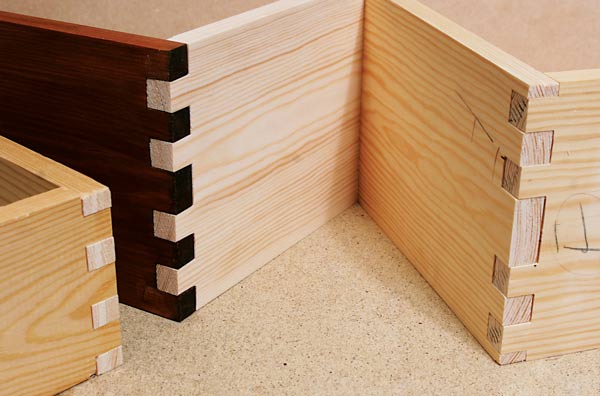
Left: Two finger boards interlocked to check the fi t of the joint
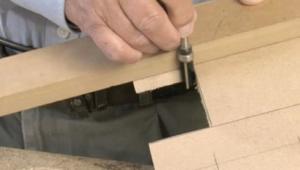
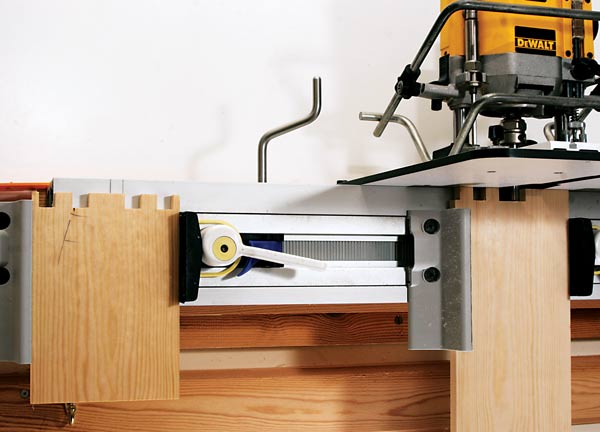
Right: A pin board being cut at the left-hand end of the DeWalt DE 6212 jig

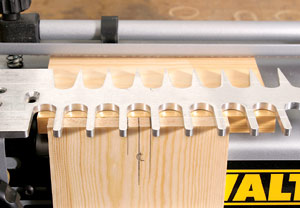
Left: The corresponding socket board being cut at the right-hand end of the jig. Note the adjustable stop to the right of the board
Right: A board with the marked centre positioned by eye in the template. Note the adjustable stop at the left of the board
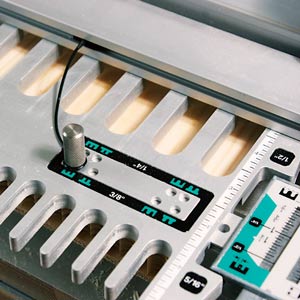
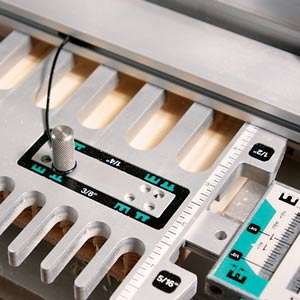
TESTING A BASIC JIG SET-UP
To test the set-up, two finger boards are cut and interlocked flat. The object is to check that the cutter is exactly the required diameter, and that the board edges line up. If the joints don’t fit you’ll have to try another cutter. If the board edges don’t line up you have to adjust the stops, if there are any, or shim the board, photo 1.
When you’re satisfied, proceed with the cutting. Finger boards are cut at the left-hand end of the jig, photo 2, and socket boards at the right-hand end, photo 3.
With an odd-width board you can, with a bit of fiddling, centre the board. Draw the centre line on the board then draw a line either side to give the width of the gap between the fingers on the template. Position and clamp the board by eye so that the two offset lines fall symmetrically under the template, photo 4.
You can now cut a board with a socket in the dead centre. You then use a socket board to position the pin boards, but you might well decide that it’s easier to stick to the recommended board widths.
DeWalt Jig
DeWalt Power Tools
01753 567055
www.dewalt.co.uk
Leigh Jig
Brimarc Associates Ltd
01926 884440
www.brimarc.com
Woodrat
0845 458 2033
www.woodrat.com
- Log in or register to post comments