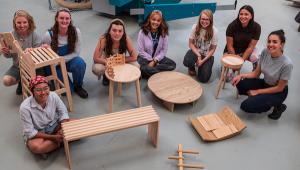
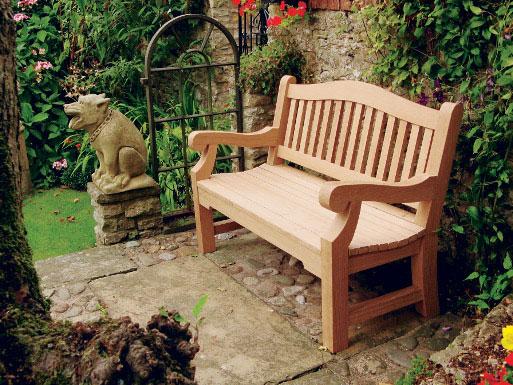
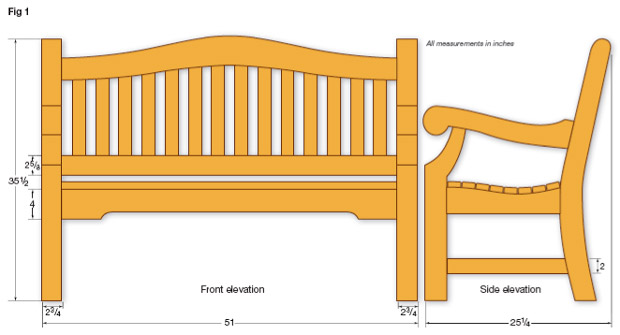
A seat in the sun
When you are satisfi ed with your positioning, draw around the patterns. Then plane and thickness the timber to 2¾in for the legs and arms, and to 1½in for the centre and side seat supports. Fix your paper patterns to the planed timber using drafting tape; then transfer the outline to the timber using carbon paper, photo 3.
Use a bandsaw to cut out all the blanks, photo 4, sawing a fraction outside the line. Make sure you leave suffi cient at the ends for the tenons. Use a planer to smooth the fl at parts of the legs, photo 5, and a combination of spokeshave, belt sander, plane and scraper to smooth the rest.
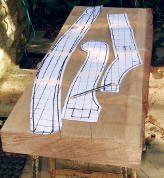
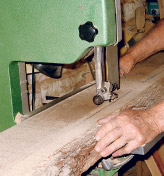

Photo 1. Use paper patterns to position the components for the most economical use of the timber
Photo 2. Remove the sapwood with a bandsaw before planing and thicknessing the wood
Photo 3. Transfer the outlines of the components to the planed timber using a pencil and carbon paper
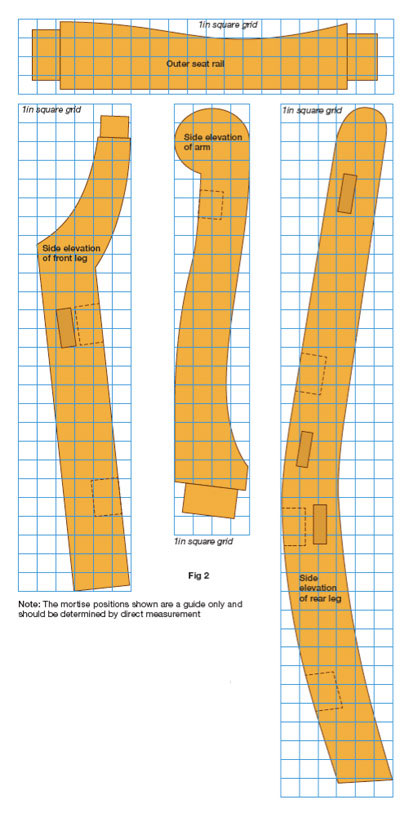
It is now a simple matter to draw a line at each side of the cross pieces so that the mortise positions can be determined, also the angle of the mortises relevant to the face. Use a pencil point resting against the legs to draw the shape and position of the shoulders, ready for when you cut the tenons.
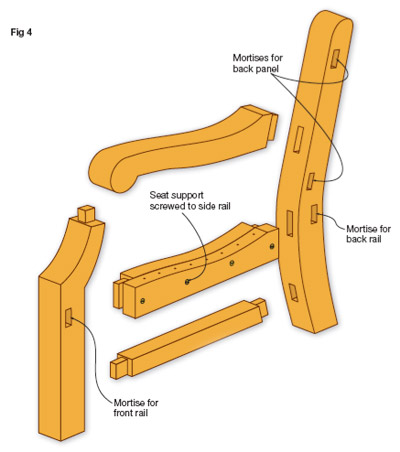
Note that the stretchers are positioned in the centre of the leg thickness, but the side seat rails are positioned so the side facing the seat centre is fl ush with the inner face of the legs. This makes it easier to fix the side seat supports on the inside of the rails.
To complete the mortises, trim their ends square by hand. Of course, if you have a mortising machine you can cut all your mortises in one operation.
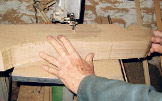
Photo 4. Cut the parts to the
outline on the bandsaw, cutting
just outside the marked lines

Photo 5. Plane the fl at parts
as far as possible on a planer
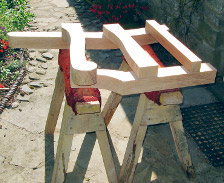
Photo 6. Place the cross pieces on top
of the legs and mark their positions.
Also mark the shoulders on the
underside of the cross pieces
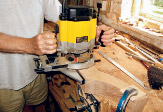
Photo 7. Use a router to remove most
of the waste from the mortises,
ready for trimming by hand
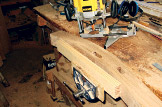
Photo 8. On the back legs you’ll
also need to provide a straight
edge for the router to bear against
I used Cascamite glue because the seat has to endure outdoor conditions. I’ve tried polyurethane glue in the past, but I prefer Cascamite because I find it less messy. Use plenty of glue in each joint so that there are no capillary paths to allow rainwater to penetrate. This does involve more cleaning away of surplus glue, but unlike a piece of indoor furniture any remains will not become obvious with staining and polishing.
The arms have to fi t into the mortises on the rear legs, so you need to form a slight chamfer at the end of the tenon to enable the arm to fi t over the tenon at the top of the front leg. The arm will be quite secure, especially when the joints are pegged. Glue and cramp the arms in place, photo 11, againchecking that everything is square, and set the assemblies aside to dry.
Drill and counterbore four holes up through the underside of each seat rail (shown in photo 15). The counterbores should be deep enough to accept 2in No 8 brass screws, so that they will have about ½in of thread projecting to enter the undersides of the front and rear seat slats.
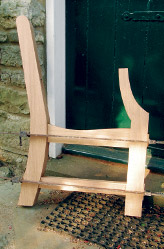
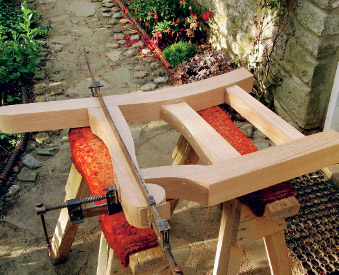
Photo 9. For each end frame, glue the legs, stretcher and seat rail together and clamp them securely
Photo 10. Lay each arm across each end frame and mark the shoulders with a marking knife
Photo 11. Cut the mortise and tenon on each arm, fit it to its end frame and glue and clamp it in place
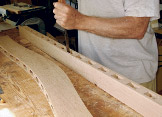
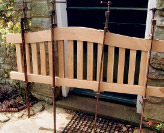
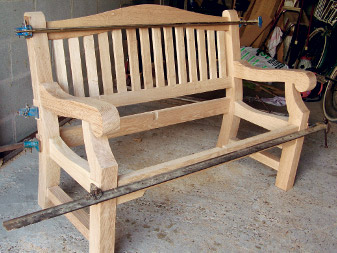
Photo 12. Sink the mortises in the back rails with a router and then trim them square by hand
Photo 13. Assemble the back panel and clamp it before trimming the rails to length and cutting the tenons
Photo 14. Cut notches in the front and rear seat rails for the centre seat support (inset), then assemble and cramp up the main carcase
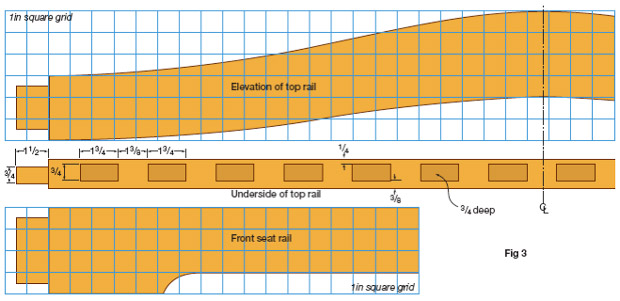
The rear slats are 1¾in wide and ¾in thick, so make the mortises in the upper and lower back rails to this size, photo 12; space them as shown in fig 3. Because there are no shoulders, fitting the slats is easy, and if one has to be replaced in the future it will be simple to remove. Use a router to cut the mortises to depth, and square the ends to the 1¾in length by hand. Then assemble the back panel and cramp it up securely, photo 13.
After removing the cramps, shape the side seat supports to the same profile as the side seat rails, but with a projection on each end (see fi g 4). Shape the centre seat support in the same way, with a projection at each end to fit the notches in the front and rear seat rails.
When you have prepared the seat slats, fi t the centre seat support in place without adhesive, and cramp the side seat supports to the side seat rails. Space the eight seat slats evenly one by one on top of the seat supports and mark the centre of each slat lightly on the sides of the seat supports. Then remove the seat supports and drill the eight clearance holes through each one (shown in photo 15).
Cramp the seat slats in place, photo 16, using the offcuts from shaping the seat supports to secure them, and drive screws up into them from below through the pre-drilled holes in the seat supports. Add the wider front and rear slats, driving the fixing screws up through the counterbored holes in the front and rear rails.
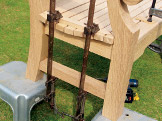
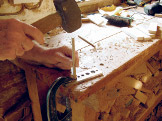
Photo 15. Screw the side and centre seat supports to the bench after drilling clearance holes through them for the slat fi xing screws
Photo 16. Use cramps and the offcuts from the seat rails to hold the slats in place. Then turn the bench upside down and drive in the slat fi xing screws from underneath
Photo 17. Use a dowel plate situated over a convenient hole in the bench to make the oak pegs, then use them to peg all the main joints
I haven’t found a commercial source of ¼in diameter oak dowel, so I made my own using a dowel plate. I fi rst shaped the pegs roughly a little oversize from straightgrained off cuts before driving them through the dowel plate, which was strategically placed over a hole in the bench, photo 17. This results in a clean, accurately-sized dowel.
Glue the dowels and drive them into place, leaving their heads slightly proud of the surface. When the glue has set, cut the dowels off almost fl ush with the surface; I used a special saw for this which is made without any set so it doesn’t mark the background. Then pare them fl ush and sand them smooth.
- Log in or register to post comments