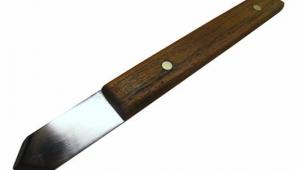
Sharpening hand saws

A friend found an old saw and sent it to me because my name is Sellers and one of my teaching associates is named Slack. The name on the saw was Slack Sellars & Co of Sheffield, England. According to W.L Goodman’s Plane Makers From the 1700’s this company produced edge tools between 1860 and 1960. This saw had no redeeming qualities by way of design or stable name and as you can see, the saw wasn’t worth a second glance with its rusted blade, steel back, beechwood ill-fitting handle and nickel-plated nuts rusting and peeling.
rusty old saw
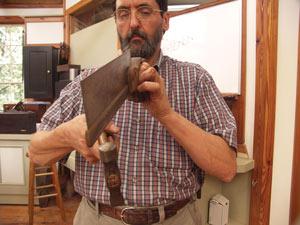
The battered and dulled Slack
Sellars & Co saw only needed
de-rusting and sharpening to
give it years more useful life
I have many different types of handsaws and needed no more, but then I thought about those who might need to restore one or simply need to master some restoration or sharpening skills. This project satisfied all the criteria and the principles are basically the same for any type or size of handsaw. At some point you must decide whether to sharpen for a ripcut or a crosscut, which will come at the end of the restoration — in this case I chose to hybridize my saw to do both.
First fix Old or new, look directly along the length of the saw teeth to see if the saw is straight or crooked, which is different than kinked. A crooked saw is readily fixed whereas kinks takes more effort. My saw had two crooked sections, which show more as curves rather than sharp bends, and a small but noticeable kink near to the heel of the saw.

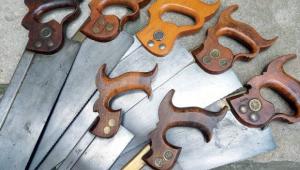
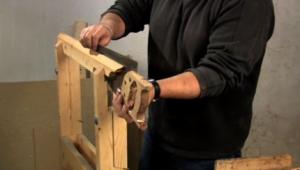
Rust coated both faces of the blade and so I suspected the development of rust inside the handle where the wood has direct contact with both the steel blade and the back stiffener. Removing the handle revealed a mass of deep rust. You can remove the back of the saw but I’m always cautious of this because it may be hard or even impossible to put it back later. My advice is to leave well alone.

cleaning rust removing handle flattening teeth
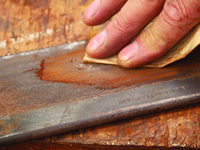
Cleaning up the saw, removing the handle and flattening the teeth back to their original shape.
The principles are basically the same for any typeor size of handsaw
I removed the rust from the surfaces of the saw using a homemade scraper from a super-thin saw blade: A paint scraper works fine too. With the heavy crusted rust removed, I went to 220 grit abrasive paper to remove the second level of rust. It may be that you will find deep pockmarks in the metal, which may make it impossible to cut good teeth into the saw later on. Work through the abrasives to 320-grit. Rust severely impairs the saw in the cut, and causes the saw to bind. Worse than that, the rust traces become evidence in the traces left on the finished wood. With the removal of rust completed, remove any kinks from the saw cheeks using a hammer and anvil. Kinks may not be obvious until you sand the rusty surface when they show as a bright shiny surface.
adjusting the handle filing the saw handle routing the handle profile
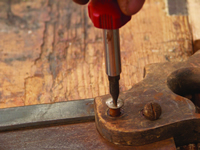
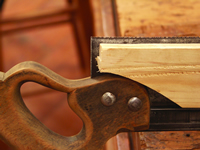
Re-shaping the handle and flattening the teeth before re-sharpening.
filing saw teeth waxing the blade Holding the saw for sharpening
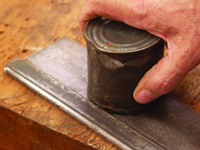
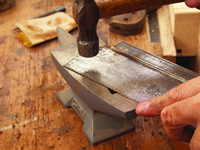
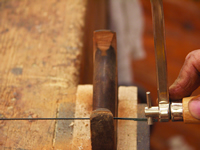
Flattening, waxing and clamping the saw in position.

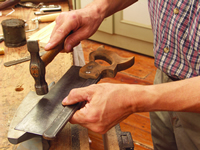
To remove the kink, I planished the surface of the saw directly on and round the kink on the risen side with a hammer and small benchtop anvil. This drives the metal back into the blade and with judicious strikes will generally straighten out the kinks.

For crooked areas along the teeth, simply tap along the back of the stiffening bar. Shocking this pinching spline draws the steel blade into the stiffener. Trial and error will establish where to tap. This isn’t an exact science.

Making the handle With this remedial work complete, you can now work on the handle. This was too small for my hand, which is a fairly common problem for me. The wood was good but a little rough. First I shaped the handle to size by hollowing out more between the horns of the handle on the outside until it suited my hand. I used a coping saw to remove the bulk of the waste and then a finer file to make flowing curves. I then used an upturned router to round over the newly cut areas and to redefine the remainder of the rounded parts.

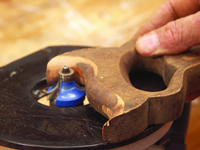
Wherever the router didn’t reach, I used a rasp and file to remove the waste and then sanded with progressively finer grits to 220-grit. To scrape the rounded parts of the handle, try a spare razor saw blade, the one I had used earlier to remove the excess rust. I filed a clean square edge and sharpened it as you would a traditional scraper. The thinness allowed me to flex it to conform it to the shape I wanted. Two or three coats of boiled linseed oil gave me the protection I needed.

saw held in vice
saw holding jig
Sharpening the teeth

The saw teeth on this saw were irregular in shape, a common fault with old or secondhand saws. It’s a fairly simply process to joint them straight and establish consistent teeth. Saws are sized by the number of teeth that occur within a given measurement. In this case we use points per inch as the standard method. Because these teeth are uneven, every other tooth must be reduced to allow the adjacent teeth to grow.

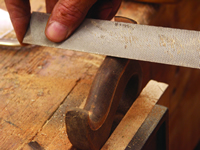
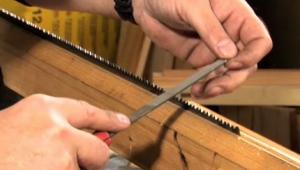
Secure the saw in the vise between two battens and use a flat, single-cut mill file to level the oversize teeth. With a suitably sized saw file, work on the obviously over-sized teeth first by filing either side of the larger teeth to reduce their widths. Use the flat mill file to take off the tops of all the teeth with a couple of strokes. This will leave flat tops to any oversized teeth while missing the lower smaller ones.

Further correct the oversized teeth by filing each side of them until they come to a point. Be aware of the adjacent teeth as you don’t want to recreate the problem on the other teeth. I used a 4in extra, extra slim taper for this particular saw, which has 15-PPI.

Your saw filing should have corrected any major discrepancies. If so, you can now file all of the teeth to even out minor differences. Simply look at each of the teeth as you file them and apply pressure to force the file into the sides of the teeth you need to change.

If no change is needed, apply pressure to press the saw file into the bottom of the gullet and use long, even strokes to file both sides of the teeth. If the saw is in particularly bad shape, take two or three strokes but do the same to every tooth, otherwise you’ll create an uneven line to the teeth.

If the saw is in good shape, file with a single stroke. You will be filing every alternate gullet, which sharpens the front of one tooth and the back of the adjacent tooth. Begin at one end and skip every other tooth.

TIP: Choose the right file. Generally, the rule of thumb is to use a saw file that’s at least twice the height of the teeth you will sharpen. That way, as you rotate your file during the sharpening, all of the three file surfaces will wear evenly.
When you get to the other end, turn the saw around and start over on the other side, filing the gullets you skipped. There are many theories about saw sharpening, and you can read some of my own more advanced methods if you want to later, but this way is the best way to develop the feel for sharpening and to understand the basic principles without the clutter of complex theories and too much concern for compound angles and the like.

I’m sharpening this saw as a non-aggressive ripsaw, which means I can use it equally for crosscut and rip-cut. The pinnacle-point teeth we generally use on more refined crosscut saws is more complex to explain and understand, while the actual method is only marginally better when it comes to cutting the wood, and so the method outlined here is ideal for beginning woodworkers to master.

Ripsaw profiles For ripsaws, we file the teeth at 90° to the saw in both directions. I position the top face of my three-cornered file so that it lies parallel to the top of my saw. That will effectively cut my teeth so that the front and back of the teeth will be 30°. Oftentimes, people sharpen saws with a rip tooth, but put an aggressive, perpendicular face on the front of the teeth. This is fine for larger saws that we use for ripping along the grain, especially in boards where we have long lengths to rip and we are bearing down on the saw with full upper-body shoulder pressure and all of the cut results from the forward thrust of the saw. However, most joinery work uses smaller saws for short-length cuts, 12in or less, and comprises both rip and cross cut in the same joint. Because most if not all of the cuts are over a short distance, usually 1⁄2in to 4in long, it’s more practical to compromise the perpendicular cut for a more hybrid pattern of sharpening above, rather than to use two saws. Another advantage is that this saw now cuts on both the forward and the backstroke, which compensates somewhat for any loss in not using the aggressive sharpening pattern.
Setting the teeth Setting the teeth is also an uncomplicated aspect of saw sharpening. We use a device called a saw set, but small-toothed saws are often too small for sawsets in which case we use a small nail punch. Most dedicated saw sets don’t go down to the range we need for fine saws, yet the saws must have the correct amount of set, otherwise they bind in the cut and make the saw difficult to use or they waggle in the cut and you lose precision.
flattening teeth setting teeth checking alignment
Flattening teeth and resetting and checking the saw for alighment.
lapping the blade
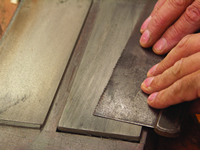
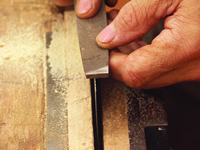
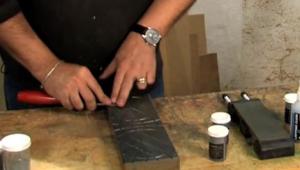
Finally, place the saw on fine
sharpening plates and rub the
saw back and forth for a few
rubs. This will both polish and
fine-tune the outside cutting
corners of the teeth

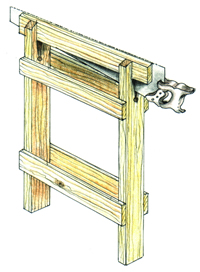
For nail-punch setting I lay the saw on its side with the teeth on a thin batten of wood so that the saw is raised up above the workbench. I also lay a batten under the back stiffening bar, to suspend the saw up on the bench.

This saw had no set at all, and so I didn’t have to follow the direction of the existing set. Otherwise, I would simply drive the teeth according to the existing pattern. If the existing set seems irregular, tap the sides of the teeth with a hammer on a steel surface or an anvil to remove the set.

setting tool
alignment
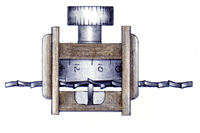
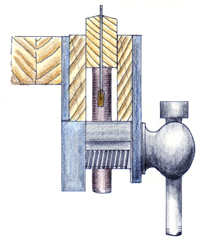
1. Using a setting tool
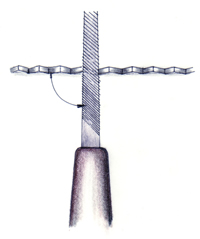
2. Keeping a file at right
angles for a ripsaw set.
Otherwise, place the point of the nail punch on the tooth and begin tapping every alternate tooth with a single tap. I use a 10oz Warrington. When you get to the end, flip the saw over and start again, but this time begin setting the opposite teeth to the ones you just did.

With the setting completed, try the saw. It may feel coarse, if so, then it’s likely that you have too much set. Take the saw back to the anvil or metal vise jaw and tap the sides of the teeth evenly, first from one side of the saw, and then the other.

Try the saw again and compare the cut. This tapping does not remove all of the set because the steel has memory. Tapping the steal compresses the steel between the hammer and the face of the anvil, but the teeth spring back after the hammer blows, but to a more uniform level.

X