Choosing the right hammer
Okay, it's not rocket science I know, but there are a few things to consider:
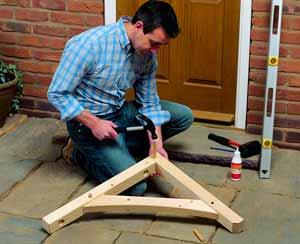
First of all, use the handle properly, always hold the end of the handle.Holding it near the head reduces the efficiency of the hammer and control is compromised. The story of the apprentice with his bag of new tools springs to mind. He came in one morning to find the his hammer’s handle had been sawn off three inches below the head. On complaining to the boss he was informed that as he did not seem to want to use that bit it was removed! The apprentice was presented with a new handle and instructions on how to fit it. I bet he never forgot that experience.
Holding the hammer correctly will improve efficiency and comfort. If you find that the strain on the wrist is uncomfortable, use a lighter hammer. As a rule of thumb I tend to use 16oz hammer for most things and have a 20oz for the heavier stuff. The 26oz claw hammer is reserved for house maintenance.
Let your whole arm do the work rather than just your wrist.
Hammers have uses other than driving nails. Think of a hammer and the first thing to come to mind is probably the American pattern claw hammer. This is the last thing you need as a furniture maker. A claw hammer is a builder's hammer designed for heavy work such as timber framing and putting down floorboards, hardly the sort of tool that could be used in the same sentence as 'finesse'. The claw is used for demolition or as the Americans aptly describe it 'wrecking'. These hammers usually have assisted grip in the form of leather or more common today, rubber-like covering on the handles. Claw hammers start large and get heavier the smaller ones are around 16oz and progress to a hefty 30oz.
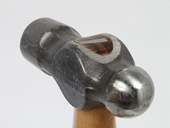
The furniture makers’ hammer is the cross pein hammer. These cross pein hammers, are altogether a more subtle tool. Hammers start at around 8oz and progress gently towards a maximum of about 16oz. Smaller more slender versions are usually referred to as pin hammers and have much lighter, 3 to 4oz heads.
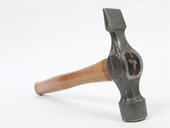
Ball pein hammers are not of any great value to the woodworker. They are a metal working or engineers’ tool.
Panel pins usually have a fairly sharp point and if used as they are supplied can split fine mouldings etc. A swift tap to the pointed end with the head resting on something solid will blunt the tip creating a flat end that will slice the fibres along the grain rather than push then apart, creating a split. The amount that the tip is blunted will depend on the likelyhood of the nail causing a split. Nails close to the edge, in very fine mouldings or close to the end of a piece of wood are more likely to cause splitting than nails surrounded by thick timber.
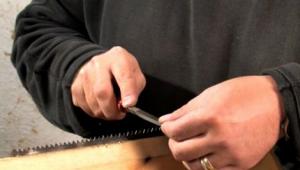
Hammer the nails in until they are just above the surface. In a confined space the cross pein can be used to tap the nail in. If the nail bends as it is being driven in, don't try to straighten it. Most of the tine you will just make the entrance hole larger and still not be able to straighten it. Use a pair of pincers to remove it, protecting the surface with a scrap of wood if necessary.
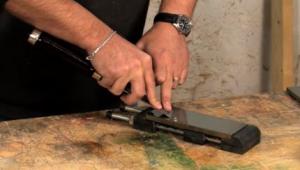
It’s advisable to set the nail head into the surface of the wood. This will ensure that the nail does not become proud if the wood shrinks. When nails or panel pins are used in areas that will be seen, the holes should be filled with an appropriate coloured filler.
Use a nail set or pin punch that is slightly larger than the head of the pin being set. The dished tip of the punch will hold the head and stop the punch slopping off and damaging the surrounding surface. The outer edge of the tip will also cut a neat hole with clean square edges ready to receive the filler.
The Pin hammer is a
lightweight slender tool
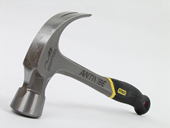
Claw hammer
The engineer's ball pain hammer
When nailing or pinning, always match the hammer to the fixing. It’s no good trying to fix something together with large nails and a small hammer. Even if you manage to drive the nail in, the joint is unlikely to be tight. On the other hand a large hammer is likely to bend a small nail. For the most part panel pins are going to be the fixing being used. Unless you are building reproduction furniture and using traditional methods and glues, it’s unlikely that nails of any great size are going to be used.
When using nails in some hardwoods, like oak and cherry, it’s important to take into account the staining that will occur when using ferrous nails. The iron in the nail will react with the tanning in the wood and cause a black stain. This staining can add 'character' to a reproduction piece but will look hideous on an example of white oak contemporary furniture.
When a nail is driven through a piece of timber it does two things. It parts the fibres creating a split for the nail to pass and/or it cuts the fibres and crushes the material to make room for the nail.
This action can be controlled by altering the shape of the nail tip. The sharper it is the more likely it is that the nail is going to part the fibres and split the wood. This tip shape is what allows air nails, brads and finish nails to be forced into wood surprisingly close to the end without splitting. Their tip profile is either a very blunt wedge or just a flat end.
All sorts of mallets are available, made from a variety of materials. The traditional woodworker's mallet is the rectangular shaped 'joiner's' mallet. This is used for applying extra force to a chisel. It should not be used to make up for the chisel being dull. It is also useful for 'assisting' in the assembly of component parts. In this role it is not to be used to force an ill fitting joint, rather to 'seat' a snug fitting joint.
Other types of mallet are used from time to time. The round carver's mallet is sometimes used to drive chisels, although I personally prefer the traditional joiner's style. Small mallets are useful for delicate work. The small round mallet shown here was found at a boot fair for a few pence. It was rather dirty and sorry looking but with a clean up and scrape off it makes a handy addition to the tool kit for those lighter jobs.
Wooden mallets can be saturated with boiled linseed oil (BLO) to preserve the timber and increase the weight. A new beech mallet will soak up a surprisingly large amount of liquid if left to soak in a shallow tray of oil overnight. The additional weight makes the mallet easier to use as the mass has been increased, less force is needed to drive the chisel.
Mallets should be used with the minimum of force. A firm 'tap' is far more controllable than a reckless wallop. You can always hit it again. Finding the correct amount of force to apply is the art of the game. It will vary with the species of wood and the type of chisel being used. As with a lot of techniques in woodworking, practise and experience will make perfect.
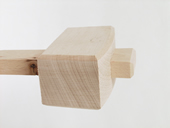
Beech wood mallet
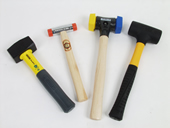
A selection of rubber mallets
- Log in or register to post comments


| Articles | Articles | Articles | More | Subscriptions | Resources |