Floating mantel
Although most new homes won’t have a fireplace these days, woodburning stoves remain popular in many older as well as some more recent properties. Many period houses still have an open fire, and if you’re a woodworker producing plenty of unwanted offcuts, either this or a woodburner makes a lot of sense. It’s always been traditional to have a mantelshelf above the fireplace, somewhere to keep a candlestick or two before the days of gaslights or eventually, electric lighting. These days, however, it’s an obvious place to display those treasured family photos and birthday cards, not to mention festive Christmas stockings!
As its name suggests, a mantelshelf is simply the horizontal part of a mantelpiece surrounding the fireplace. Some mantelpieces could be very ornate, and you’ve only got to visit a few of the grand National Trust properties around the country to get some idea. The fireplace and mantelpiece would often be the focal point of a grand living or reception room, so it needed to reflect the owner’s status and wealth – a chance to show off a bit – from elaborately hewn marble or limestone to exquisitely carved mahogany, walnut, oak or pine.
In Georgian and Victorian times, cast-iron and slate became popular materials, too. In less wealthy residences, the mantelpiece would often be simpler – perhaps no more than a shelf fixed above the fireplace. Function, rather than statement, was typical of farmhouses and cottages in rural areas, so these would often make do with a heavy timber beam.
Floating shelf
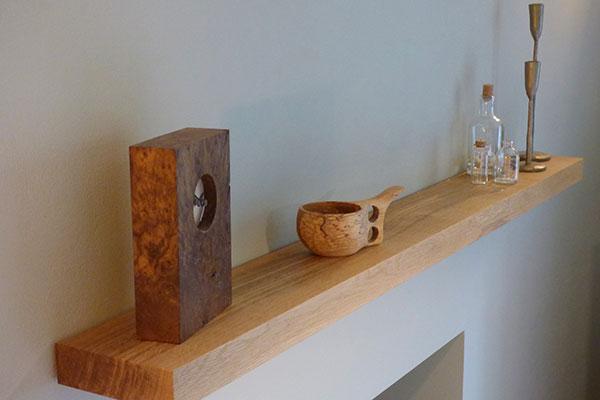
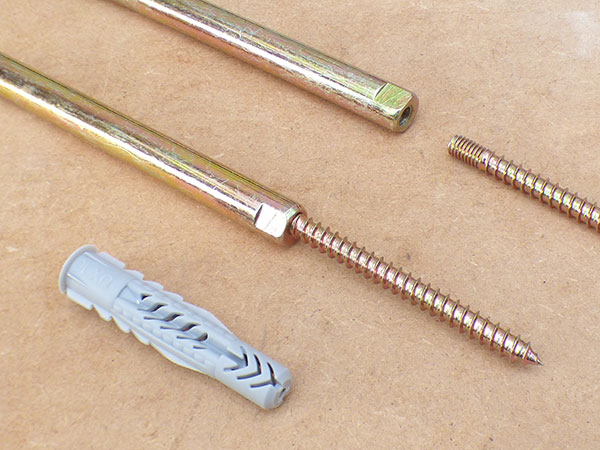
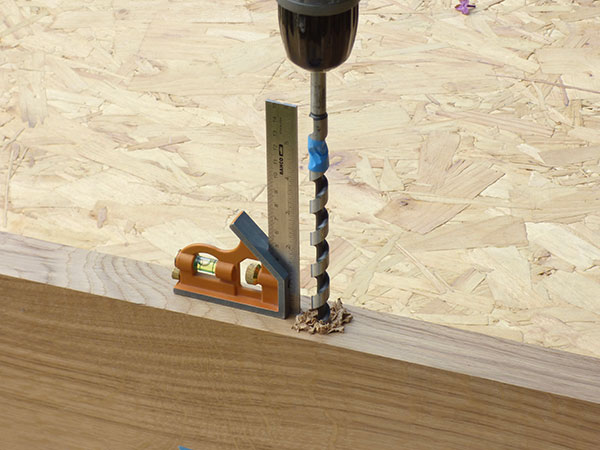
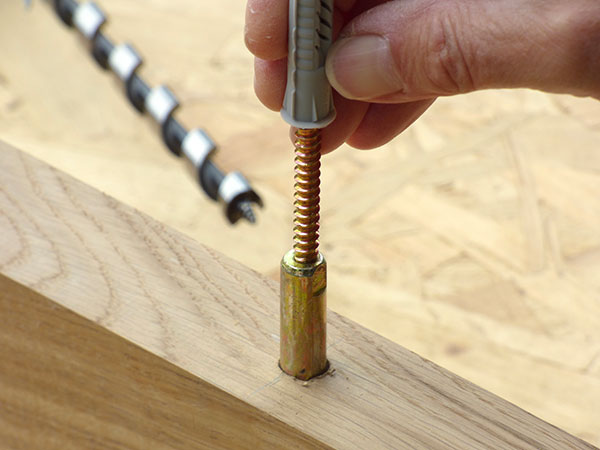
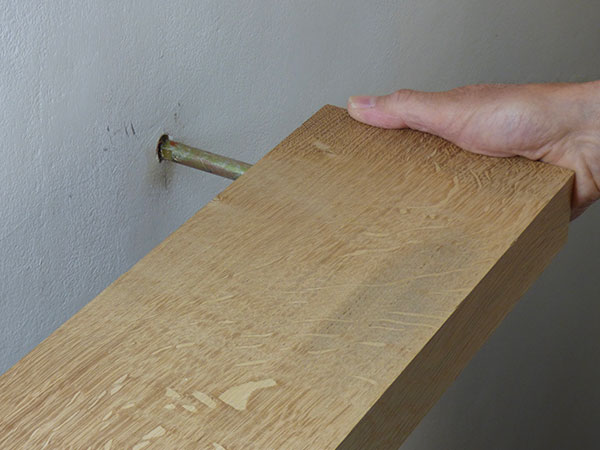
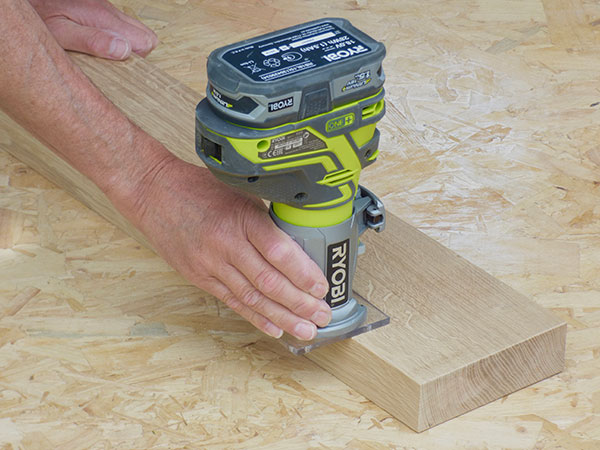
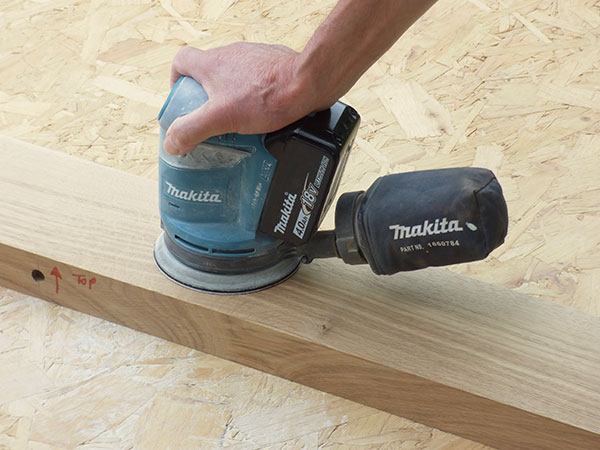
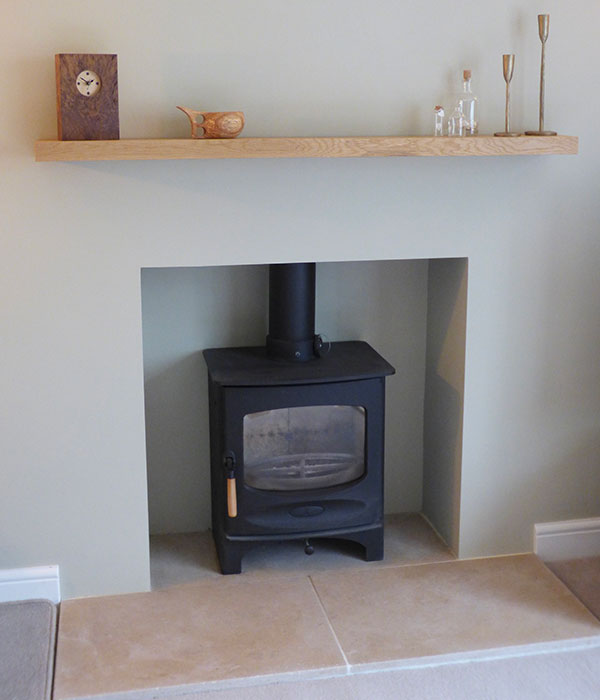
Of course, you don’t necessarily need to have a fireplace to add a mantelshelf. They can look just as effective across an alcove, even above a flatscreen TV mounted low on the wall. After rebuilding a fireplace and installing a new woodburner some 18 months ago, a planed length of oak was all I needed to complete the work in my living room. Unless you’re going for a rustic look, you’ll need to prepare your timber first – my oak finished at 145 × 45mm. You could make a couple of matching supporting brackets, though for a neater, minimalist look it’s easier to fit the mantel as a floating shelf. A dense timber such as oak will be heavier than softwood, so check your selected fittings can take the weight. These will also limit the depth of your timber; too deep – front to back – and there could be some movement. I used steel floating shelf brackets from BespOak Interiors – www.bespoakinteriors.co.uk – which are unique in design.
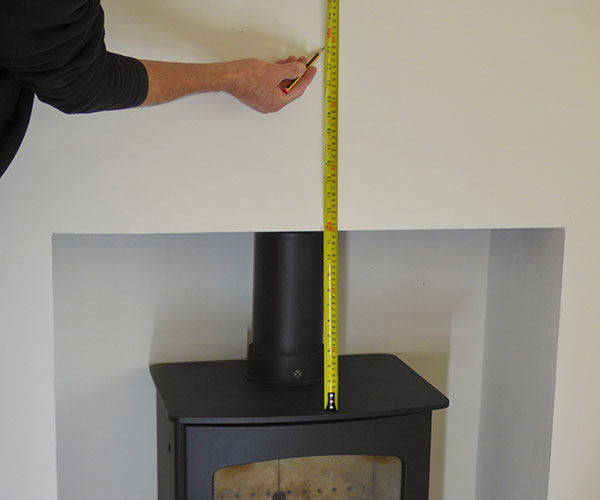
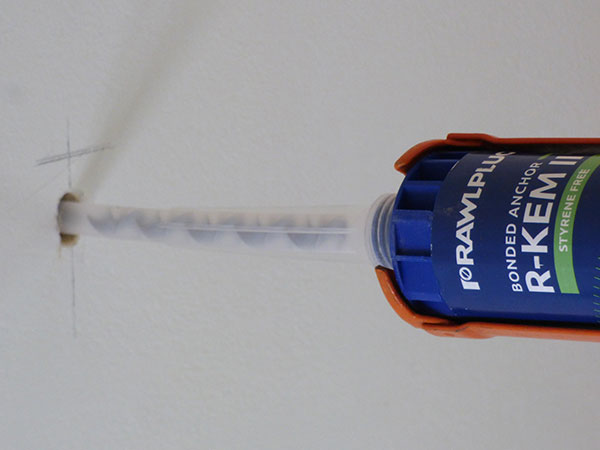
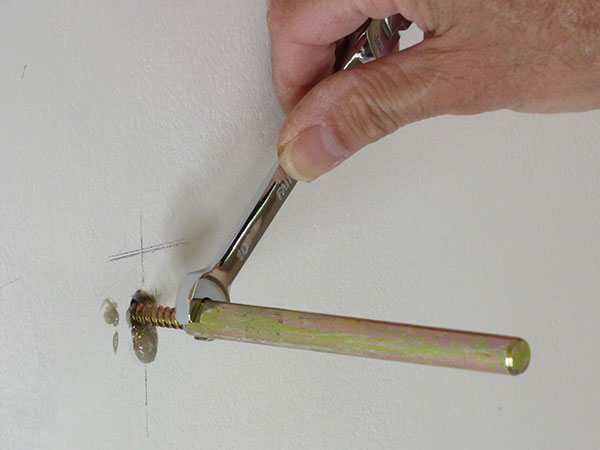
The fixing screw is offset from the barrel, so you can tweak the timber at either end to get it dead level. These offset brackets also help overcome the problem of their fixing holes not quite lining up, a common problem when drilling into masonry. My oak was 1,300mm long, so three of BespOak’s long multi-wall brackets were more than adequate to support the weight of my mantelshelf. Barrel length of these is 120mm, while 80mm versions are more suitable for shallower shelves. It’s worth mentioning that when fitting a mantelshelf above a woodburner or open fireplace, it must comply with relevant Building Regulations. Critical measurement here is the minimum distance from the stove for any combustible material, which must be at least 300mm. Easily achieved, it’s more of an aesthetic choice when deciding on the height. I chose to install my mantelshelf at 1,170mm above the stone hearth.
Step-by-step


|
|
||||
- Log in or register to post comments


| Articles | Articles | Articles | More | Subscriptions | Resources |