The garden shed - an alternative approach
The garden shed - an alternative approach
I thought fellow readers may be interested to see photos and read details of how I went about making my garden shed, which followed a traditional design measuring over 2m high with a walk in access and a small window. I came to realise that a great deal of space is wasted - approximately one-third of the floor space is for access and the window is not conducive to accepting shelves.
The shed described here is to suggest an alternative design, but once the principles are noted, then detailed construction is dependent on material readily available and at the discretion of the constructor.
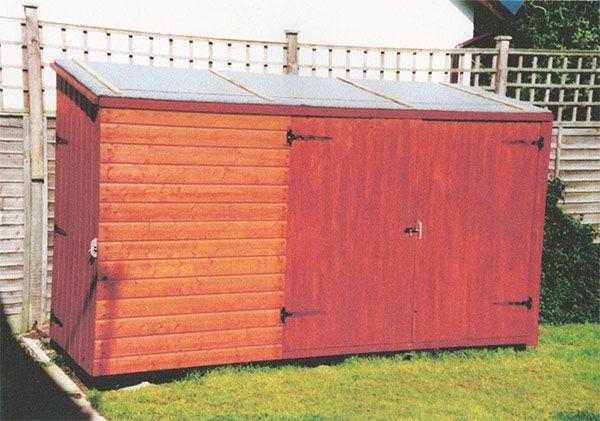
The completed shed in its new livery - courtesy of Cuprinol
The shed measures only 1.6m high at the front and 1.8m at the back. The plan view comprises three modules of a metre square - the whole of the floor area is free for storage and all the wooden walls will take nails/screws and/or shelves without needing physical access. Two modules have a double door at the front and the other module from the side. Other than putting a foot on the entrance, all items can be easily reached.
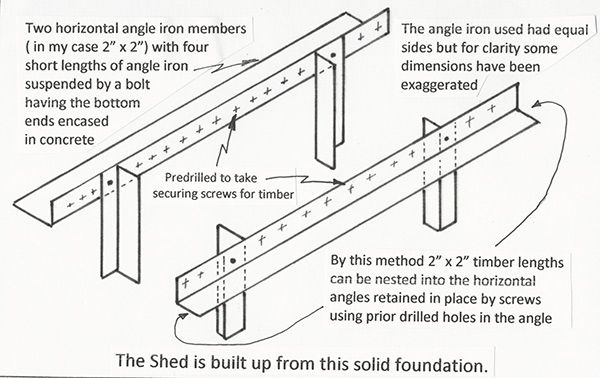
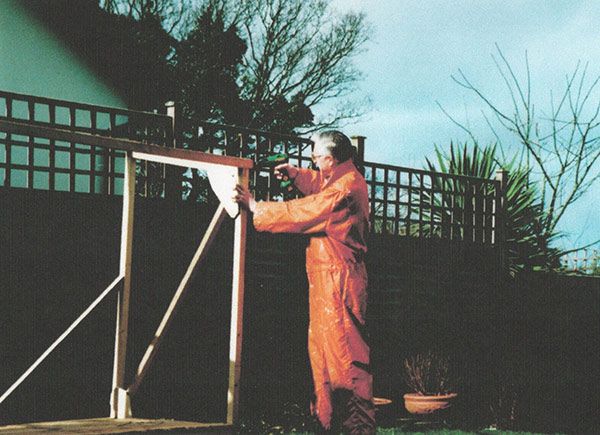
It goes without saying that a firm foundation is essential - here you can see the method Bernard applied
Firstly, four pieces of angle iron uprights were to be set in concrete. Prior to this, two load bearing angle iron horizontal cross members were bolted to these uprights. I used angle iron but heavy timbers would be fine (as you will gather, I had access to an angle iron!). In effect, the two cross members were bolted to the uprights and were chocked in position to allow the concrete to be poured. Besides giving high stability, this arrangement prevents damp from rising into the shed.
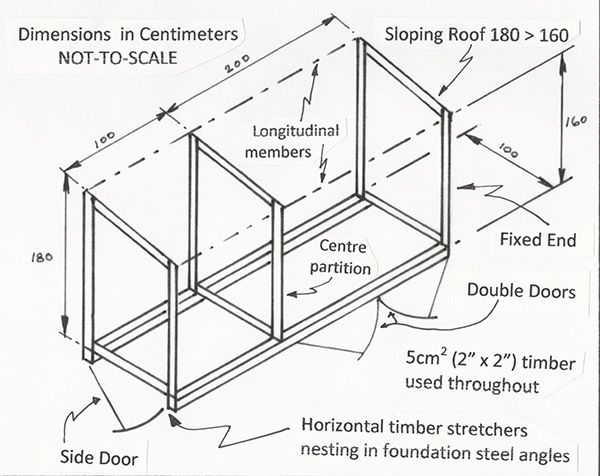
A view of the basic construction principles
The 3m back wall is stiffened by cross braces so that it does not concertina and also the fixed wall at the front has cross braces. The fixed end is braced with a strut, with the corners having thick battens screwed to its frame and the brace itself to give a rigid construction. The centre partition frame is treated similar to that of the fixed end. The opening for the door at the end cannot be braced but battens at the top corners will help to stiffen it (the shed has been in use for over 16 years, not requiring hogging of any sort).
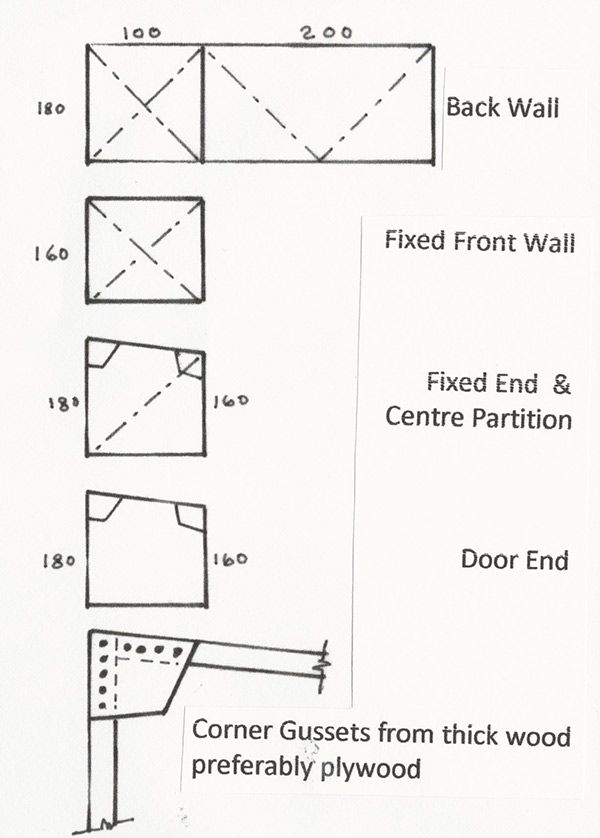
The bracing details
Fixed end with bracing and corner gussets
Once the goalposts have set in the concrete, a horizontal timber (50 x 50mm) is nested in the support angle secured by screws via predrilled holes in the angle. Cross members can be fitted at floor level (to take the flooring) before the three braced items are positioned. The back wall bracings are next to be fitted with a horizontal member fitted at roof level so that the back wall and the three frames are stable, followed by bracing the short front wall. A horizontal member running along the roof at the front stretching along the top of the short front wall and across the double door opening is next to be fitted - again using the angle iron and similarly at the front.
This sets out the principles of the construction, I leave details of flooring, doors and roofing to the discretion of the reader.
Bernard Smith, by letter
- Log in or register to post comments


| Articles | Articles | Articles | More | Subscriptions | Resources |