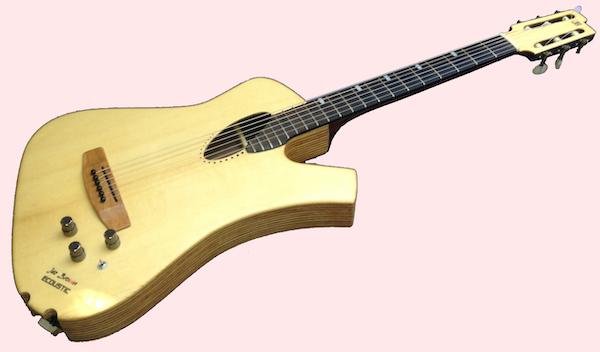
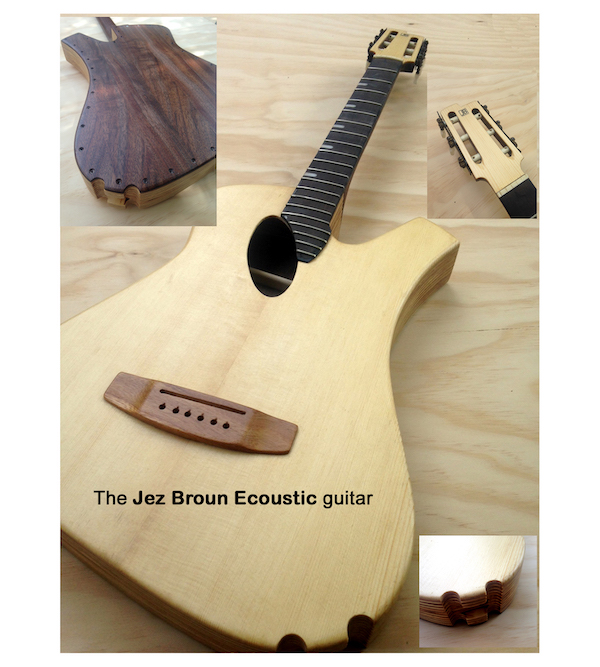
The Jez Broun ecoustic guitar
“It took me years to figure out Jeremy’s world view, even after meeting him back in 1991, to judge my work for inclusion in an exhibition of furniture makers in Bath. By coincidence, I now live in Seville where Antonio de Torres – the Stradavarius of guitar making – made the first six string guitar in 1836.
"Fast forward to the present day and Jeremy strips away the mystique of the luthier, showing usthe traditional way in part one, then his own energetic ‘why not’ guitar in part two, which I really think is a fabulous contribution and will get both beginners and experienced hands to start building a guitar, as I did at the age of 15.“
Nicholas Chandler – Designer-maker, Seville, Spain
Imaginative, modern methods
I was 17 when I made my first guitar and the only guide available was a hardback book no thicker than a guitar top, written by A P Sharpe in 1957. I still have that book today, which is only 32 pages long with just six photographs. It enabled me to build a Clifford Essex concert Spanish guitar, which I completed in a weekend, working through the Friday and Saturday night. Howard Orme, my woodwork teacher at Abbotsholme school, gave me the keys to the school workshop. It was a very nice sounding guitar, but sadly ended up being used as a cricket bat during a school barbecue later that summer. It was probably the first guitar to feature two sound holes.
When I left school, I considered becoming a guitar builder – I find the term luthier somewhat snobbish and intimidating – but realised I’d get bored very quickly. Back in the 1960s and for many decades after, guitar making was a rigidly traditional craft.
Today, however, the story is different and in the first half of my book, Guitar Making Art, I guide the reader through a solid grounding of traditional practice, going on to build an imaginative modern semi-acoustic guitar in the second half. It allows a woodworker of any skill level, with low cost ordinary tools, to make a guitar that suits individual requirements.
The reader is encouraged to move tradition onwards and embrace modern materials – such as plywood, for example – and technology to build a worthy electro-acoustic guitar. With its unique online link to videos and printable plans, the book offers both comprehensive and detailed information, and will hopefully inspire confidence and creativity.
Here I’m going to share extracts from both halves of the book; traditional acoustic guitar construction and my Jez Broun Ecoustic – electro-ecoustic guitar – the design of which isn’t on an artistic whim, but addresses structural challenges such as how to form the body profile, which is traditionally achieved by steam-bending.
Using a radical method of stack laminating ordinary plywood, various low cost shop-made jigs are devised – for example, skimming with a router in order to reduce the top’s thickness.
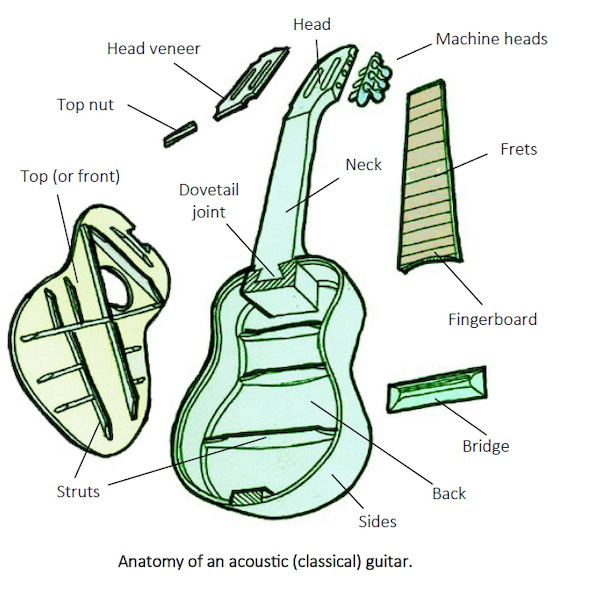
Anatomy of an acoustic guitar
The safest route for progress is to travel from the familiar to the unfamiliar, so before we embark on the journey of building a guitar like mine, let’s look at the tradition of acoustic guitar building as a springboard for moving on.
There are two types of acoustic guitar: a nylon strung classical guitar and a steel strung version, which is perhaps best typifiedby the strutting method used for the top (face). The purpose of the top is to transmit sound freely without it breaking. A guitar top is commonly 3⁄32in (2.4mm) thick. Forgive my traditional background in using old Imperial units! The struts serve to stiffen the top without inhibiting the amount of vibration.
The two major strutting – bracing – methods for nylon and steel strung guitars are Torres and Martin. The former is for Spanish classical and the latter more popular across different types of acoustic and electro-acoustic guitars. For this build, I’ve chosen the Martin method. The top and its struts are traditionally made of European spruce (photo 12) and the figure is close-grained and closer at the centre.
Two bookmatched halves make up a guitar top – as with the back. For maximum strength, the annual rings on the struts’ end section should be vertical. The acoustic properties of the back and sides – ribs – are slightly less critical than for the top.
Historically Honduran mahogany, Brazilian rosewood and walnut were used, mahogany offering a mellower, earthy sound. Traditionally, the sides are steam-bent around a heated tube (photo 7), then held in the guitar former. The neck is the sculptural part of the guitar and critical in its profile: a wide neck – 51mm at the top nut – is for classical playing and a narrow neck – 45mm– for steel strung guitars.
Necks are made of other woods such as maple for steel strung varieties, which have a reinforcing steel truss rod inserted, the tension on steel strings being greater. Laminating the neck adds stability and bamboo laminates are increasingly used.
The revolution in guitar building during recent years has seen a very decent tone and great looking guitars achieved with even plywood-type laminated tops, which are still somewhat of a mystery to me. The fingerboard is flat in section for a classical guitar and slightly cambered – radiused – for a steel strung version.
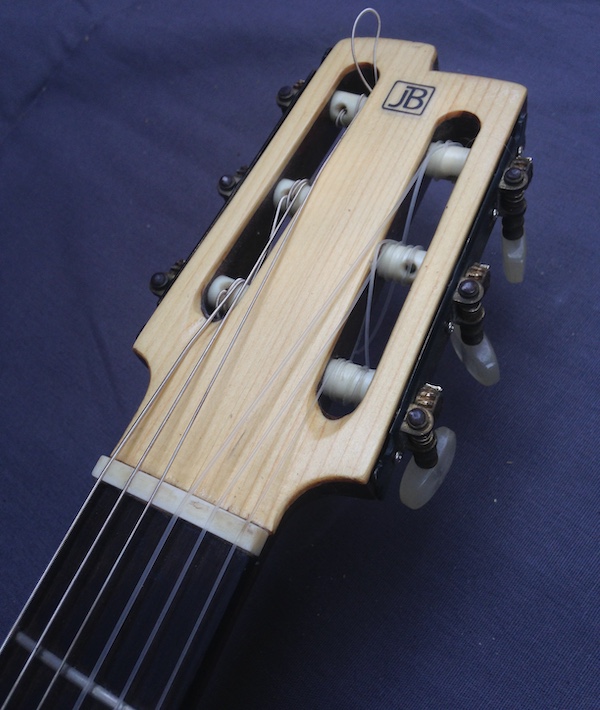
Fingerboard markers vary from minimal dots made of celluloid or acrylic, to ornate floral or bird-like inlays in mother-of-pearl. The guitar head is either slotted to take the machine heads for nylon varieties, or drilled for steel strung ones.
Tools & sundries
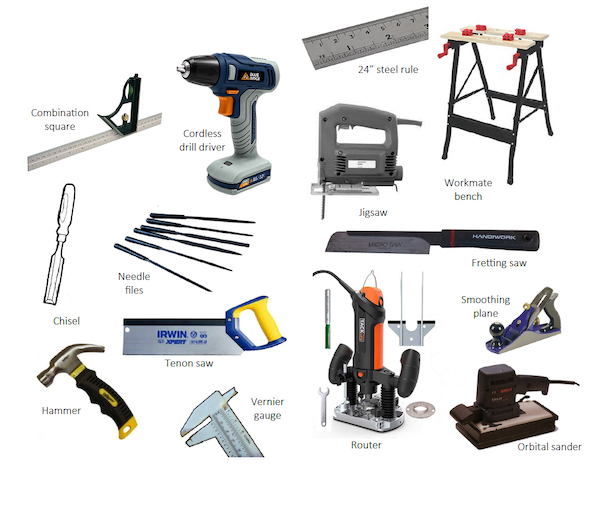
You don’t need specialist equipment or a large workspace to build a worthy guitar; you can use general woodworking hand and power tools. Ideally you need some basic power tools/machines. Shown in photo 4 are some of my suggested priority tools and machines, all of which are small and relatively low cost.
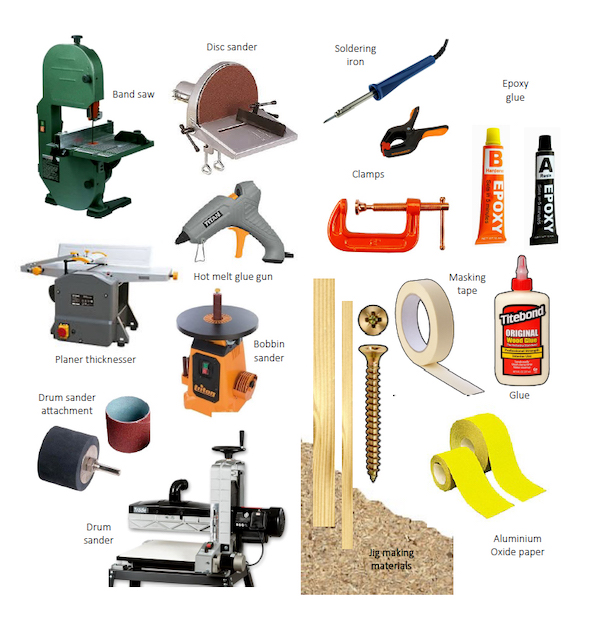
There’s extra woodworking tools and machines (photo 5) that are considered a worthy investment beyond guitar making, and a priority one is a small bandsaw, which can end up costing a lot less than what some may spend on a hand plane.
Jigs
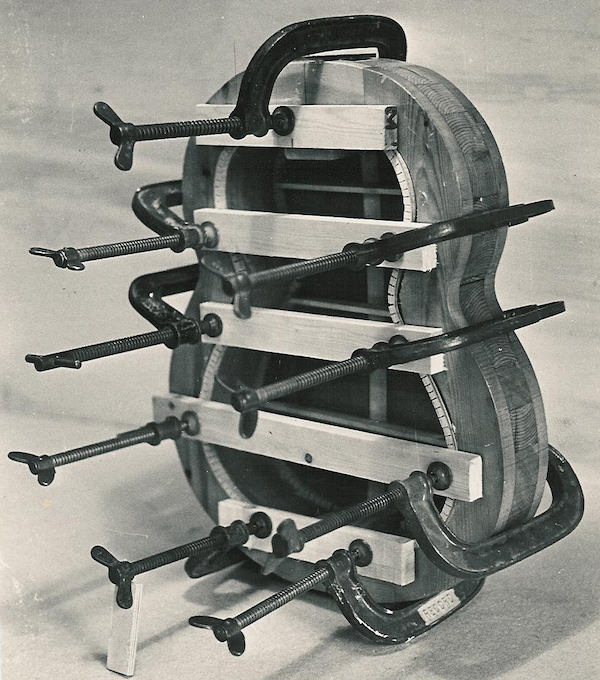
The two jigs I used when making my early classical guitars were the traditional body former and steam-bending tube. The body former, joined in two parts, is made up of softwood laminates with alternating grain for stability. It’s just a little narrower than the width of the sides, allowing access for clamping the linings.
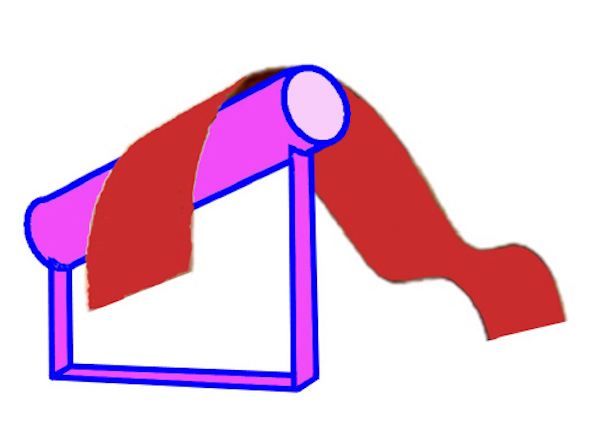
The steam-bending jig is essentially a metal tube clamped to the bench with a blowtorch aimed inside. A damp cloth helps prevent the saturated wood – rosewood – being scorched as it’s bent.
In my early handicraft teaching career at schools in both London and Bristol, I evolved simple methods of guitar building for pupils as young as 16, and with little woodworking experience. In the subsequent adult guitar building classes I taught during the 1990s, I evolved a very simple body jig for forming the sides, to use with cold bent plywood.
The jig is very easy to make: the profile of a favourite guitar is copied onto a piece of 12mm chipboard, the inside profile cut out a little smaller and softwood strips hot-melt glued around the inner profile, then screwed in place. This jig is featured in my Acoustic Guitar Easy Build video integrated ebook, alongside other low cost jigs, tools and materials required to make a good sounding guitar.
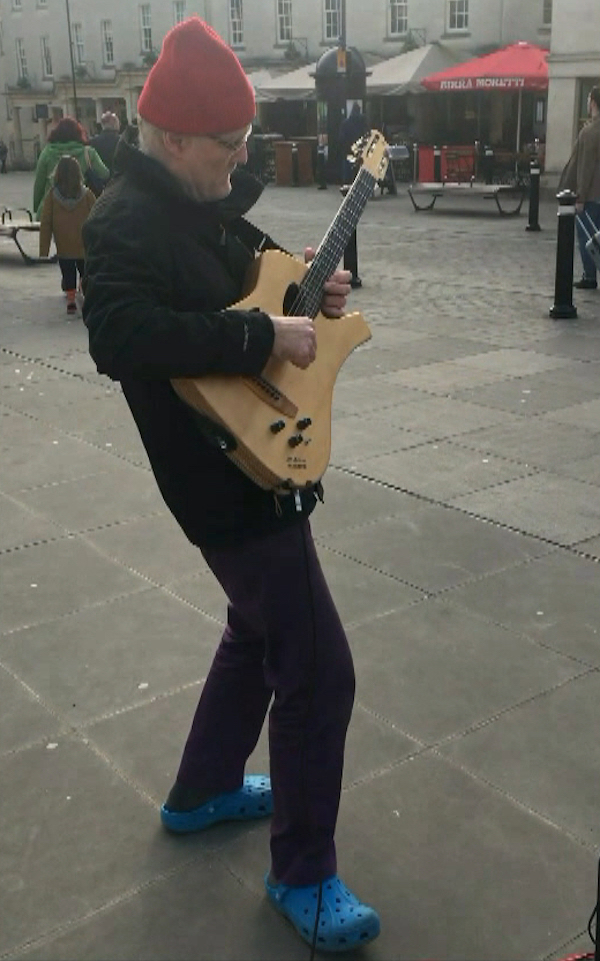
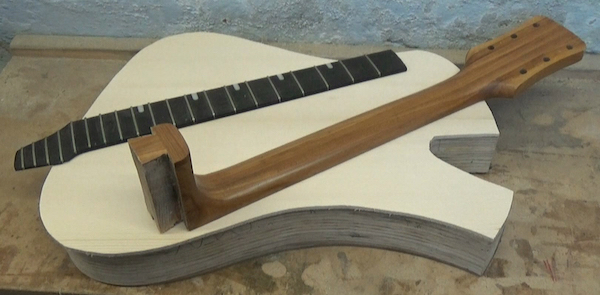
Making the Jez Broun Ecoustic guitar
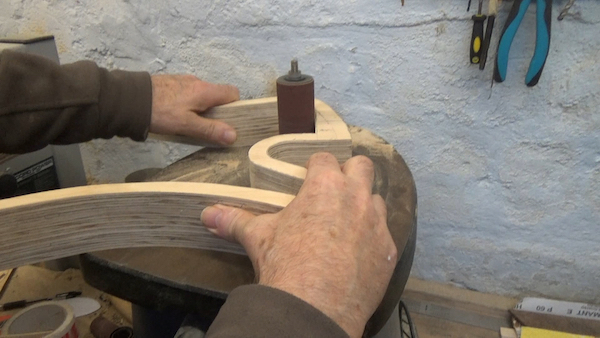
I’m reluctant to be too prescriptive here as I want to encourage the reader to use my design mostly as a guide. However, you may of course prefer to copy it, so I’ll offer the sequence more or less of how I built it. You may not own some of the specialist machines mentioned here – such as bobbin and drum sanders (photo 10), and a milling machine – but all these tasks offer various fashioning options.
Much of the shaping can be completed with abrading sticks or blocks using a coarse AO paper. The DIY machines I’ve used are mostly low cost and the tiny bandsaw and router are priority tools.
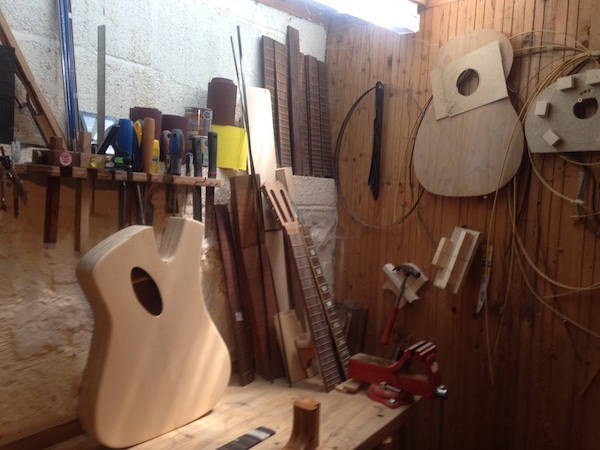
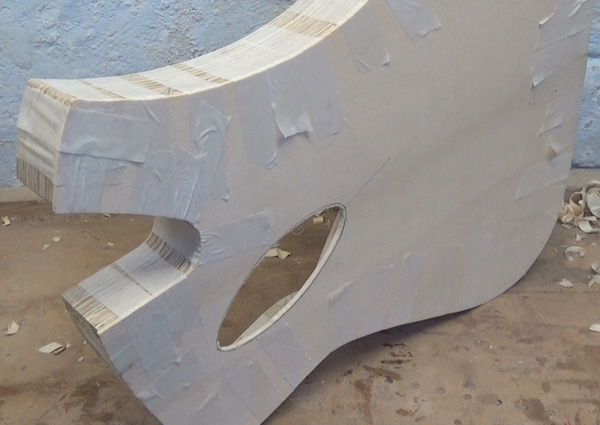
Cutting the plywood body profile
If you can source it, I’d recommend Brazilian pine plywood for the body, which can also be used for the back. It’s 19mm plywood and cuts really easily on a small bandsaw or with a jigsaw. The plans for my guitar are included with the book via the links shown below, so I’d obviously encourage you to support my innovation by buying the book!
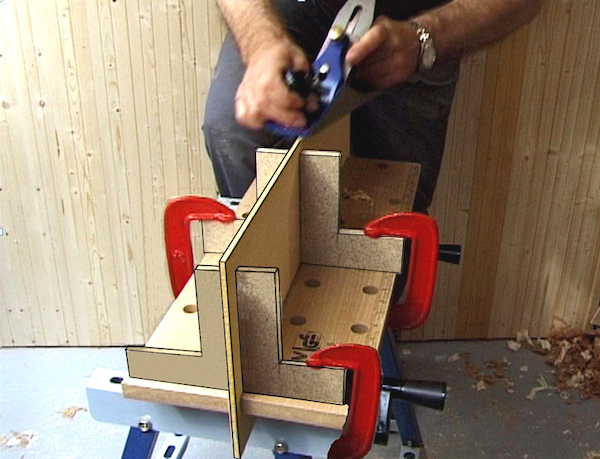
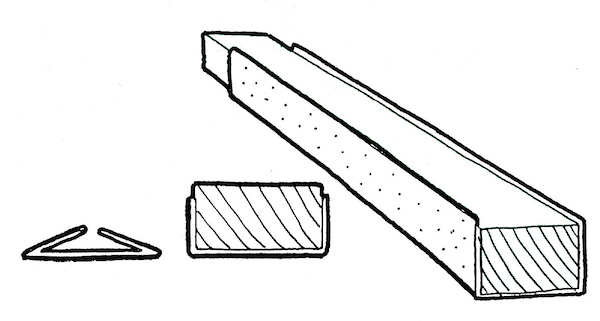
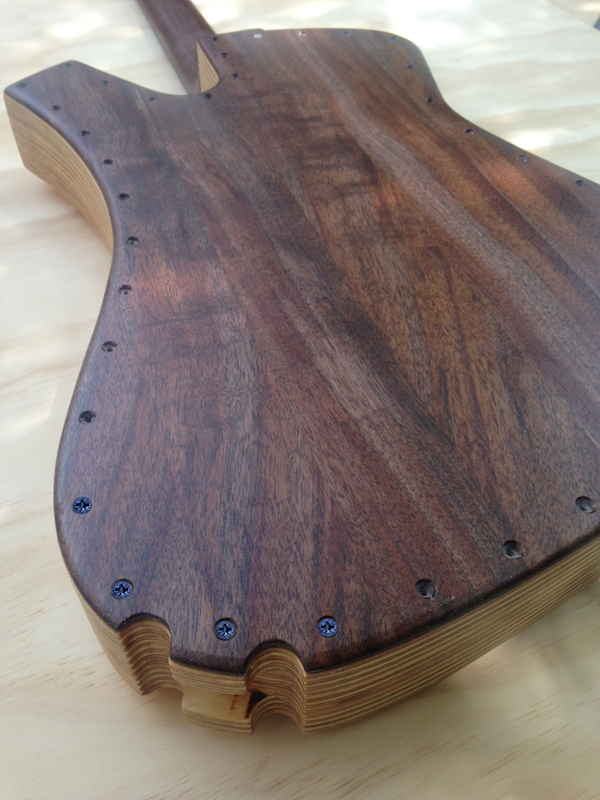
The guitar sides are stack laminated and offer the option of how deep you choose to make the guitar. I chose three ply laminates, giving a total depth of around 57mm. The shaping is revolutionary as it’s carried out on a bandsaw, or could alternatively be completed with a jigsaw.
Making the face
I’ve used a medium grade European spruce top for this guitar. The guitar’s acoustic quality is a bonus as this is a semi-acoustic version that relies mainly on electronics. Unless a hand plane is used, the quickest way to join the two halves is with a small router set up with a straight cutter, using a long steel rule as a batten guide. This is then mounted on a chipboard backing board, attached to a Workmate.
Glue is used to join the two halves. The closest grain on the matched halves is at the centre. The two pieces are rubbed together – to form a suction – before attaching masking tape, and stretching it to form a clamp, on both sides. My preference is Titebond Original aliphatic resin glue, which can be handled within an hour, but let it cure for a few hours before reducing the top’s thickness to 3mm.
You can use a smoothing plane for cutting across the grain, a hand plane – working mostly across the grain – or a simple router skimming jig. The finish is achieved by working though aluminium oxide abrasive grits – from 60-120 – mounted on a block.
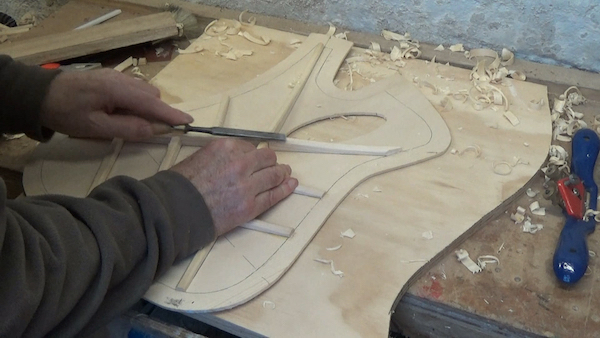
Use a Vernier gauge to check. The final finish on the top’s face is completed later; I’m less finicky about the underside. Next, trace the top profile from the guitar body shape you first created. If you use a more conventional circular/symmetrical sound hole, then you’d obviously line up the centre join with that of the sound hole.
Designing the head
By this point, you’ll have decided whether to use slotted classical or electric guitar-type holes for the tuner, which is explained on page 32 of Guitar Making Art. I feel that what makes guitar making an art is exploiting key features and my preference with all the extra work involved is the slotted head. You can see the various designs I played around with – why not break with convention and consider what works and looks nice?
Profiling the head & machine head slots
You may wish to design your own head, but mine is used here as a guide. When designing this part, it’s important to ensure that the strings run freely to each machine head roller. Use a 1⁄2in (12.7mm) straight router cutter with a straight fence. An in-depth video tutorial for this stage, including tapering the neck ready for shaping, is included in the additional online content. Full plans of the entire build can also be downloaded.
Stiffening the neck
Most, if not all, electric steel strung guitars have a stiffening truss rod buried in the neck, which is usually adjustable to ‘unbow’ the neck. As there’s less string tension, the nylon strung guitar doesn’t require a truss rod, which also adds weight and arguably alters the tone. My guitar neck has been reduced in thickness, so I wanted to strengthen it and also be able to take out any likely bend.
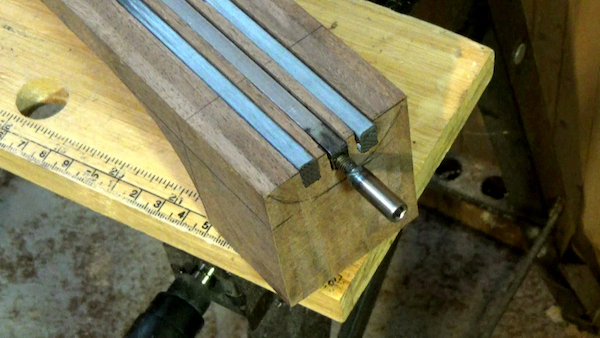
Here, I used two tiny square section carbon fibre rods (photo 13), which were light as a feather. I simply routed three grooves along the neck, epoxy glued the carbon fibre rods in place, ensured the truss rod was tight, and put tape around it to prevent any future rattle. The hexagon recess takes an Allen key, which is accessed through the sound hole.
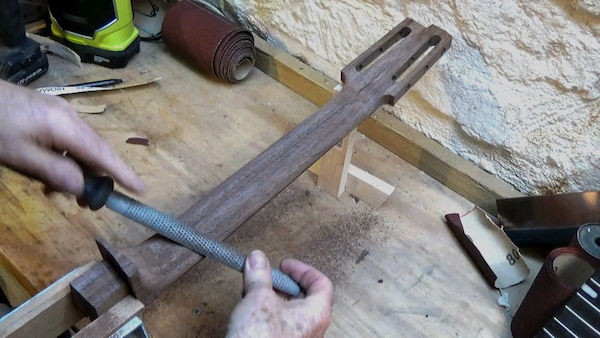
Sculpting the neck
Perhaps the most satisfying part of the guitar build, and certainly the most time-consuming, is sculpting the neck. You can use a spokeshave but I’ve mostly abraded it, working through the coarse grits of AO paper to various files. Draw lines down the neck (A) to denote the neck’s width and depth boundaries.
These important lines mustn’t be removed until the very final shaping. Start by working on the stem, taking off the corners, and make the first cut at 45° (B), continuing to remove the edges until a curve is formed using the bath towel technique, with thin strips of AO paper. The heel is shaped with round files, rasps, abrading rods and narrow strips of AO paper.
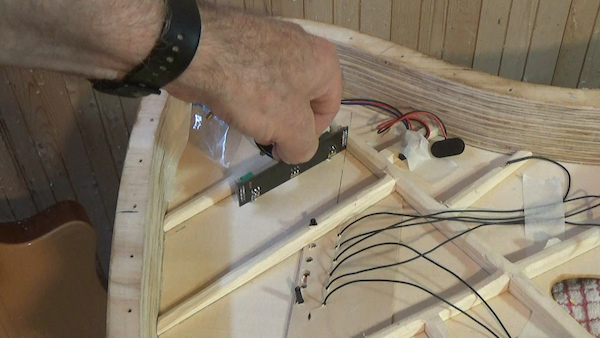
Electrics
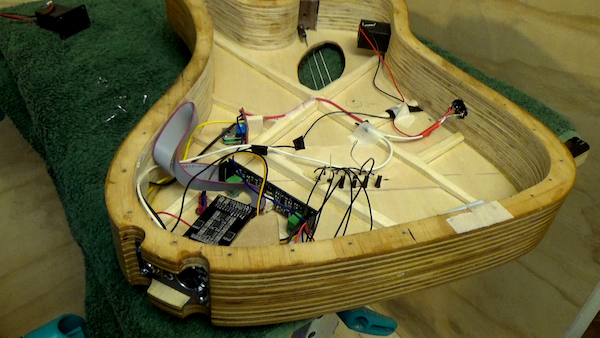
The most basic electrification of an acoustic guitar is to strap a magnetic pickup across the sound hole and link the wire internally to a 1⁄4in jack socket, located on the guitar’s base. However, this method is limited to steel strung varieties. The piezo pickup is a wonderful invention for both steel strung and nylon guitars.
Instead of a magnetic signal, it uses crystals for amplifying the sound. The neatest solution is to use an under saddle piezo pickup so that everything is concealed. The tiny jack links to a preamp (B) that itself might include an extra internal microphone – called a ‘blender’ (C) – which adds to the richness of sound. You can extend the microphone telescopically for public address.
A useful on-board effect, saving the need for a foot pedal, is a delay effect built into the preamp. This links to a piezo under saddle pickup. There’s a huge range of knobs and switches for electrified guitars. Other electronics that avoid foot pedals and cables are preamps for guitar distortion – Ironstone, for example – as well as wireless jacks. See back cover of book for online links to PDF file technology options and videos, and page 70 for further electrics.
Varnishing the guitar
This is a high point of the guitar build and whether to go for a high gloss or matt finish. I tried both and found that a few imperfections on the back were brought to my attention, so I left the top coat as matt polyurethane. Sandwiching coats of matt and gloss seems to work. The base coat is always matt and diluted with 20% white spirit/turps.
Gloss coats tend to build up the coating’s strength. Rubbing down in between with a Lubrasil paper, or 400 wet and dry with a block to maintain flatness, is important. You can always change from matt to gloss, and preparation here is, of course, essential.
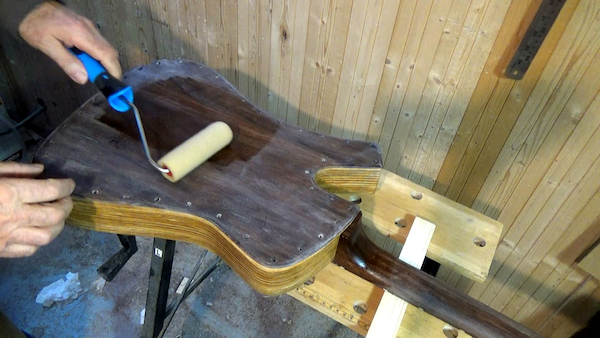
I also used a roller (photo 16) and with practice, the orange peel effect can almost be eliminated. A water-based acrylic varnish would be more environmentally friendly, first applied by brush to build up a few coats, then using an aerosol afterwards, cutting back with a fine paper. Vacuum the wood to remove any dust. The very final stage is to use ultra fine ‘0000’ steel wool, perhaps dipped in a little wax polish.
FURTHER INFORMATION
This excerpt is taken from Guitar Making Art, by Jeremy Broun
80 pages; 28 illustrations – photos and diagrams
Online content includes five A4 printable plans and four videos
• Overview
• What does it sound like?
• Student testimonial
• Shaping the head and installing machine heads
Guitar Making Art is part of a small range of unique hardback books, written by Jeremy Broun, which he also designs and self publishes. Links to online content are included on the back cover, and signed copies available to buy via www.woodomain.com/online-store
Other books by Jeremy Broun

- Log in or register to post comments


| Articles | Articles | Articles | More | Subscriptions | Resources |