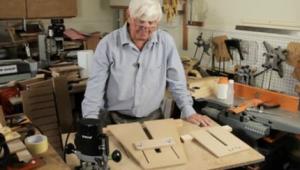
Leigh Super Jig review

The new Leigh Super Jig is one of three different sizes available, with 12, 18 and 24in capacities allowing you to buy the one to suit your needs or space. The capacity relates to the width of the timber that they can accommodate, otherwise each jig has the same design features. They’ll all cut through and half blind dovetails, using the individual component method, where each piece is routed separately. They can also cut the single-pass half blind dovetails, something that’s normally associated with the lower end jigs, and can’t be done on the high-end Leigh jigs. There are also two box or finger joint options, each with a fine-tune fitting option, so there’s plenty of scope within the jigs. The 18 and 24in jigs give maximum adaptability, mind; the 12in is a little more limited in so far as it can’t use the decorative Isoloc jointing templates, which restricts it to cutting dovetails and finger joints, though there is some scope for angled joints as well as sliding dovetails.
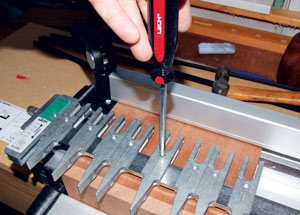
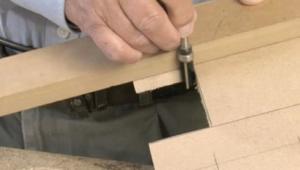
Pic 1. Variable dovetail spacings can be made by sliding the forks along the central bar and locking them with the supplied driver
Pic 2. The fork assembly is marked with identifi cation information to ensure you orientate it correctly for the joint being cut
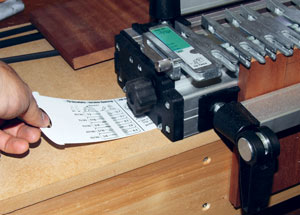

Pic 3. This handy quick reference guide shows the correct cutter and fork assembly positions
Pic 4. A small onboard peg gives the correct timber offset for dovetail or finger joints
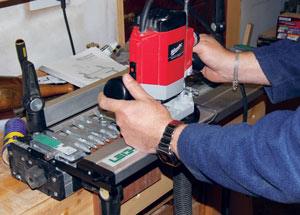
Pic 5. The optional dust kit is well worth the
money, offering extra router support and sliding
with the router to collect nearly all the waste
Some assembly is required to get the jig ready. It’s pretty straightforward, but you’ll need a couple of hours to make sure that you’re on top of it before committing to making joints. The most important step is to set the stops against which the work butts. On the D4R these stops are milled into the main jig body and therefore fixed, but on the Super Jigs they’re made of plastic and need to be adjusted using square offcuts to ensure they’re perfectly aligned so that subsequent joints will be accurate.
If you follow the assembly instructions and mount the jig on a baseboard, there’s a nice little pull-out instructional guide that slips between the board and the jig so that you can quickly check the cutter and fork assembly position without having to reach for the manual — very useful if you haven’t used it for a while and the cobwebs need blowing away.
Anyone who has used Leigh’s D4R will find cutting any joint with the Super Jig a familiar experience. There is a difference, however. The D4R has a split tine system to allow the forks to be moved apart for variation in the pins. On the Super Jig, the forks are fixed with a pair of tines so that pin spacing is also fixed, and therefore limited to the guide bush and cutter ratio. The tails, however, can be spaced infinitely along the clamping bar, giving the joints a more traditional layout if needed, and it also allows the joint to be aligned correctly for half pins on any width of timber, something that can be difficult with fixed comb jigs. Each fork is held with a single square drive screw, and locks firmly
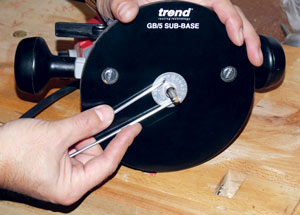
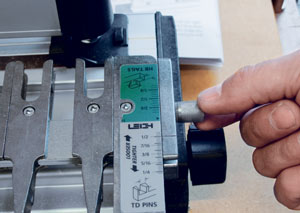
Pic 6. If you have a suitable base, the new
guide bush has the ability to rotate and fine tune
the fit of the joint
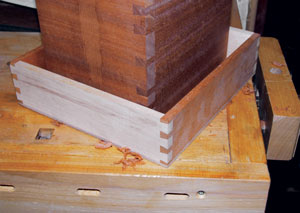
Pic 7. The variable spacing of the jig gives
plenty of scope and cuts fast, accurate joints
every time once it’s set up
If you want to make joints quickly, then the easiest way is to make them in a single pass, but you will end up with the uniform tail/pin configurations that characterize the cheaper dovetail jigs. You also need to offset the components by half a pin for single-pass cutting, and there’s a neat little adapter that’s stored on board and which clips into the jig to give the correct offset. It also doubles up as a spacer when you set the jig for finger joints.
The work, meanwhile, is clamped into the jig with cam-locked pressure bars, one for vertical cuts, one for horizontal. Each bar has a coarse abrasive backing to grip the work and prevent slipping, which works very well.
Leigh jigs start to come into their own, however, when working with variable spaced joints. Through dovetails need two cutters — one dovetailed and one straight. Adjustments are made by moving the fork assembly forwards or backwards for the perfect fit, but once a setting has been made, it’s simply a matter of recording them for future reference.
For half blind joints the adjustable fork assembly is simply flipped and positioned to the cursor marks to match up with the thickness of the stock that you’re working, and all with a single dovetail cutter. To help eliminate errors, the fork assembly is colour coded and also has graphics to show the orientation that’s set.
Adjusting these joints used to be a matter of fine tuning the height of the cutter, but Leigh has an ingenious guide bush system, though it requires an American-style base configuration of the sort available from Trend. Once the bush is in position, you simply rout the joint and test the fit, and any adjustments are then made by rotating the bush, which has an oval profile that increases or decreases the ratio between the cutter and the bush; the 10 incremental positions mean that the joint can be adjusted by as little as .002in. This does mean that you have to keep the router in the same position as you work through the joint though, so if you have a tendency to rotate the router as you work, the joint will alter accordingly. It’s a good idea in some respects, then, but a little problematical in others.
If you use a normal guide bush to suit your own router, fine tuning is done by adjusting the fork assembly backwards of forwards fractionally.
Verdict
+ Loads of scope, simple to use once set up
- You need a compatible guide bush or base
RATING 4.5/5
Made in: Canada
Brimarc 0845 330 9100
The best thing for the end user is the cost. Leigh Jigs have always been pretty expensive, but the biggest model, the Super24 is £221.95, and that includes three cutters so you can, in theory, get cracking. The only real drawback is the guide bush system, as the one supplied with the jig needs a suitable base. For the UK market, a Trend style bush would be a better option, or even the option to pick a bush from a list of compatible ones at the time of purchase, although the adjustment is then back to fi ne tuning the router rather than the guide bush.
I recommend that if you do buy one of these jigs, (and they do work superbly well once you’ve got to grips with them) you also get the Vacuum Router Support (VRS) dust kit. This full length aluminium support bar sits in front of the fork assembly, and is held in place with a couple of built-in magnets. The bar supports the front of the router so that it can’t tilt as you exit from the forks. Below the bar is the dust chute. This slides along the bar, and has a couple of little steel rods that link to the edges of any router so that as it moves through the joint, the chute moves with it, meaning that it is always in the optimum position when cutting. The VRS kit works fantastically well: my test cuts left little if any debris on the jig, floor or bench; when I cut one without it, the waste promptly filled my shoes! It’s a pity the kit isn’t supplied as standard, but the cost would bump up accordingly.
- Log in or register to post comments


| Articles | Articles | Articles | More | Subscriptions | Resources |