Mitre keying jig
I will demonstrate here how to make veneer keys and how their use can add a new visual element to the humble mitre joint while dramatically increasing its strength. A special jig will need to be made to key the mitres effectively and I will use another jig to help clean up the finished joint. Once built these jigs can take a permanent place in the workshop to aid future projects.
Veneer keys are just that, thin keys made from veneer that are inserted into purpose cut grooves on the outer corner of a mitre. The veneer can be a contrasting colour to show off the detail. Or if you would rather disguise the keys, simply match the timber and veneer colour for a near invisible finish. For demonstrating the technique I have made up a maple frame and will be using mahogany veneer for the keys.
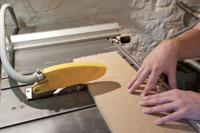
After cutting a set of accurate mitres with a good saw. Glue them up in the usual way. I prefer to use a good quality chop saw for small mitres and a table saw with a mitre sled for larger ones.
Click here to watch a video of the mitre key jig in action
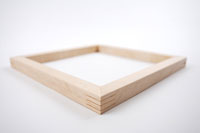
1. Three veneer keys equally spaced
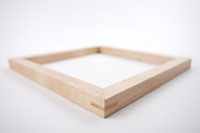
2. Three closely spaced veneer keys
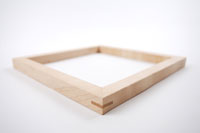
3. A solid mitre key
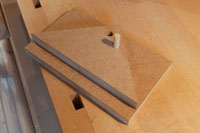
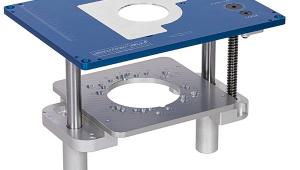
The jig can be made to any size, the important thing is the design which supports the 90 degree angle of a glued mitre joint. I have opted for a good general purpose size for use with small frames and boxes.
Please be aware while following these instructions that the sizes can be customized for your own needs. If for example you work with large frames, you might want to make a bigger jig to accommodate the larger scale of your work.
First cut the main components. My cutting list was as follows (all dimensions in MM):
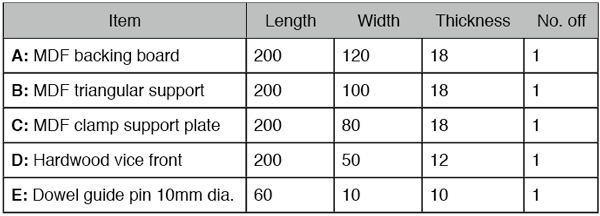

4. Using a chop saw to cut mitres for maple frame
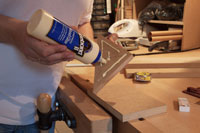
5. Mitred frame being glued up with special purpose framing clamp
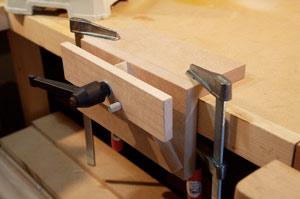
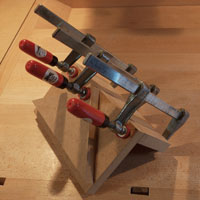
6. Finished jig clamped to the workbench and ready for use

7 & 8. Cutting the components on a table saw.
9. Using a mitre saw to create the triangular support in MDF
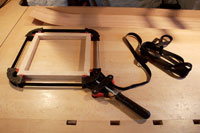
Mark a central 10mm hole in the hardwood vice front (D). Mark another 10mm hole that is offset from the central hole at approximately 45 degrees. This second hole will accommodate the dowel guide pin (E) and will keep the vice front aligned with the rest of the jig. Drill the holes using a drill press then line up the vice front with the jig assembly for marking.
Mark the drilled holes onto the main assembly and again drill the holes using a drill press. There is no need to take the guide pin hole all the way through, about 25mm deep should be ideal.
Insert the dowel guide pin (E) into the offset hole and glue in place. A tight fit is good to keep everything alined. If needed use a mallet to gently knock the dowel into place.
10. Applying glue to the triangular support
11. A simple rub joint is ideal
12. Dowel located in hole
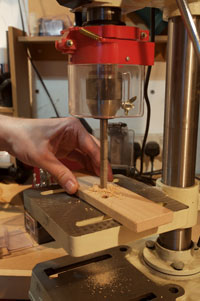

13 & 14. Drilling the holes in the vice front and in the main assembly
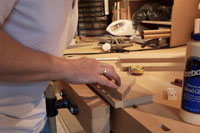
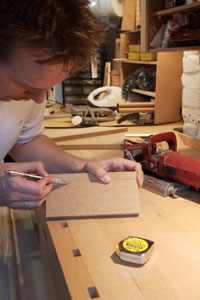
15. Marking out biscuit positions
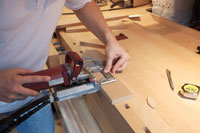
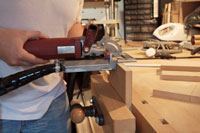
16 & 17. Biscuit jointing the two components
18. Clamped up assembly
The next thing to do is counter bore the back of the jig. The nut (when using the locking handle fixing) or the bolt head (when using the wing nut type approach) needs to be sunk so that is doesn’t protrude passed the back face of the jig.
Once counter bored I recommend gluing the nut/bolt head in place to stop it spinning during use. A hot melt glue gun is ideal for this.

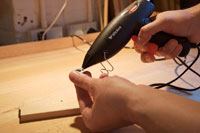
19. Counter boring the back of the jig to make clearance
20. Using a hot melt glue gun to secure the nut in place
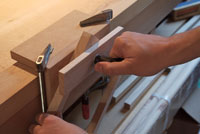
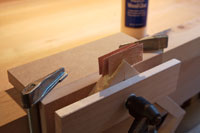
21. Securing a mitred frame in the jig
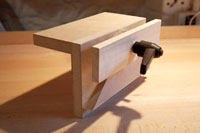
Clamp the jig to your work bench with a couple of clamps then use the vice jig to snugly secure a corner of your mitred frame.
Before working on the frame mitres, cut a slot in a piece of waste wood using a fine saw. A small dovetail saw is ideal. This will allow you to gauge the saw kerf thickness. Try slotting in various thicknesses of veneer to see which fits best. You can always use more than one layer of veneer to create keys for thicker saw kerfs.
Once you are confident with your saw kerf / veneer thickness combination it’s time to use the jig.
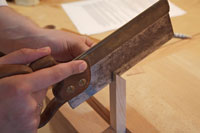


22. Cutting into a piece of waste wood to test the saw kerf thickness
23. Trying the veneer thickness for size in the saw cut
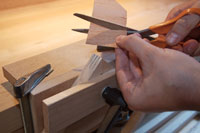
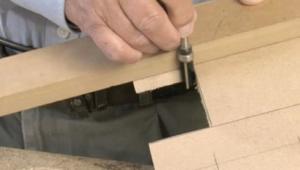
24. Cutting into a mitred joint using the jig
A single veneer key will add significant strength to a mitred joint, but using two or three keys will make your joint even stronger. If you are using contrasting woods it can look more appealing too.
Cut the veneer with a knife or pair of scissors. Another important point to remember is the grain of the veneer should run in the same direction as the saw did when you were cutting. This will create the strongest joint possible. Think of it like plywood, you are essentially making room for another layer of timber with your saw cut and just like plywood, each consecutive layer of grain should run in the opposite direction.
25. Cutting the veneer keys to shape with a pair of scissors
26. Veneer keys glued in place
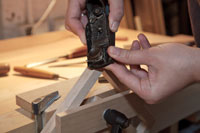
27. Using a block plane to trim the veneer keys
Leave the glue to dry, then trim the keys with a chisel and block plane. Be sure to follow the direction of the grain to avoid any ripping out. The jig provides a versatile system for both sawing and cleaning up.
Just like dovetails, veneer keys can be used for decorative effect. Try using different spacings between the keys. If you want to get really creative you could even use different coloured veneers for multicoloured joints!
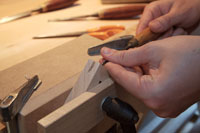
28. Using a small chisel to clean up a mitre key joint
Click here to watch a video of the mitre key jig in action
- Log in or register to post comments


| Articles | Articles | Articles | More | Subscriptions | Resources |