Post a letter
You can cut lettering with a router using templates (or freehand, with a bit of practice), but machine-cut lettering is seldom distinctive or particularly elegant. However, the starting point for any letter carving is an understanding of the techniques — and we can break lettering down into two very distinct stages. First, the lettering has to be designed and laid out; then the individual letters are cut into the timber. Very different skills come into play at each stage.
The design for an inscription can be done on a computer, or by freehand drawing or calligraphy. Usually it’s best to do the finished layout on paper, even if you draw it freehand, and then to trace it onto the planed timber. Designing your own attractive letter forms isn’t easy, so unless you have some experience, you should start by copying other letters.

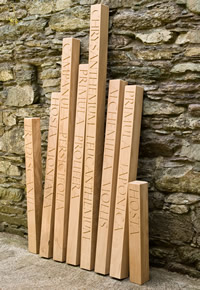
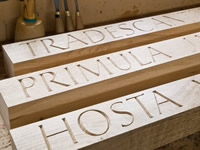
The clue to why she wanted the lettering lies in the garden's title – 'What's in a Name'. Each post bore the Latin name of a plant in the garden, from hosta at the short end of the scale, to chrysanthemun leucanthemum, which stood about 1.5m high. They made striking sculptural features in a pretty garden.
So-called Roman lettering is particularly good for incised carving. It reads well, and the proportions always look good. In fact, many modern letter forms draw on these proportions, perfected 2000 years ago. Roman lettering was originally designed to be cut in stone, but it works very well in wood. The ends of the letter stems are flared to delicate points, called serifs, which improve legibility but are a little fiddly to carve.
• scanning an alphabet of suitable lettering;
• opening the scan in Photoshop Elements and sizing the letters to fit the timber;
• creating an outline of the letters;
• moving them individually into a new document, in the correct sequence;
• making fine adjustments to the spacing;
• finally, printing out the full words and transferring them to the timber.
Instead of chopping the middle of the letter and doing two further cuts in from the edges to form the V, I use a V-tool up the middle of the letters, photo 3.
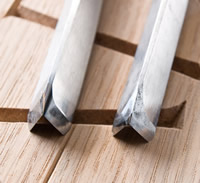
A razor sharp tool is essential, and I keep the edges in perfect condition by honing them on a strop – a strip of leather dressed with a mild abrasive paste, photo 4. I also regrind the tip of my V-tools so they make a crisper cut (see Improving the V-tool).
I work from one direction, and then the other, to get right to the ends of the letter stems. You needn’t cut to the full depth in one hit, but by using the standard 60° V-tool, the sides of the letters will have the optimum incline. Try to avoid twisting the V-tool sideways, particularly when following curves.
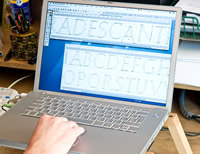
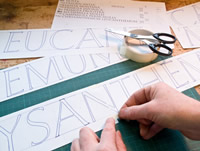

Photo 1: Computers enable us all to lay out competent lettering. I used Photoshop, but a word-processor is simpler.
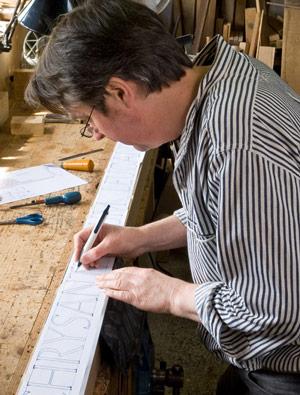
Photo 2: You might need to print your letters on several sheets of paper and tape them together. It's best to transfer lettering from drawings, or a print out, rather than drawing directly on the timber.
Photo 3: If you can get a V-tool razor sharp, it should cut across the grain of most timbers with little tearing.
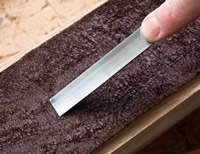

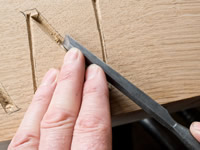
Photo 4: Keep your gouges razor sharp with a leather strop.
Photo 5: The V-tool can be raised at the end of the cut to start forming the serif.
Photo 6: The sloping sides can be straightened with a regular bevel-edge chisel.
• Larger letters are easier to carve than smaller ones. Small letters with tight radiuses are a real challenge, and require a wider range of gouges, so start with letters at least 50mm tall.
• Capitals are easier to carve than lower-case letters, since there are fewer tight curves and more straight cuts. Explore lower case once you’ve mastered capitals.
• Spacing is the key to good lettering. An even layout with slightly dodgy letters looks better than perfectly formed letters that are unevenly spaced. The white spaces between letters should be similar, not the spacing between the edges of letters.
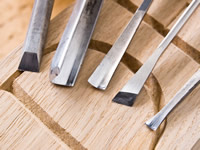
• You’ll need several carving tools for cutting lettering. I used (below, left to right) a 10mm paring chisel, a 9mm V-tool, a 10mm no. 5 gouge, a 10mm fishtail skew and a 6mm No. 3 fishtail
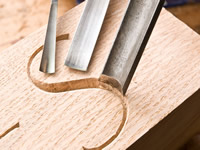
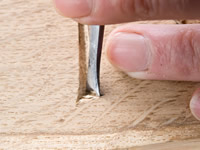
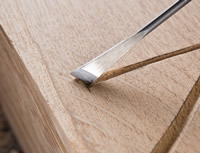
Photo 7: A variety of gouges are required to clean the curved letters. Scribing pattern gouges can be particularly useful.
Photo 8: I've ground a 6mm no 3 gouge to an exaggerated fishtail, great for forming serifs.
Photo 9: A skew chisel is useful for cleaning letters and forming serifs.

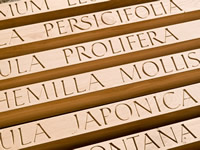
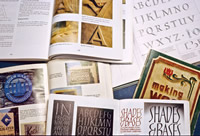
Photo 10: The skew chisel is also very good for cutting the end of the serif.
Photo 11: After planing, the surface the letters become lovely and crisp.
Photo 12: Books are a great source of inspiration.
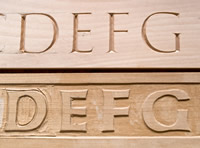
Relief letters are easier to cut well than incised letters. To form them, the background is cut away, leaving the letters standing proud. While the two techniques can be used for a variety of different letter forms, they each suit distinct styles of lettering and it's preferable to bear this in mind when choosing one or the other. Relief letters are better cut chunky and unfussy, so there is less chance of unintentionally knocking off fragile bits. Incised letters, on the other hand, can be more slender, and made more elegant with wispy serifs.
• Alphabets and Designs for Wood Signs by Patrick and Sherri Spielman (Sterling)
• Encyclopaedia of Calligraphic Techniques by Diana Hardy Wilson (Headline)
• Lettercarving in Wood: A Practical Course by Chris Pye (Guild of Master Craftsman Publications)
• Lettering in Stone by Richard Grasby (Anthony Nelson Ltd – an excellent source book for Roman lettering)
• Letters Slate Cut by David Kindersley & Lida Lopes Cardozo (Cardozo Kindersley Editions)
• Making Wood Signs by Patrick Spielman (Sterling)
• Practical Guide to Lettering and Applied Calligraphy by Rosemary Sassoon (Thames and Hudson)
• Relief Woodcarving and Lettering by Ian Norbury (Stobart Davies)
• Writing and Illuminated Lettering by Edward Johnson (John Hogg, 1906)
Many of these books can be bought new, but some are out of print. This is no problem these days: there is a phenomenal exchange of second-hand and out of print books on the internet.
Go to www.abebooks.com or www.amazon.com, and search for the title you want. You’ll find all the books listed here at a reasonable price, new or second-hand, and ready to be posted to you.• Ashley Iles (carving tools) 01790 763372 www.ashleyiles.co.uk
• Axminster (DMT diamond shim) 0800 371822 www.axminster.co.uk
• BriMarc (Tormek grinding system) 0845 659 0000 www.brimarc.com
• Stobart Davies Ltd (books on lettering) 01992 501518 www.stobartdavies.com
- Log in or register to post comments


| Articles | Articles | Articles | More | Subscriptions | Resources |