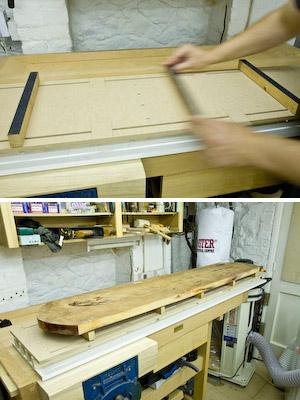
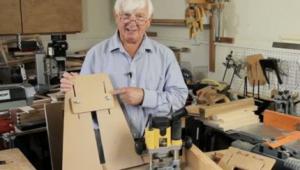
Surface planing with a thicknesser
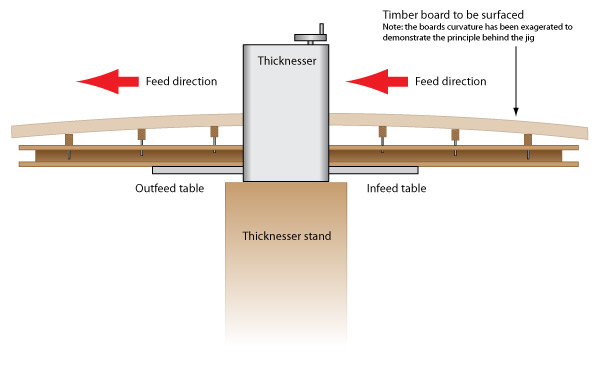
The principle behind the jig is simple. It allows you to hold a rough sawn board in position while it’s carried through the thicknesser. Holding the board in position is the key to the jigs success. By using the adjustable screw stops to alter the height of the cross supports along the range of the jig, a rough sawn board can be ‘jacked’ into position at various points along its length. By supporting a board like this, the thicknesser can then do what it’s good at ~ plane boards perpendicular to their opposite side.
I’m using a Makita thicknesser, but the jig should work just as well with other manufacturers machines. The design is a useful one and should add productive value to any small workshop where the overhand planing width available is less than the accessible thicknessing width.
It’s fairly straight forward to make. I’ve used melamine faced chipboard for the bottom face. The melamine face reduces friction and can be coated with a silicon spray or furniture spray polish to further reduce friction.
When deciding on the jigs length it’s worth having a good look at your workshops overall size. I found it best to go for a medium length jig that’s fairly easy to handle while being long enough to cope with 80% of the boards I need to surface plane. You can always make a longer version of the same jig for those rare extra long, extra wide planing jobs.
To determine the width of the jig, take the maximum width accepted by your thicknessing machine and allow 3MM clearance on either side. My thicknesser has a max planing width of 305MM so my jig measures 299MM in width.
Cut the melamine board for the bottom face to its finished size. Then cut a second board to the same size for the top face. Unlike the bottom surface where a smooth non porous surface is important, the top surface should ideally be a board material with good overall strength, such as plywood or MDF.
The next move is to make a series of battens which will separate the two boards. By securing both boards to the battens, overall strength and rigidity is increased. Vital clearance is also created for adjustment of the adjustable screw stops which will form the basis of the board support system. I’ve opted for battens measuring 45 x 19 mm. These are just thick enough to comfortably hold a screw and wide enough to provide ample adjustment clearance. Mark out the screw hole positions on one board. Secure the battens to the boards using screws of between 1 and 1.5 inches in length at approximately 200MM intervals along the battens length. Ensure the edge battens are set in by about 50MM to allow enough room for the support rail adjustment screws which we’ll add later. I used five battens in total for good overall strength. Once one board is marked out, simply place it over the other board, line up the edges so their flush and drill directly through the two boards at the same time ~ this saves both marking out and drilling time!

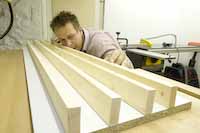
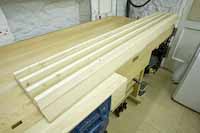
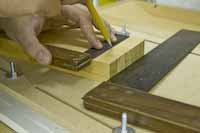
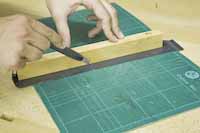
Cutting and lining up battens
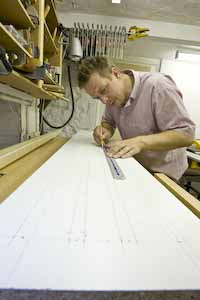


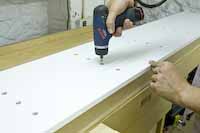
Marking out, drilling and countersinking holes and finally screwing the board to the battens.
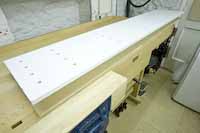
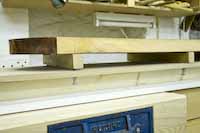
Battens fixed to MDF board and attaching the melamine face board.
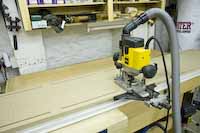

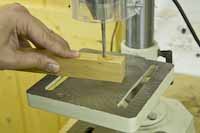
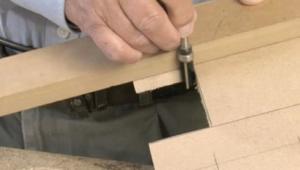
Routing the grooves, inserting the threaded fixing and marking out.

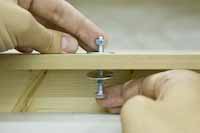
When the slots are all cut it’s time for the adjustment threads to go into position. Add a nut, a sprung washer and then an oversized flat washer (in that order) to a 40MM M6 bolt, then wind the nut down to approximately 10MM above the bolt head. Insert the bolt through one of the slots from underneath the top surface of the jig and attach another oversized flat washer and M6 nut when it comes through the other side. Now lightly glue the second (top) nut to the top face of the oversized washer using a hot melt glue gun. This makes adjusting the screw threads easier when in use. Repeat this process for each slot.
Plane up a length of 22 x 30MM section hardwood for the support rails. Hard stable timber like beech is ideal for this. Cut five lengths to match the width of your jig. Next, drill a pair of 6MM holes to a depth of 20MM on one of the 22MM faces of each length of 22 x 30MM section. The holes should have centres to match the threaded bolts you’ve already added to the jig slots. Now counter bore each hole with a larger drill bit ~ the counter bore should be just big enough to house one of the nuts that are glued to the oversized washers on the top face of the jig.
On the opposite 22MM side to the counter-bored holes, adhere a length of grip tape or fairly rough sandpaper to the entire length of each rail with double sided tape. Use a stanley knife to trim the material flush from the back. This will form a grippy surface to hold sawn boards in place.
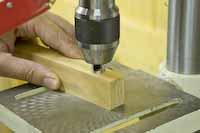
Marking out and drilling / counter-boring the holes.
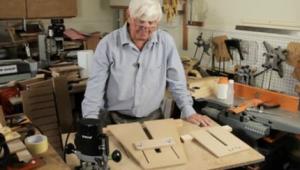
Trimming the grip tape and view of the jig ready for use.
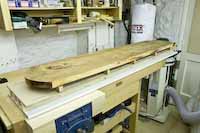
When taking the jig through the thicknesser make sure you use plenty of adjustable roller stands. Due to the nature of the jig and combined timber it can be very heavy. Ensure there are ample surfaces around you to rest the jig on when transferring from the out-feed to in-feed positions. I would recommend using at least two roller stands at both ends of the thicknesser.
I have found this jig to be a useful addition to my workshops armory. It’s one of those jigs that really does make a next to impossible job possible in a relatively short period of time. The short time needed to make the jig should pay off after just one or two wide board planing jobs.
- Log in or register to post comments


| Articles | Articles | Articles | More | Subscriptions | Resources |