Top Drawer!
The start of it all
When I took to woodworking seriously after my retirement, I was determined to use wood in ways that emphasised its grain and figuring. I asked the family if there were any projects they would like me to attempt. My wife asked me to make a couple of somewhat idiosyncratic occasional tables. Then my daughter asked for a set of bedside cabinets
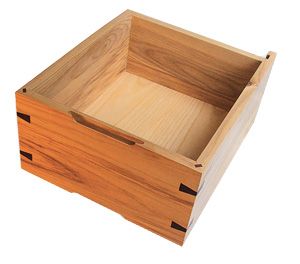
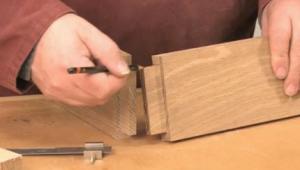
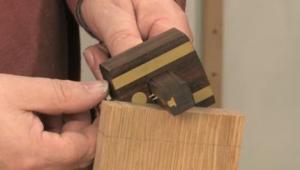
containing a couple of drawers in a light-coloured wood. I decided that a combination of ash and the use of ‘waterfall’ joints, which carry the grain around corners – see below left – would meet both her requirements and mine.
Splines at the corners
In its simplest form the waterfall joint is inherently weak, but splines can be used to strengthen it. Of course, as I was trying to make the wood show off, I decided that the splines would have to be in a contrasting wood (I chose purpleheart). But simple splines across the joint would disappear when the drawer was closed. The idea was born of putting a dovetail cutter across the corner to form what I called a butterfl y spline.
Handle details
Having decided the form of the cabinet drawer boxes, I needed to work out how to deal with the handles. I didn’t want to just screw a handle onto the drawer; I thought this would spoil its clean lines. Looking through the Wealden router cutter catalogue, I came across their fi nger pull cutter – an instant off-the-shelf solution.
In all this design work I’d thought I was breaking new ground, but finding this cutter showed I wasn’t. Then, during the making of the cabinets, I came across an article by Peter Dunsmore that showed even my idea of the butterfly spline wasn’t new! But it was new for me.
 Ideas into practice
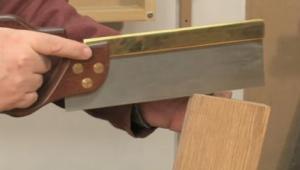
Once I knew what I wanted to achieve with the bedside cabinet drawers, all I had to do was work out a method of doing it! Cutting the mitre slope across the drawer front and sides was relatively straightforward, although it did call for accurate setting of the table saw.
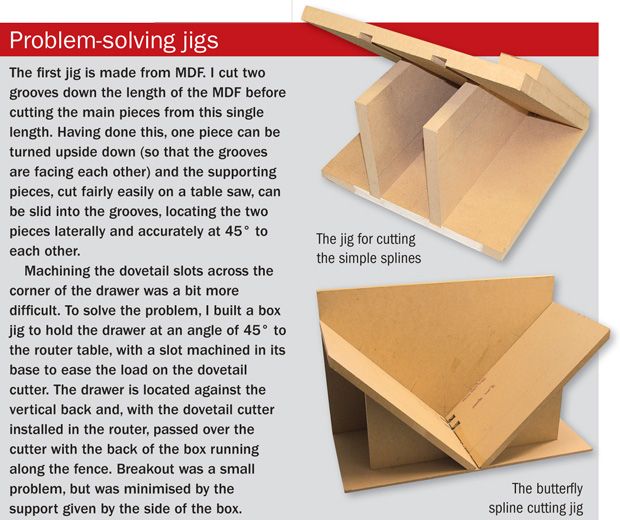
Cutting the groove across the mitred end was a little more diffi cult, and needed a jig to hold the cut edge vertical so that the piece could be passed over a slotting cutter in a router table. Machining the dovetail slots across the corners was the biggest
challenge of all, and again needed a custom-built jig. See the panel overleaf for more details.
Back to the handles
Creating the handle cut-outs in the drawer front was really only a matter of setting up marks on the router table fence to show the size of the cutter, making start and stop marks on the drawer front and then taking small cuts into the wood. Breakout at the end of the cut was a problem, although some judicious sanding minimised its effect. But there was a major design flaw lurking.
Without really thinking, I had made the handle cutouts in each drawer front and then slotted it across the back to house the drawer base. What I hadn’t realised was that the slot would cut into the handle hole.
The cure I devised was to cut a piece of wood to fill the slot and to re-machine it a little shallower – 4mm instead of 6mm. I reckoned that as not much weight would be put into a bedside cabinet drawer, the reduced support to the base wouldn’t be a problem. So far it hasn’t been!
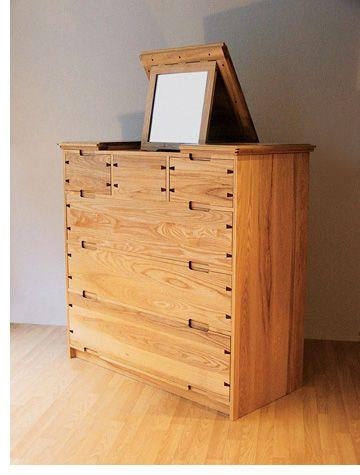
 The chest is conceived
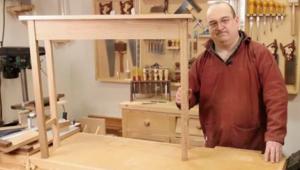
Having completed the cabinets, my daughter immediately requested a matching chest of drawers with a mirror that could be used as a dressing table. So the idea of the dressing chest was born. I thought I’d got solutions to all the potential problems from making the bedside cabinets. But it wasn’t really so. Is it ever?
Tackling the sides
The fi rst job in making the chest was to machine the side panels. I had decided to carry on the dovetail theme and fit the dust frames in sliding dovetails, so my first job was to see if it were feasible. I machined a dovetail slot across a board and the matching dovetail onto a dummy dust frame, and tried to put them together. Of course, they wouldn’t go.
Calling to mind my primary maxim (‘If at first you don’t succeed, use a bigger hammer’), I did get them together, but it was obvious there was no way I could use true sliding dovetails on all the frames.
A cunning plan
I devised a way of giving the appearance of the sliding dovetail that I thought would work. I machined a true dovetail for the front 50mm of the slot, and continued it as an 18mm wide square-sectioned slot in the rear portion of the side. This required a male dovetail section on the front of the dust frame, and if this male section is too long, it doesn’t matter too much as it will fit into the square slot.
Compound slots
As a technique it worked, but it needed a jig. To make the compound slot needs three router cutters (12mm cylindrical, dovetail and 18mm cylindrical – and I used them in three routers) and they all have to run along exactly the same centre line. I achieved this by fi tting each router with a 30mm guide bush and running each router/cutter in sequence in a slot cut in a piece of thin ply aligned along the line of the slot.
My first effort at producing the sides was a failure. I used a simple jig aligned to a line drawn on to the sides, and the cumulative errors resulted in the top slots (I started at the bottom and worked up) being about 3mm out of true, and worse, sloping in opposite directions. So those pieces were put aside for use in a future project (or, as we sometimes say, scrapped). I needed a better jig (see panel, top right).
Using the jig
The first slot in each side piece is cut as accurately as possible by whatever means you wish. The jig is then set up by positioning the narrow pieces of wood parallel to and at the correct distance from the guide slot. By setting the guide strip into the first slot on one side, the second frame slot can be cut into that side. By reversing the jig onto the second side and setting the guide strip into the fi rst slot, the second frame slot on that side can be cut. By reversing the jig, the slot on the second side is a mirror image of that on the first – they must be parallel.
There’s no guarantee that each slot will be perpendicular to the front edge of the side, but they will be parallel! In fact, I was able to achieve 1mm of perpendicularity over the height of the sides.
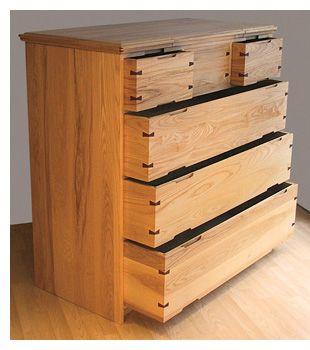
Multiple drawers
The drawers in the chest were made in substantially the same way as the cabinet drawers. However, as everything was quite a bit bigger, lifting and manipulating them was somewhat more awkward – and there were other complications.
Each drawer has two handle cut-outs on the top and bottom edges and they all have to line up, so the setting out and working to the marks is critical. And then there is that problem of the drawer bottom slot breaking into the handle hole. With such large drawers, the idea of a shallow slot struck me as inadvisable, so I applied a fillet across the back of each drawer front and cut the slot into that.
A final challenge
The big problem was cutting right through the dust frames between the drawers using the finger-pull cutter; breakout was a major problem. Luckily, the dust frames are made mainly of ply with a lipping (albeit fairly substantial) of real wood on the front edge. I machined the lippings first and stuck the successful ones (there were quite a few unsuccessful ones!) to the ply.
The top deconstructed
Although I regard the long mitres on the drawer corners (the largest drawer is 300mm deep) as the most challenging part of this project, most people see the top of the chest with its fold-down mirror as its main feature.
The top is made up of three layers. The bottom of these is also the top frame of the chest which, as well as being the means by which the top proper is attached, carries the grooves that allow the angle of the mirror to be adjusted.
The top layer is made from a single board wrapped in a frame, mitred at the corners and cut into three pieces, and forms what I think is the most sensuous part of the chest. Under this solid layer there is a skeleton middle layer that, on the outer parts, just thickens up the top but in the centre creates an inverted box into which the mirror fits.
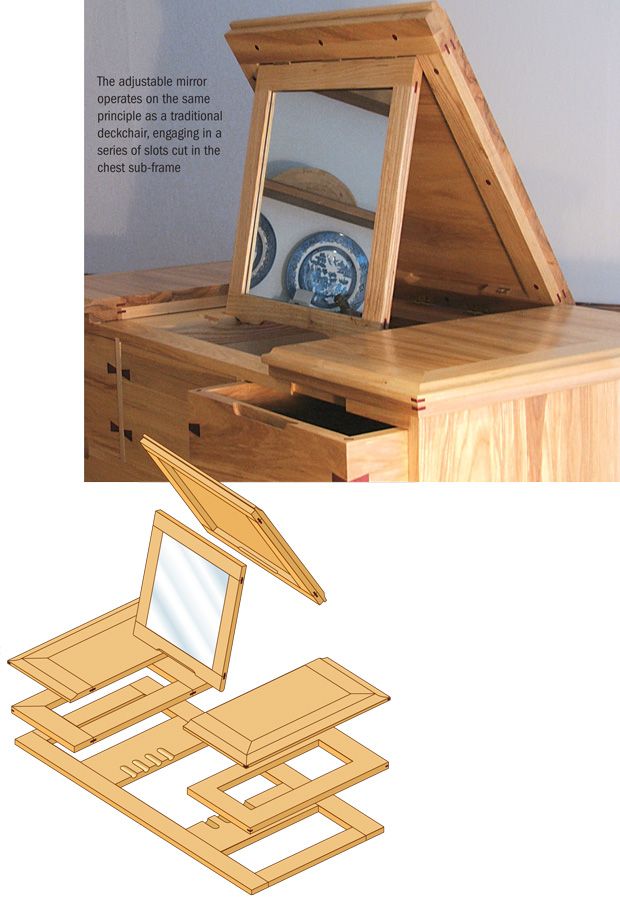
Framing the mirror
The mirror frame is made up of four elements with butt-jointed corners (actually dowelled, but fitted with decorative splines to continue the spline motif) as I felt that even splined mitred corners would not be strong enough to carry the mirror. The frame has a simple rebate on the back inside edge into which sits a piece of veneered MDF to which the mirror itself is glued.
Gluing the mirror to the backing piece may seem unusual, but I discussed this with the glass supplier who foresaw no problems. The glass is slightly smaller than the hole it fills; before it was stuck to the backing board I ran around its periphery with a wide tipped black marker pen. This very effectively hides the small gap between the wood and mirror. When the top is to be lowered, the mirror is hinged backwards into the box created by the top and sub-frame, and is held in position with ball catches. To ease opening the mirror, there is a finger grip machined into the lower edge of the mirror frame and the corresponding position on the sub-frame.
Final details
The original bedside cabinets have dished tops to stop things rolling off them. Making the chest with a similar dished top wasn’t practical, but a similar profi le was used to finish off the outer perimeter of the top (with an additional small radius rounding over to further soften the edges). There are many purpleheart splines, real and apparent, in the top and all the screw heads are covered with purpleheart plugs. The real splines across the mitres help align the various parts and strengthen the joints, while the apparent splines continue the theme. With that lot in place, there’s no point in trying to hide the screw holes.
- Log in or register to post comments


| Articles | Articles | Articles | More | Subscriptions | Resources |