A touch of cherry
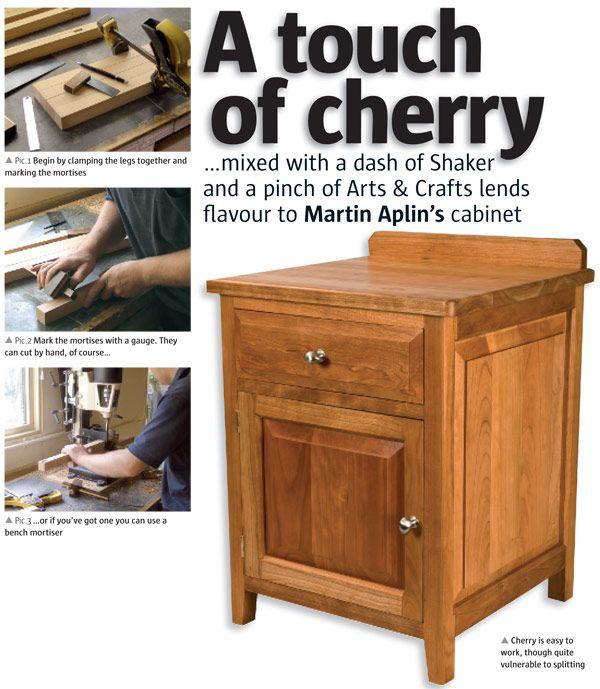
The cabinets are quite light in appearance, but their construction means that they are in fact very strong. Theyre influenced by the Arts and Crafts style, with the heavy chamfering to the frames creating some interesting shadow effects and making the appearance lighter still; theres also a slight Shaker influence, especially with the angled base to the front legs. A contemporary feel is created by the plain bevel fielding of the side and door panels, and the drawer fronts. As a final touch, because they sit either side of the bed, the cabinets are handed simply by hanging the doors on the outside leg of each cabinet.
I used mortise and tenon joints to construct the carcase, as I find them to be the most practical joint for smaller sections of timber, particularly for the stub tenons used on the mid-rails front and back. For the front-rails above the drawer I opted for dovetail joints as I think theyre stronger.
Cutting the joints
For the legs youll probably want to select the best grain for the front pair of each cabinet and mark them as such; the legs are handed front and rear, so mark these as well. Measure out the position of the mortises and cut them. Although I used a bench mortiser, hand-cutting is not overwhelming on a small project like this; otherwise you can use a router. In my original plan I had left nothing on which to mount the back-end of the drawer runners, so I added an additional rail; youll need to cut an extra mortise in each leg for this. You can also angle the inside faces of the front legs between the lower front rail on the foot to give a Shaker
appearance, as I have done.
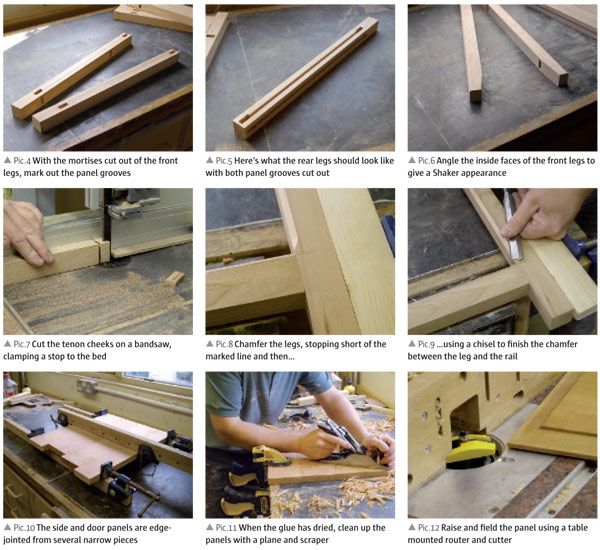
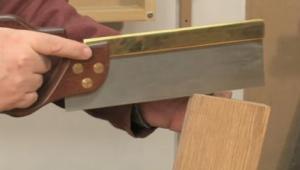
The side-rails are straightforward to make, being rectangular in section with a tenon on each end. The tenons are offset so that, on assembly, the outside faces of the rails are flush with the outside faces of the legs. I cut the tenons with a bandsaw, though you could do it by hand, clamping a stop to the bed to prevent the cut going too deep. Once theyre cut, its a good idea to dry assemble the frames, easing the joints where necessary, and to number each joint so on final assembly all the parts are in the same position.
Next mark out and cut the grooves for the panels, bearing in mind that on the legs these grooves break out into the mortises. The easiest way to cut them is with a router (but see More power to hand tools). The grooves are quite deep, so make several passes, progressively deepening the cut and ensuring that they line up with the grooves in the legs.
Chamfer the panels...
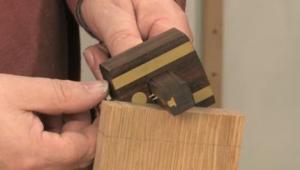
To prepare for chamfering, re-assemble the frame components and cramp them up, then mark a pencil line on the outside face of each frame member 5mm in from each edge. Separate the parts and using either a chamfer cutter or a plane, cut a 5mm chamfer along the marked edge of the stiles; you can do this with a router, though youll need to stop short of the marked line and finish it with a chisel, carefully paring away until the chamfers on the legs and the rails meet.
I made the side-panels up from several edge-jointed pieces of timber; I dont think theres much need to strengthen these small panels with biscuits or loose tongues as they are not subject to any great loads or forces and can be free to move in the frames. Alternate the growth rings in the boards to reduce the risk of the boards cupping; then glue and cramp together, checking the boards for twist and flatness.
...then field and finish
When the glue is dry, you can clean up the boards using a plane and scraper and cut to size, allowing a clearance of 3 to 4mm all round for when theyre fitted in the grooves. The panels are fielded using a suitable bearing guided router cutter which, due to their size, must be mounted in a router table. Even so, youll find that with smaller routers the base aperture will not be large enough for the cutter to pass through and that, as a result, the cutter will be too high above the table. You can overcome this by placing a spacer made of MDF (or something similar) between the table mounting plate and the router base to lower the router, providing a recess for the cutter to sit in. You should cut against the grain for the first cut to avoid breakout, and machine the panels until they just enter the grooves in the legs and side rails; you should keep the panels slightly under-flush with the frames.
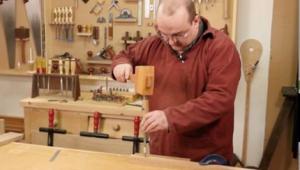
Once youve cleaned up the panels, you can apply the finish: three coats of Danish oil followed by a good quality wax polish should do it. Apply glue to the joints, assemble and clamp, checking for square and twist.
Front and rear rails
Now prepare the timber for the front and rear rails and cut the joints, remembering that the upper front rails are constructed with dovetail joints rather than mortise and tenon. The rear rails require grooves for the panels, with the
mid rail requiring a groove in the top and bottom faces; you dont need to chamfer the rear rails, as theyre not seen. The inside faces of the mid rails require mortises to accommodate the drawer runners; these are straight sections of timber with a short tenon cut on each end. Size the rail so the tenon shoulders are about 3mm shorter than the distance between the front and rear rails to allow for timber movement. Make the rear joint a good sliding fit, as were not gluing the joint. The rear panels are made from 6mm cherry veneered ply or MDF. Dry assemble the cabinets, checking for fit of the rails and panels, then apply glue to all the joints except the rear end of the drawer runners and assemble; cramp together, ensuring all is square.
Top, bottom, and doors
To attach the top panels to the cabinets, glue two rails and screw to the inside faces of the top rails, level with the top face. These also act as upper drawer runners, to prevent the drawers tipping as they are opened. Cut small mortises into the inner faces so you can apply some small wooden buttons later.
The cupboard bases are made from 12mm veneered MDF and are supported on 12mm square strips glued and screwed around the
inside faces of the lower rails. Position the strips so the base panel sits flush with the top face of the front rail; secure by driving the screws from underneath.
For the doors I used a tongue and groove joint between the rail and stile. The grooves run the length of the stiles and rails to accommodate the door panel, the tongues formed on the rail ends. The door panels are prepared in the same way as the side panels.
Hang the doors, remembering to put them on the outer leg of each cabinet if youre making handed ones. Carefully trim the doors to size, ensuring there is an even gap all the way round, and remove them for finishing.
Finally, the drawers
The drawers have lapped dovetails to the front and through dovetails to the rear. Raise and field the front panel, then mark the dovetails on the side panels. Bear in mind that there will be a groove near to the bottom edge of the sides for the bottom panel so make sure the groove is within the lower dovetail; on assembly the groove in the front panel will show. Cut the pins, transfer to the front and back panels and cut the tails. Once the drawers are assembled and glued, veneered
MDF drawer bases are slid into the grooves, held by a couple of screws driven into the lower edge of the rear panels.
Glue and pin a thin strip to the drawer runners to guide the drawers and prevent them crabbing, and glue and pin a small block to the front rail to prevent the drawer from going too far in.
The tops, being quite wide, are again made up from several edge-jointed pieces. As the tops are not so well supported as the side panels, strengthen the joints with biscuits or loose tongues. When the glue has dried, you can clean up and plane flat. As an extra touch you could round the corners, as well as the upper edges of the sides and front of the top, which will reduce the risk of injury if you bang your head! An upstand is fixed flush with the rear face of the tops, secured with glue and screws inserted from underneath.
Now you can apply the finish to all bare timber, fix the tops, and re-hang the doors. Attach the top to the carcase with wooden buttons, which fit into the mortises cut into the upper drawer runners via tongues; if the tops were rigidly fixed they could split as the timber dries. With the doors hung, fit some latches and handles. I chose satin chrome handles for the finishing touch.
- Log in or register to post comments


| Articles | Articles | Articles | More | Subscriptions | Resources |