Turned up for Christmas – part 1
Over the past few years, I’ve written several Christmas-themed articles for the magazine. This time, however, I thought I’d show how to make various designs of Christmas tree decoration, all of which are easy to turn, can be modified to suit individual requirements, and look really effective when finished. I hope you like them, and have a go at making your own versions.
A few safety basics:
- Always protect your eyes and lungs, using use some form of dust extraction. I have a Charnwood extractor, which can be purchased for as little as £200. Also wear a full-face mask, especially while sanding as the extractor won’t capture everything. I’d also advise investing in a good pair of safety specs or full-face visor.
- Wear a dedicated woodturning smock or something with tight-fitting cuffs, which will reduce the chances of you getting caught by the lathe as it spins. Wearing a garment with a close-fitting neck also prevents bits of debris finding their way in.
- If possible, try not to cut wood at the end of the toolrest. This is the weakest part of the rest, offers the least support, and is the area where you’re likely to encounter the most tool vibration. It’s also likely to come off the toolrest, which isn’t too bad at the tailstock end, but can be rough at the headstock. I like to use a black marker to highlight the ends, so I know when I’m nearing the mark.
- Ensure your tools are sharp. I use a black marker to mark the bevel, and with this in place, bring the tool into contact with the stone and move this by hand. If the angle is correct, the mark will be removed; if it still remains, you need to adjust the tool angle before switching on the grinder.
- Dust reduction – I picked up this tip from Mick Hanbury: try to wet sand as much as possible – this simply means using some soft wax with your abrasives, or create a mix of liquid paraffin and beeswax, so the consistency is similar to that of petroleum jelly, and apply to the piece, wiping of any excess. When you begin sanding, the dust will clump and fall down to the lathe bed. There’s also a secondary benefit in that sanding in this manner fills the wood pores and helps to seal the piece before applying a finish – just buff the wood until no marks are left on the tissue, then finish.
- Before applying a final finish, I also use Yorkshire Grit to gain a really smooth surface. Just remember to remove all residue prior to adding colours or top coats.
- Another really good tip is to have some kind of light source placed behind the workpiece while it’s spinning on the lathe. Yes, I know you can see a ghost image of the wood’s shape as it turns, but the addition of light gives greater definition.
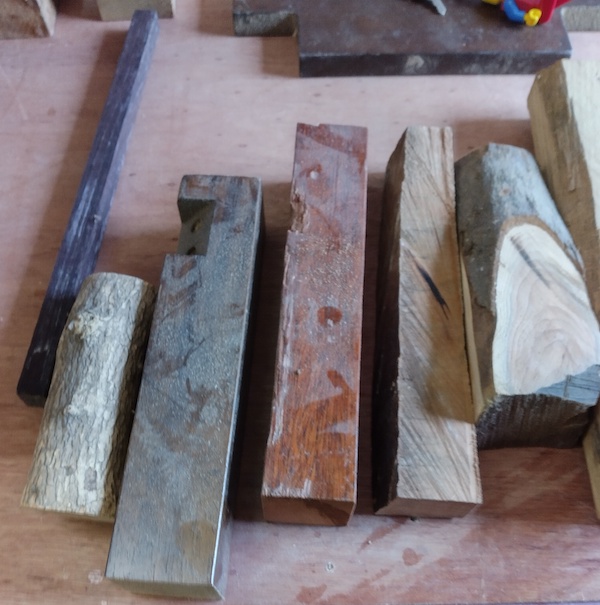
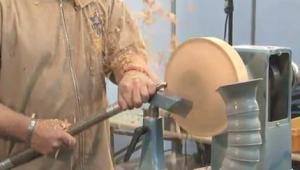
1 Before you start turning, pick your wood. This photo shows a selection of pieces I had lying around the workshop – boxwood, mahogany, oak, etc. The decorations in this article are made from oak as well as one that uses a fence post scrap. Start by mounting the wood between centres and roughing it down to a cylinder, so that it’s just a little larger than required for your chuck jaws
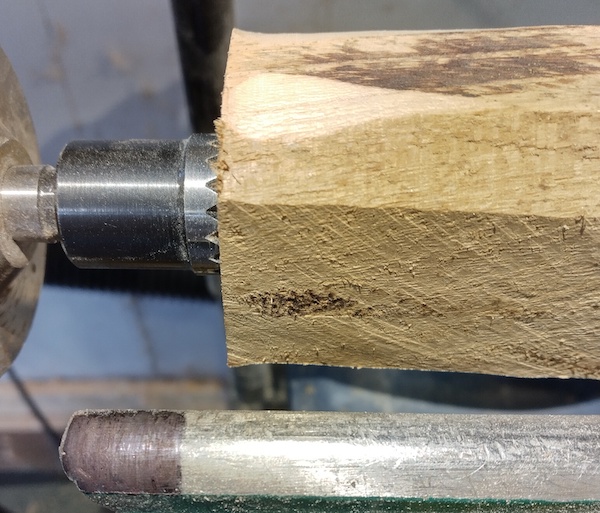
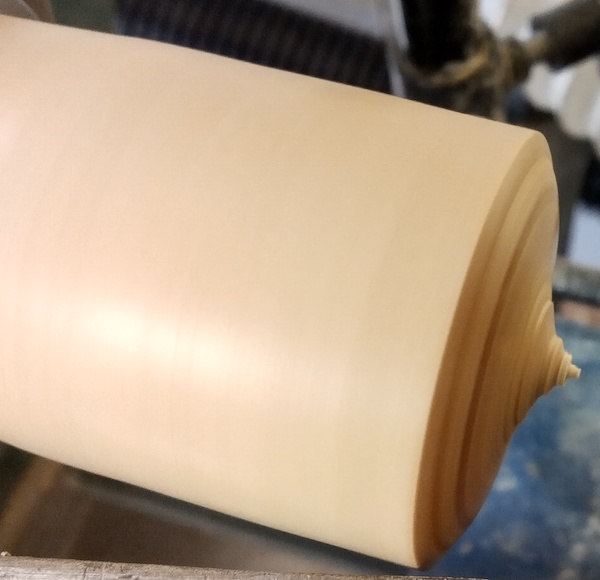
2 Here you can see that I’ve mounted my blank into the chuck jaws. The setup shown won’t hold the blank very well. At this point, due to its size, the wood will only be held by the very corners of each jaw, instead of the whole thing; this means there’s a risk of the project flying off when the lathe is switched on
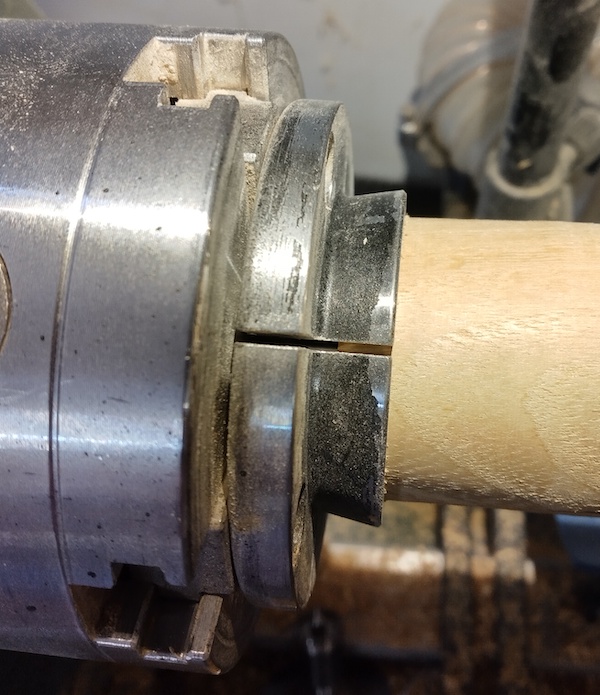
3 This photo illustrates how the wood should be held in the jaws. With the jaws closed up, there’s only a small gap between them, which means the gripping surface is as close to round as possible. Jaws are made as single parts, then cut into quarters, so the gap represents the material removed from the jaw after it’s been cut
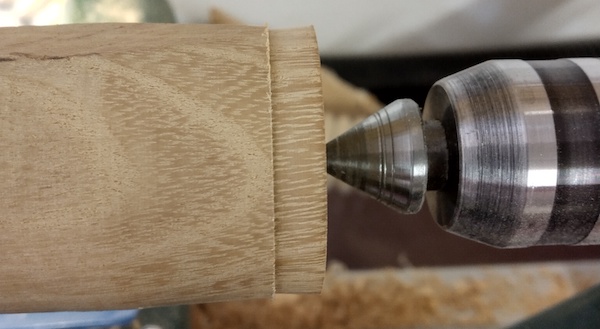
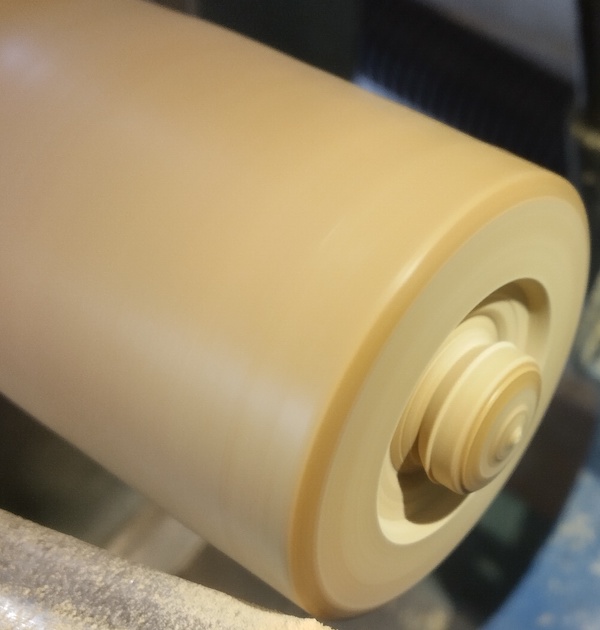
4 These jaws are also tapered, so a tenon is therefore required at one end. I cut this to match my jaws and used a small skew chisel to form a dovetail on it. I then flipped the wood over and secured the tenon in the jaws. You need to ensure that the wood is fully centred – use the indent created by turning between centres. If it spins offcentre a little, either the wood has moved slightly, in which case just remove a little more, then reshape the cylinder. It’s also possible that you need to perform a kiss test, which involves bringing the tailstock up to the headstock – with both centres fitted – to see if they line up, then adjust until they do. Luckily, however, these projects don’t demand that level of accuracy
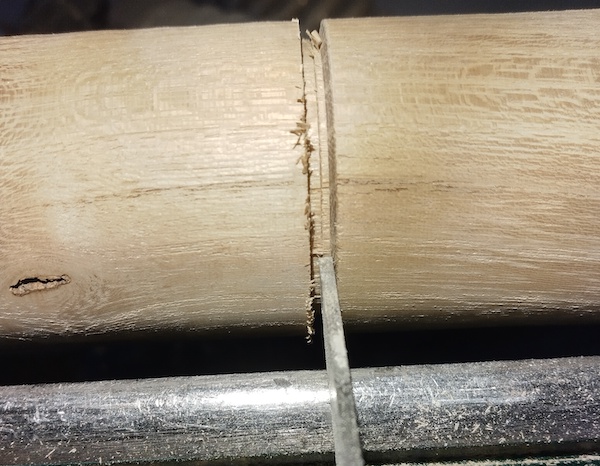
5My blank was a bit too long, so I parted it off in the middle ensuring to make another tenon on the part to be removed. I could then remount it for the next decoration
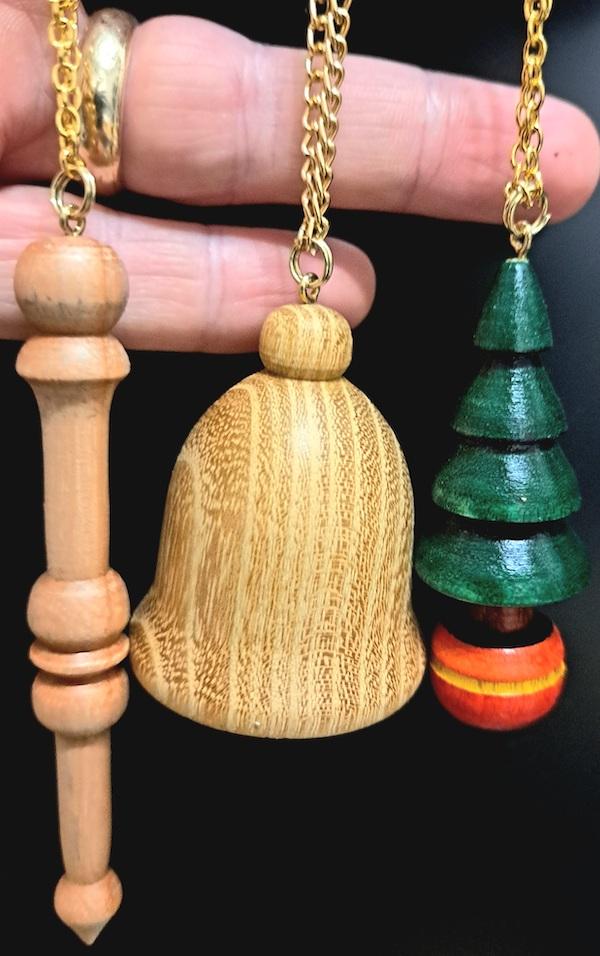
Christmas tree: version 1
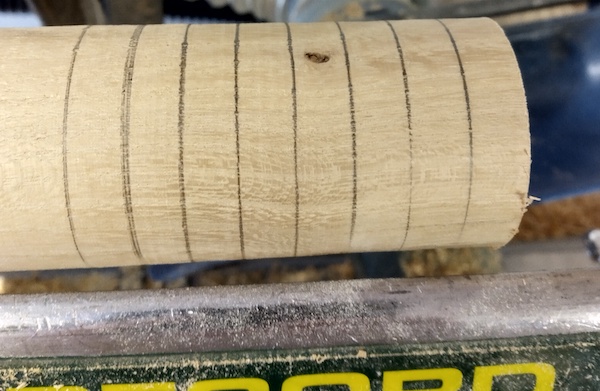
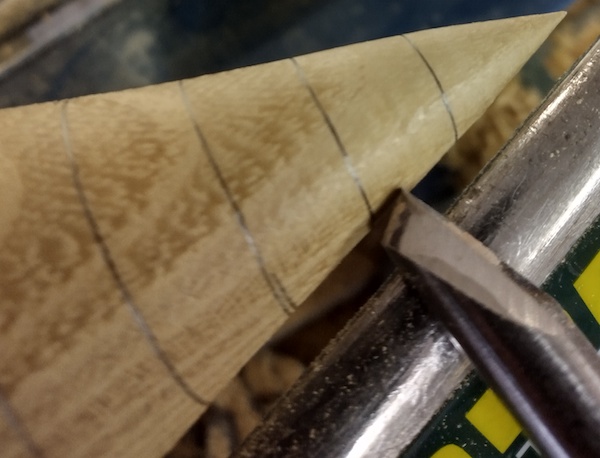
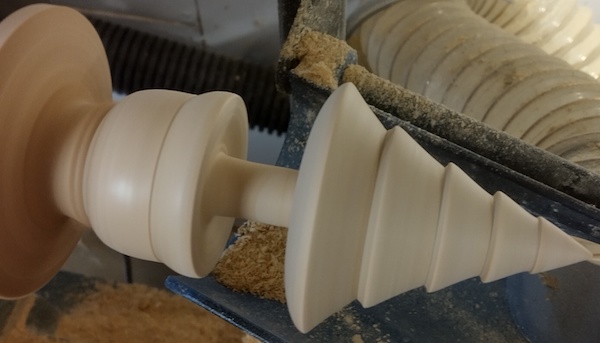
6 The first one we’ll tackle is a Christmas tree, which is designed to be hung on the real thing. Begin by marking a series of lines, at roughlyequal distances along the blank’s length
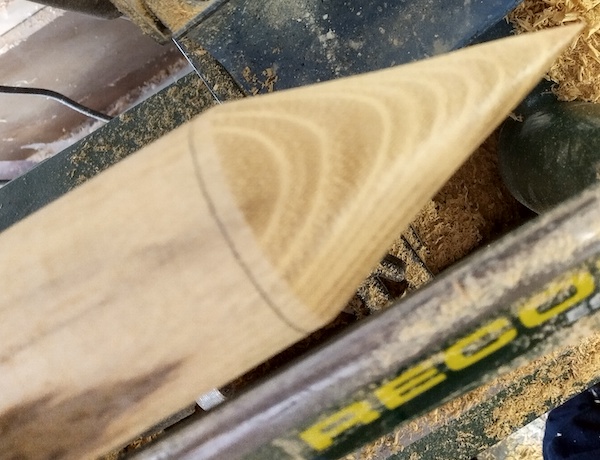
7 Then, using a chisel, work backwards from each line and remove material to form a taper. As you progress further along the blank, you’ll begin to see a cone shape forming. This time, I chose to use a spindle gouge, but you could easily use a skew chisel if preferred
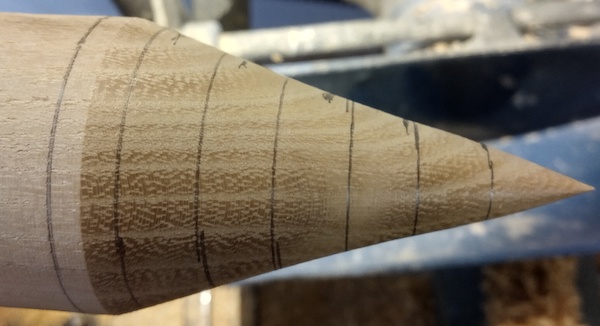
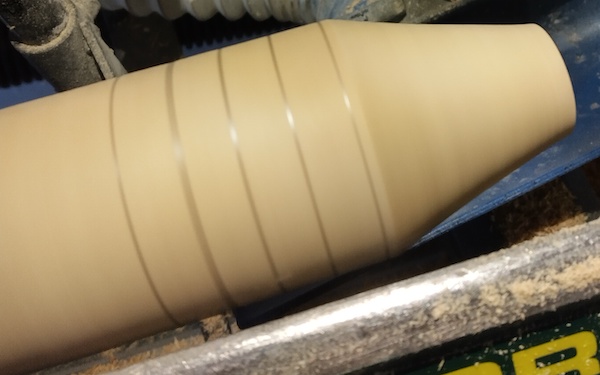
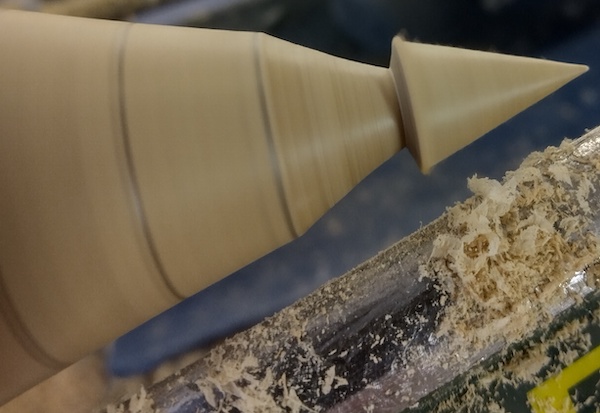
8 With the cone made, as before, mark a series of lines from tip to base and turn the toolrest so that it runs along the cone’s side, as shown
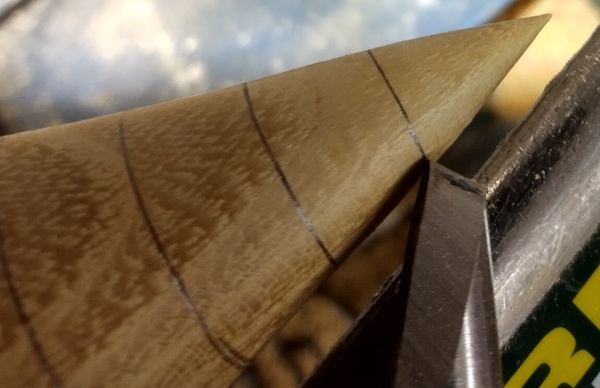
9 You could use a skew chisel for the next part, but it’s very easy to experience a catch. Instead, I used a spindle gouge with the flute facing back towards the headstock; this allows you to make a small ‘V’ cut at the line

10 Now turn the chisel over and remove stock, working backwards to the next line, ensuring to only go as deep as the bottom of the ‘V’ cut. If you want a steeper looking slope, just turn the chisel over and increase the ‘V’ before turning the chisel over again and removing more wood up to this point
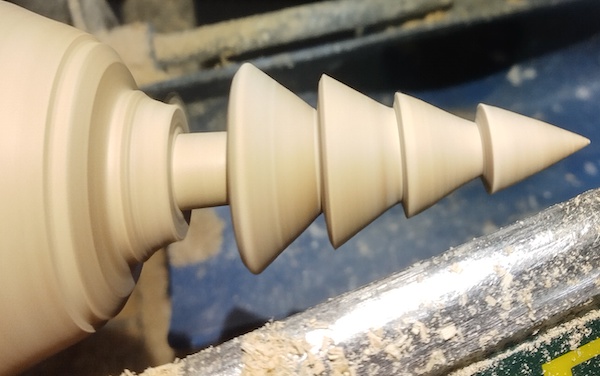
11 When you’re happy with the first part of the tree, start again at the next line and carry on until you’ve created the desired number of branches
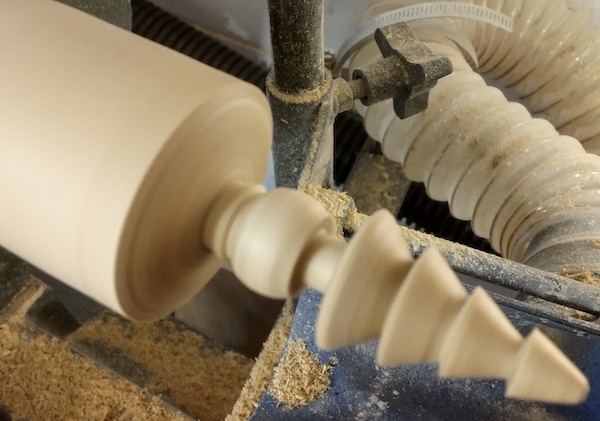
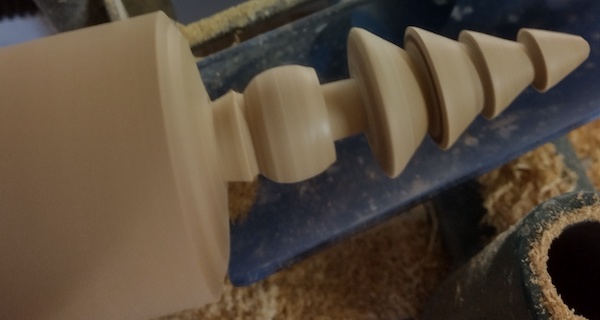
12 The pot that the tree sits in can be made any shape you like. For this one, I chose to create a round pot, which is a simple bead. Use a parting tool to form the trunk, ensuring to make it long enough so that it can be sanded afterwards, followed by a bead at the end for the pot. Once you’ve completed the overall shape, sand the entire piece through the grits down to 320 or 400

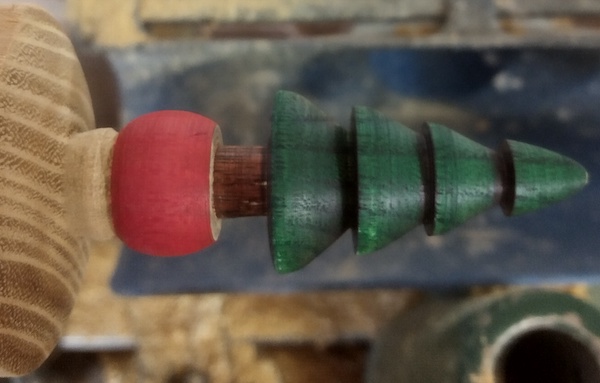
13 You can choose whether or not to add colour, but here I decided to do so. Using various Sharpie pens, I worked from the top of the tree, with lathe speed low, colouring the branches green, trunk brown, and pot red. After I’d coloured the tree, with the black pen placed just in the ‘V’ cut, I added some shadow underneath the branches. Once done, I thought the pot looked a little plain, so using a thin parting tool, I cut a band around it and coloured this in with a yellow pen
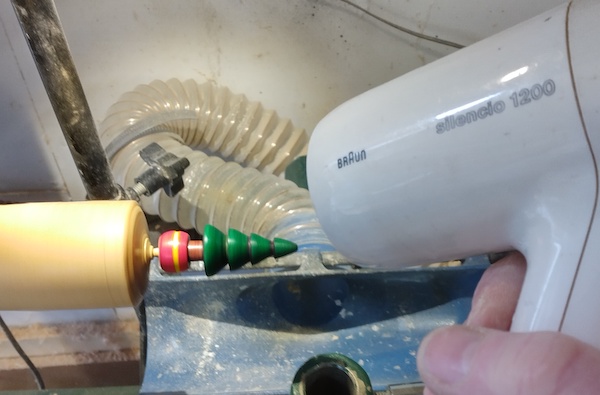
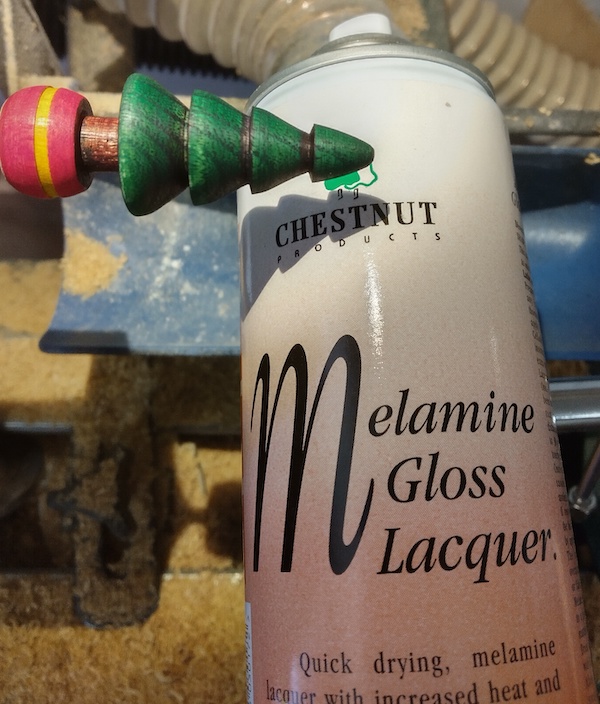
14 I began to part off the decoration from the remaining blank, but stopped just before it came loose; this allowed me to spray it with some melamine lacquer, which helps to seal the colours.I then dried the lacquer using an old hair dryer
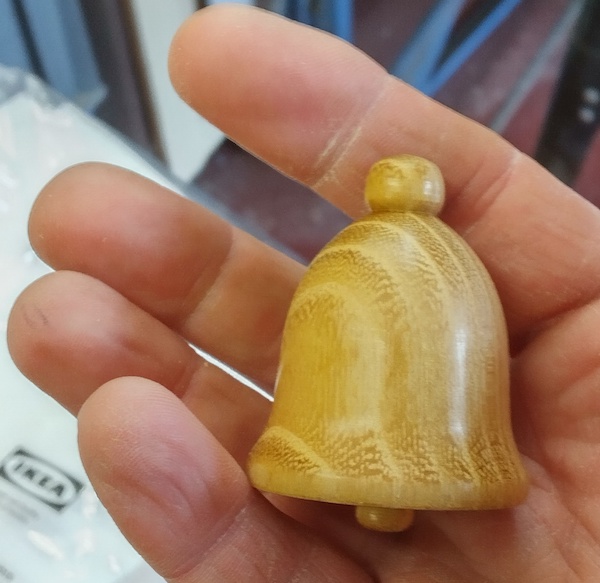
Bell
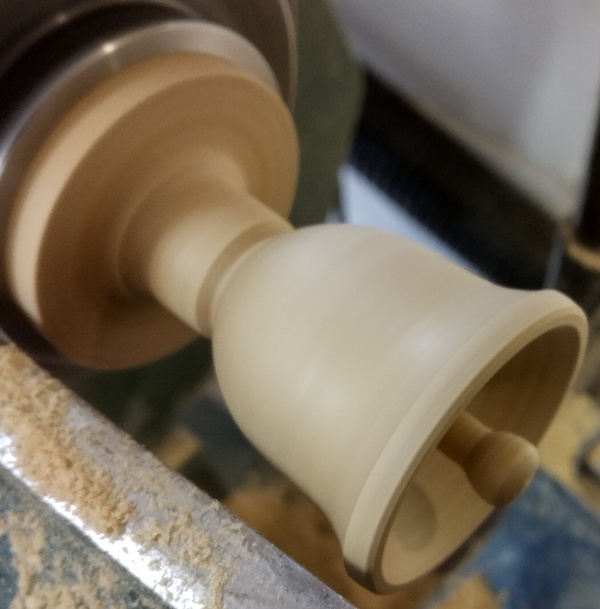
15 It’s now time to move on to the next decoration, which is a bell. You can make these in a few differentways: they can be solid or hollowed out; you can add an actual bell inside or nothing at all, or even use a glass bead hung from a piece of wire, which acts as a clanger. My version features a turned wooden clanger, which protrudes from the bottom of the bell. Start by turning the blank’s surface to leave a portion protruding at the centre. Next, remove the wood around it, as if turning a bowl, keeping the centre in place for stability
16 To avoid hitting your elbow while working inside the bell, ensure to remove the tailstock’s centre
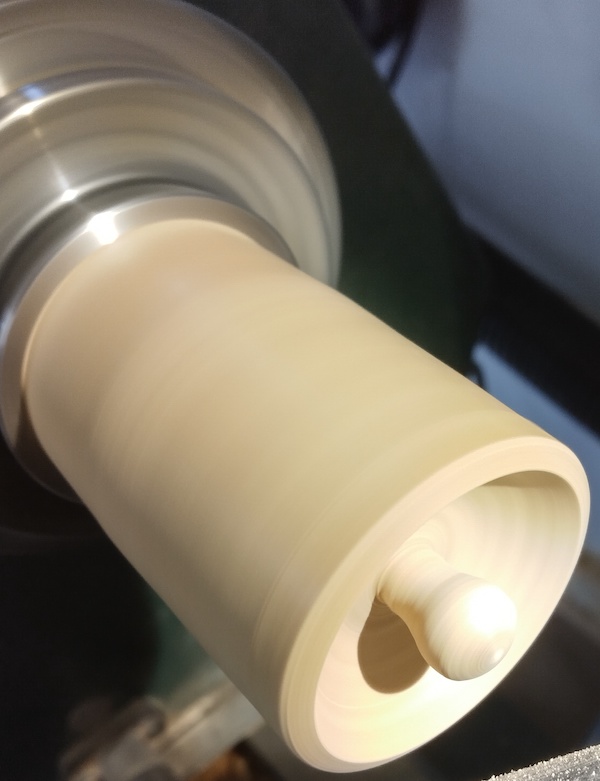
17 As you get deeper into the wood, begin to shape the clanger so there’s a sphere on the end and a narrower spindle attaching it to the inside. Ensure to go deep enough so that the point where the clanger joins is difficult to see from the blank’s underside; this gives the impression that the clanger can move freely, which creates a better finished result
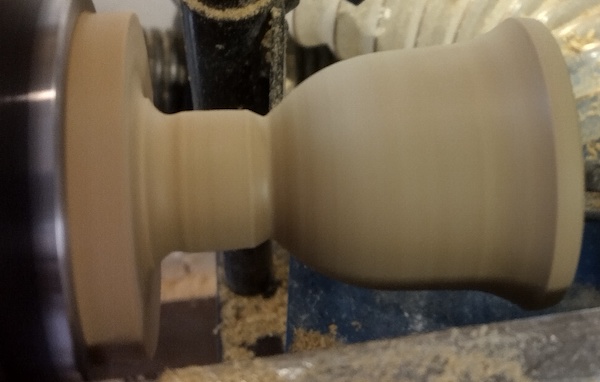
18 Once happy with the inside, begin to shape the outer bell. Don’t worry too much about wall thickness as there should be plenty of material to go at. I like to put a straight edge at the mouth, then curve inwards to about halfway, before starting to make the bell’s dome

19 I used Yorkshire Grit for the final finish prior to shaping the bead on top, then parted it off
Christmas tree: version 2
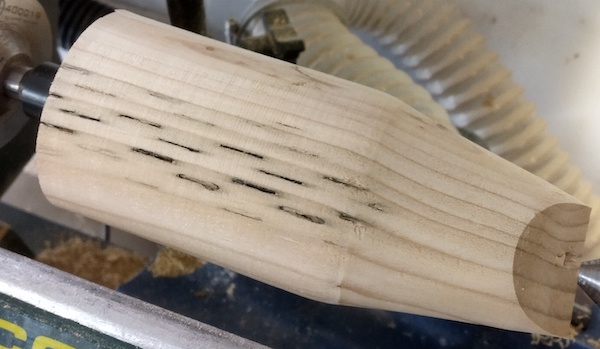
20 I made a second tree, but this time using a scrap of garden fence post. I followed the same steps as for version one, but made this one slightly taller with different pot detailing, and chose to leave it natural, not adding any colour
PART 2
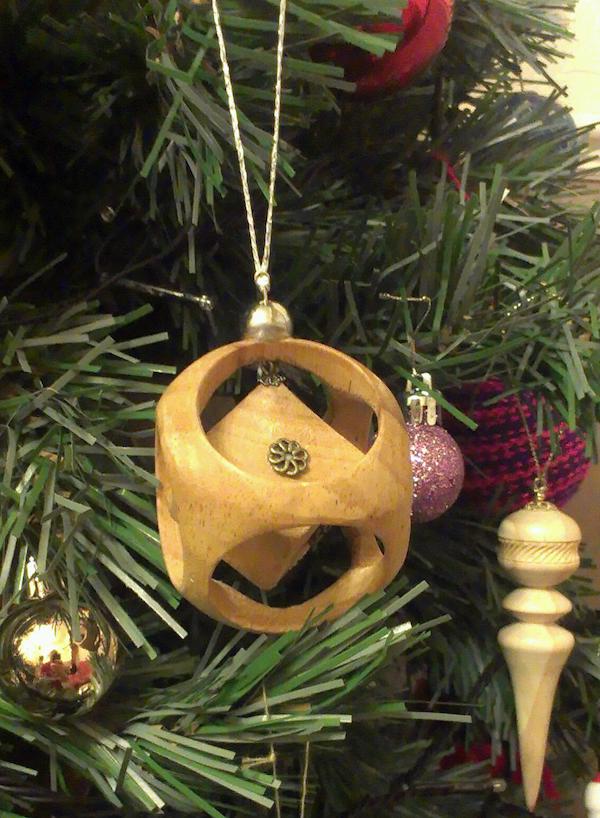
In the second part of this article, Ken will turn the two final designs: an icicle and a suspended cube
- Log in or register to post comments


| Articles | Articles | Articles | More | Subscriptions | Resources |