Box clamping jig
One problem I have encountered on numerous box making projects is how to hold an assembled box when cleaning up or fitting hinges. It’s a perennial problem that is not catered for particularly well by traditional woodworking benches and clamps. Well, I decided it’s time to find a solution and design a simple box clamping jig that helps make the process of clamping and working on an assembled box easier.
The jigs design is a simple one, and as soon as I had come up with it I wondered why I hadn’t done so years ago! The jig consist of three pieces of MDF and a standard ‘bed bolt’ fixing.
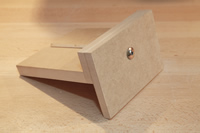
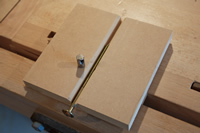
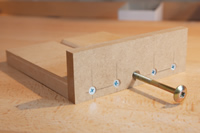
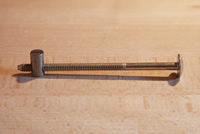 Front and rear views of the finished jig. The third picture is an example of a bed bolt.
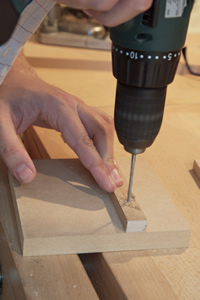
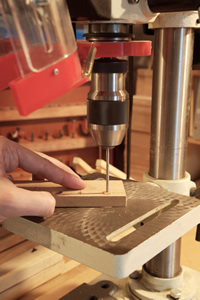
The fist step is to route a groove in the jig base board. This will form the channel that will take the ‘bed bolt’ screw thread. Because the base board is 150mm square it’s an awkward size to route. For this reason I cut a small batten approx. 15mm wide in MDF and temporarily screwed it to the base board. This allowed it to be secured in a bench vice and the groove routed safely.
| ITEM | LENGTH | WIDTH | THICKNESS | NO. OFF |
| A. MDF base board | 150 | 150 | 18 | 1 |
| B. MDF upright support | 150 | 50 | 12 | 1 |
| C. MDF vice front | 150 | 100 | 12 | 1 |

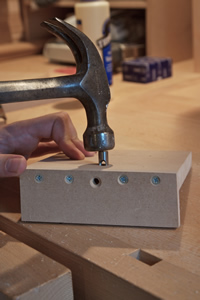
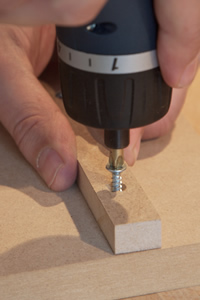 Drilling, checking screw depth and fixing in place.
When fixing the batten to the base board ensure that you use only two screws at either end. A screw in the middle is likely to come into contact with the router cutter when cutting the groove.
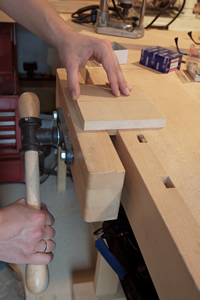
Securing the base board in a vice ready for routing.
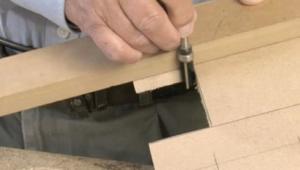
Now the base board it securely fixed in the vice a router can be used with a fence to safely cut a central full length groove. The groove needs to be slightly wider than the diameter of the ‘bed bolt’ screw thread and deep enough to allow the thread to lie below the surface of the base board. Sinking the thread like this ensures an assembled box can sit on the base board without coming into contact with the thread.
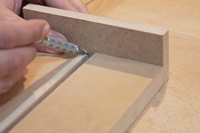
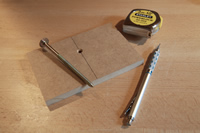
Checking alignment
The next stage is to mark a central hole in the jig upright. Use the base boards groove position to scribe onto the upright. The hole in the upright will determine the bolts vertical position so remember to keep it below the surface of the base board.
Once the hole has been drilled, check the hole and groove align properly when the threaded ‘bed bolt’ is fed through the two. Everything should line up nicely.
Once everything is lining up as it should, it’s time to permanently fix the upright to the base board. I opted for a nice quick screw and glue fix; Ideal for jig making where form very definitely follows function!
 Marking out and checking alignment.
Be sure to countersink the upright so the screw heads don’t come into contact with the side of a box when the jig is clamped up. When screwing into the side of MDF board it’s also advisable to pre-drill pilot holes because MDF is very easy to split along it length. Pilot holes minimize the risk of splitting.
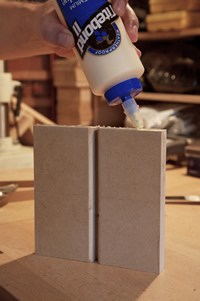
Apply glue to the joint and screw home for a tight fix. Because the joint has been screwed there is no need to watch glue dry before moving onto the next step!
Before the glue goes off it’s worth double checking the screw thread alignment one more time to make sure nothing has moved.
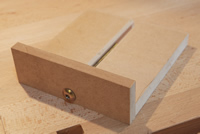
Fixing the upright support and inserting the bed bolt
The last step to finishing the rear part of the jig involves inserting the nut part of the ‘bed bolt’. It needs to be embedded along the groove line to provide the jig with a clamping facility.
To do this; offer the bolt up to the jig and determine the point along the groove that is going to give the bolt maximum travel. Bed bolts usually have a stopped thread some distance below the bolt head. The nut placement has to be far enough along the groove to allow the bolt maximum travel.
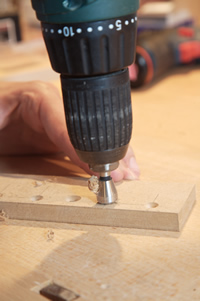
Before drilling the hole, measure the diameter of the bed bolt nut with a micrometer. Mine was 10mm so I used a 9.5mm drill bit in the base board to ensure a tight fit.
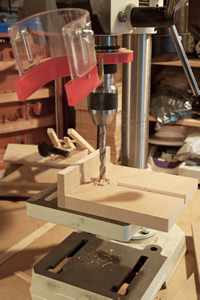
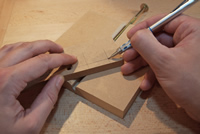
Drilling the bed bolt nut hole and inserting the nut.
I prefer to use a drill press where I can for a clean and vertically aligned hole. Lightly tap the nut into the slightly undersized hole. These types of nuts normally have a slot on one end so they can be adjusted with a flat head screwdriver. Perfect alignment can be achieved with a combination of tapping with a hammer and turning with a screwdriver.
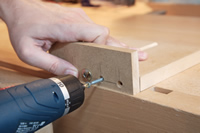
Next, mark a hole in the jigs vice front for the screw to pass through. The top of the vice front needs to be flush with the top of the existing jig assembly. The extra material on the bottom of the vice front will be used to secure the jig into a bench vice. The hole should allow free movement of the screw thread without being slack. My thread was 6mm so I used a 6.5mm drill for the hole.
Next, assemble the jig using a cordless drill/driver to quickly tighten up the ‘bed bolt’. Place the jigs vice front into a bench vice and secure in place.


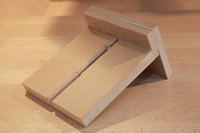
Fixing the vice front in place and using packing boards with the jig for larger boxes.
By using packing boards with the jig, any number of box sizes can be securely clamped. The packing boards need to be the same thickness as the jigs base for this to work effectively.
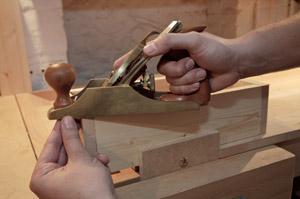
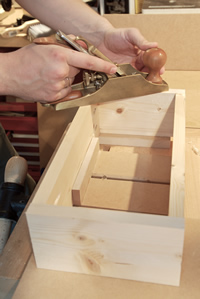
For the purposes of this article I have made up a quick softwood box using a Kreg pocket hole jig. Not the most elegant of construction methods but fine for demonstrating the box clamp jig in use.
The jig holds the box steady while the top joint is planed with a smoothing plane. This is usually a tricky job but using the jig makes light work of it.
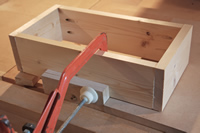
For clamping a box with its bottom in place, G clamps can be used to secure it to the jig front.
Now for the next project; I think its about time I made a decent box!
- Log in or register to post comments


| Articles | Articles | Articles | More | Subscriptions | Resources |