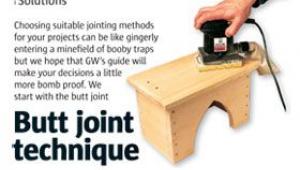
Making bridle joints
• Try square
• Pencil
• Mortice marking gauge
• Tenon saw or Pullsaw
• Coping saw
• Router with straight cutter
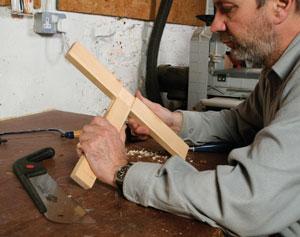
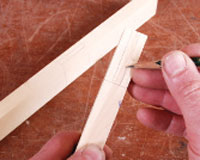
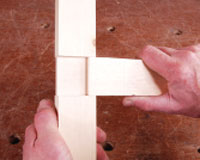
1] Start by marking the position of the joint on the tenon member with a try square and a sharp pencil
2] Use the mortise member and the try square to mark the wood’s exact width on the tenon member
3] Extend the lines all round the workpiece using the try square. They should meet exactly if the wood is square


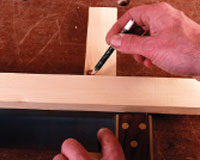
4] Mark the depth of the slot on the mortise member. You can make it a little deeper and then plane off the end once the joint is complete, to produce a neat finish
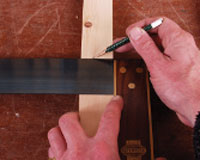
5] Set a mortise marking gauge to the width of your chisel. The wood is 19mm thick, so I chose a 6mm wide chisel as closest to one third of its thickness
6] Centralise the gauge and mark both sides of both components. Always work from the same face of the workpiece to minimise any inaccuracies
7] To make the marked lines more clearly visible before cutting the joints, run a sharp pencil along them
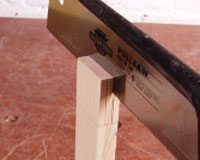
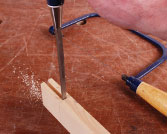
8] Fix the mortise member vertically in a vice. Using a fi ne-point saw, cut down on the waste side of the marked lines
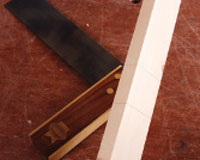
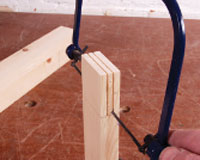
9] Use a coping saw to remove most of the waste from the slot. Take care not to cut beyond the base line
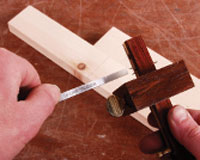
10] Square off the base of the slot with a chisel, cutting down to the marked line and working from both sides of the wood
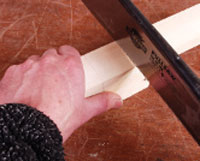
11] Now cut the matching tenon. Make sure the cuts are vertical and within the waste area. Don’t run over the gauged lines
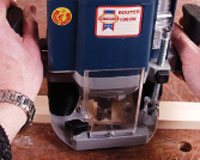
12] You can use a router to remove most of the waste. Fit a wide straight cutter and plunge down to the gauged lines in stages
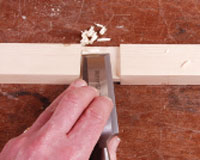
13] Clean up the base of the joint on both sides of the wood with a wide-bladed chisel held fl at to the surface
14] Test the fi t of the joint, and make any necessary adjustments with a chisel or abrasive paper
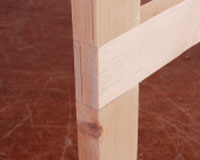
15] The fi nished joint. If you marked and cut the mortise a little over-deep, plane the projection fl ush for a perfect fi nish
- Log in or register to post comments


| Articles | Articles | Articles | More | Subscriptions | Resources |