Mission-style clock

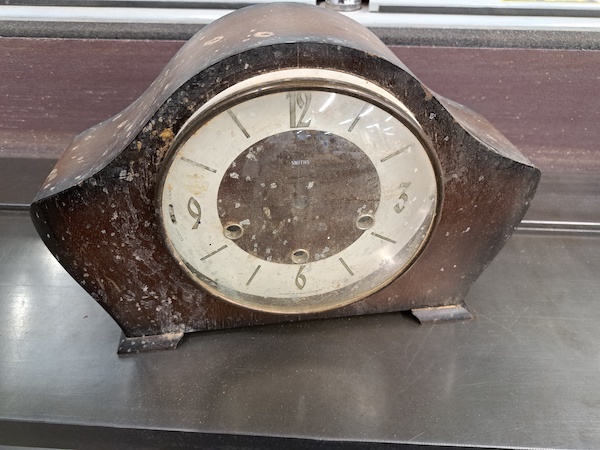
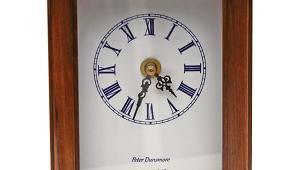
When my mother passed away 12 years ago, she left me her Amberley clock (photo 1). It featured an eight-day Smiths Westminster brass chime movement, which I loved, but wasn’t so keen on the clock case. I’d always planned to make a new case for it, but other jobs always seemed to get in the way.
Fast forward 12 years, however, and looking for a suitable weekend project to tackle, the clock finally found its way onto my workbench. A quick online search gave me a good idea as to the design I was looking for, so I prepared a quick sketch (photo 2).
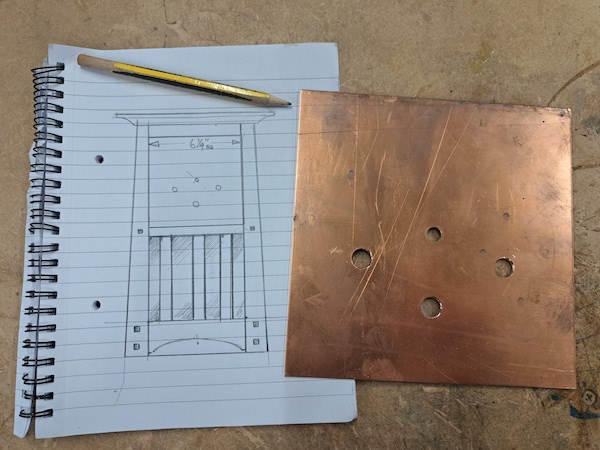
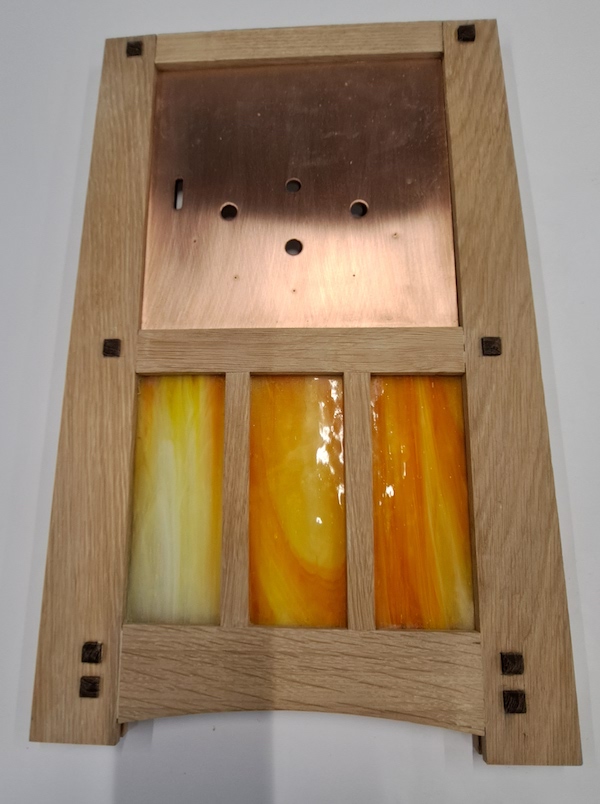
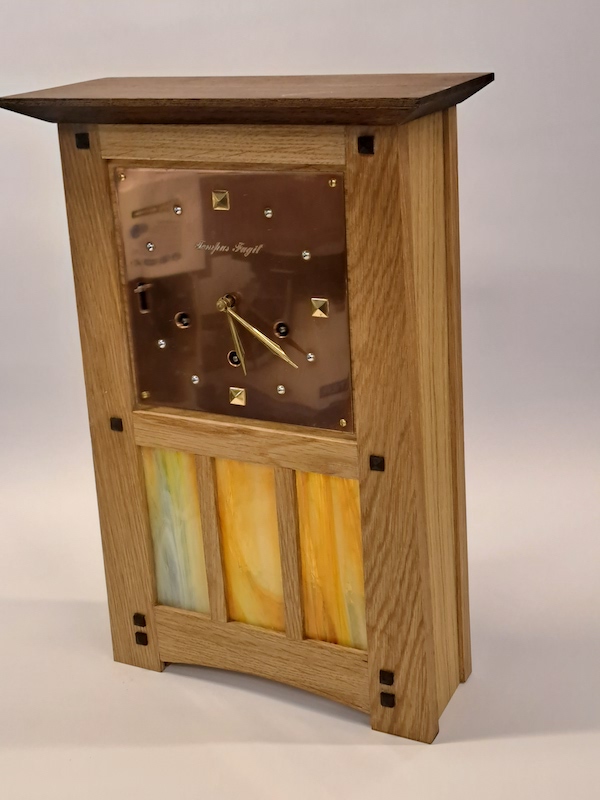
The key elements seemed to be a tapered case with ‘roof’ and glass window. I had to change the proportions slightly from the sketch due to the chimes’ length; I don’t think that cutting them to fit would’ve ended well!
On a mission
Usually, the pendulum is visible through this window, but as the movement has an escapement instead, there wouldn’t be much to see! Another online search turned up a beautiful piece of hand-made glass, which I could incorporate and in doing so, solve the problem.
Sound idea
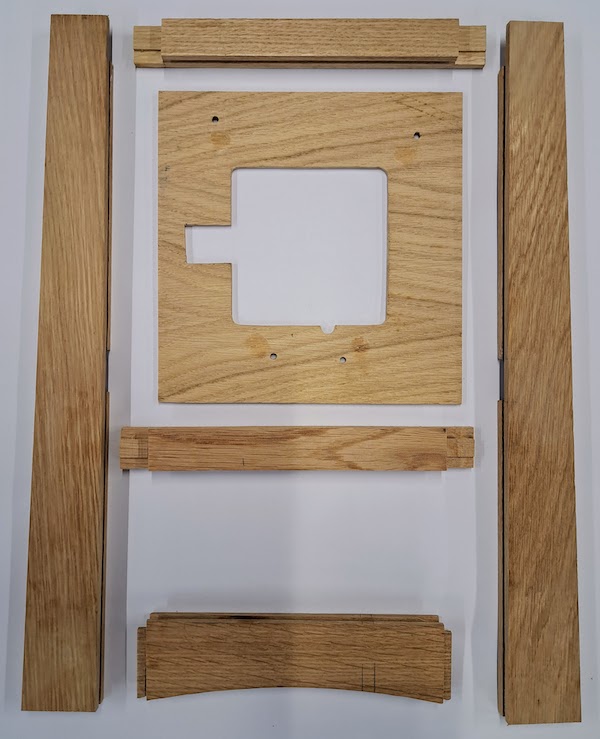
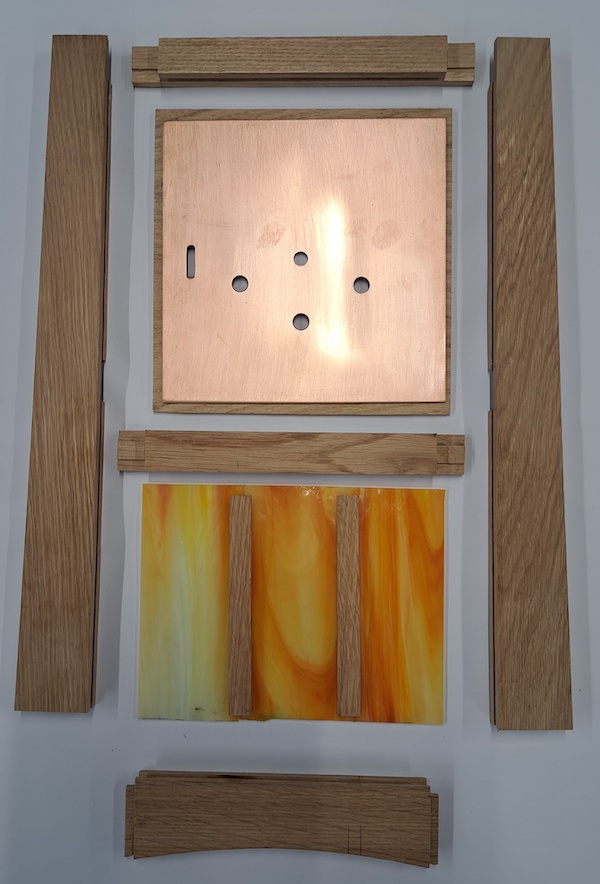
I’d planned to build the clock from solid oak, but further examination of the original case revealed a thin plywood construction. I reasoned this might be for acoustic purposes, allowing the chimes to resonate more than if made from solid timber, which might dull the sound. I changed the plan to, basically, two ‘face frames’, which consisted of four solid oak uprights connected with thin veneered plywood panels. The rebates on the uprights, to receive the panels, were produced on the table saw, which resulted in a snug fit.
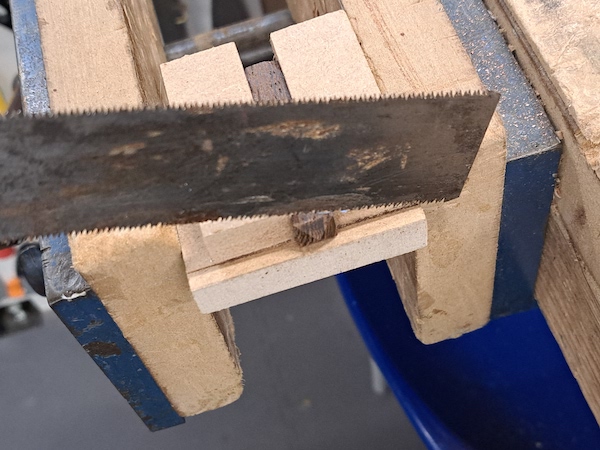
The horizontal rails are fitted to the uprights with half-lap joints (photo 3). Many of the Mission clocks I’d seen online had contrasting ‘draw bore pins’ on the joints; these aren’t strictly necessary with modern glues, especially where the joints aren’t stressed as on a clock, but I liked the look of them. I set about cutting a 10mm square strip of wenge, sanded a pyramid on each piece, then cut them to length using a simple jig (photo 4) before gluing in place (photo 5).
Face to face
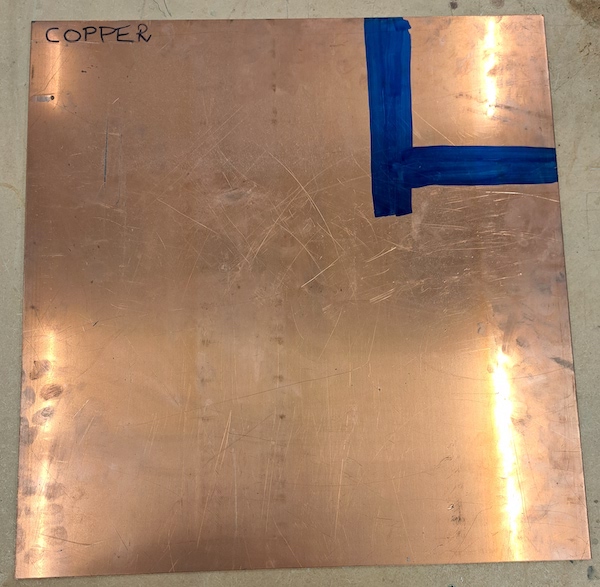
The Amberley clock has a ‘chapter ring’ for the numerals, and I wasn’t sure whether to do the same, fit a dial, or keep it simple. Some of the designs I’d seen online had a copper face, which I liked the look of, especially as I already had a 1.5mm thick copper sheet in my odds and ends pile (photo 6). Using the original face as a template, I marked the position of the three holes for the key and very carefully drilled them – if these were offcentre to the winding spindles, it would‘ve looked awful.
I added a bevel to the holes to catch the light – a small detail that makes a big difference – then made a paper template, which allowed me to mark the hour and five minute intervals (photo 7). For the positions at 12, three and six, I used 10mm square pyramid-shaped brass studs, which are usually added to clothing, particularly leather jackets. I chose these to mimic the fake draw bore pins. I cut the tangs off the back, filled with two-part filler and glued them to the copper using CA adhesive.
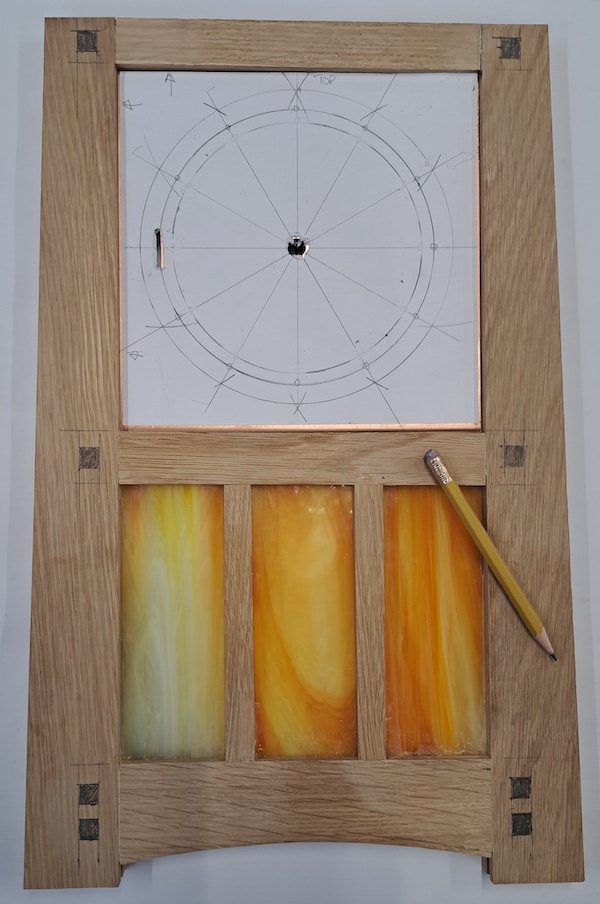
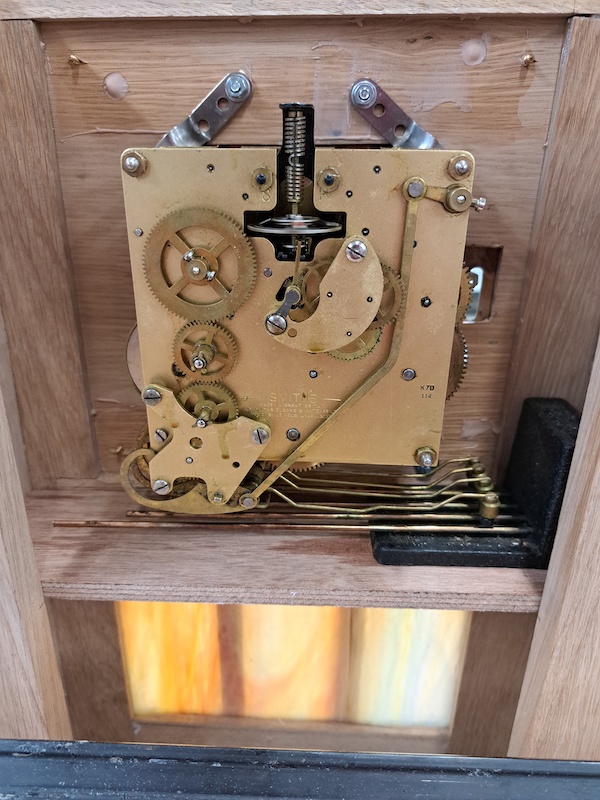
The interim positions are marked with 6mm diameter silver domed upholstery nails. I drilled a 1.5mm hole and soldered these in place from the face’s reverse. The 3 o’clock position is where the lever protrudes, so it can turn the chimes either on or off. The brass hands on the original clock seemed to suit the copper perfectly, so were therefore reused.
Hurry up & wait
Whenever my Mum wanted us kids to hurry up, she always said ‘Tempus Fugit’, which, translated from Latin, means ‘Time Flies’. I thought it’d be a nice touch to have it engraved on the clock face.
Glass act
Coincidentally, the thickness of the glass exactly matched that of the plywood, so I used the same method as before to create the rebates. The two glazing bars are simply thin strips of oak, which are stuck to the glass with clear silicone sealant; this was also used to fit the glass into the rebates (photo 9).
Moving on
The movement is fitted to the plywood sub face with the original mounting brackets, which are secured in place from the front with countersunk set screws. These are hidden by the copper face, which, in turn, is fitted to the plywood with four small brass roundhead screws. The chimes are mounted in a heavy piece of cast-iron, which sits on a plywood shelf attached with three machine screws taken from the original clock (photo 8).
Open & shut case
I decided to leave the bottom half of the case’s reverse open, which would allow light to pass through the glass, and a decision that I think worked well. The top is in wenge to match the pins. The bevel was made on a disc sander and fitted to the case by screwing a piece of ply to the underside – the size of which exactly matches the case interior and sub assembly – before gluing in place with PVA glue.
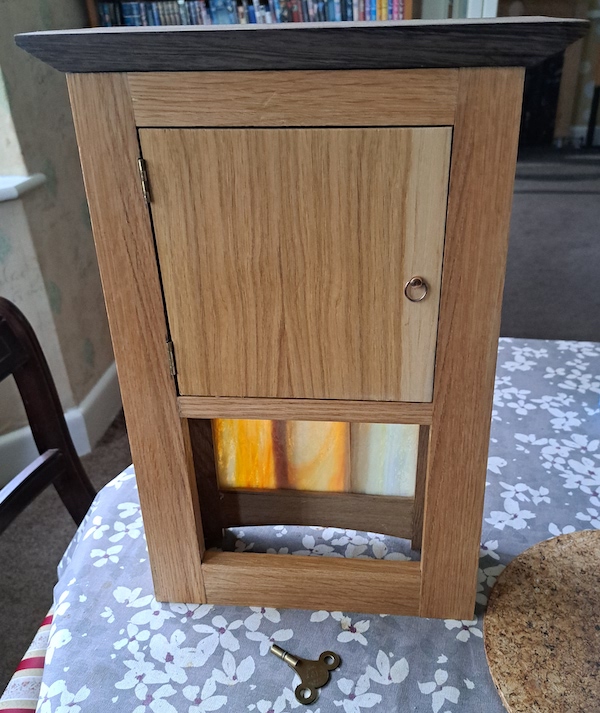
I made the door – which allows access to the movement – from veneered plywood as before; this was fitted with some small brass hinges, also from my bits and bobs pile. The ‘D’ shaped handle and catch was taken from the original clock and coincidentally made from copper, which I only discovered when it came to polishing them. (photo 10).
Finishing time
I sanded the case down to 400 grit, then applied two coats of Danish Oil, wiping off any surplus with a clean cloth after 10 minutes. This was followed by a few coats of paste wax, buffing to a soft sheen. The only thing left to do now is find the best position for the finished clock – this could take some time!
- Log in or register to post comments


| Articles | Articles | Articles | More | Subscriptions | Resources |