Organising is customising...

Recycling is in my blood, so most of the material for the workshop units came from pallets and other bits of used timber. It may not be the most beautiful material, but I knew I was going to be the only person who’d really see them, so their appearance wasn’t nearly as important as their strength.
While recycled materials may be free, they do often require careful preparation, as they’re not only likely to contain nails, but stones and grit carried in the surfaces will ruin the blades of a planer or thicknesser. I usually clean up the wood with a quick sanding, then check it with a metal detector before machining.
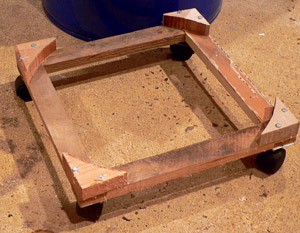
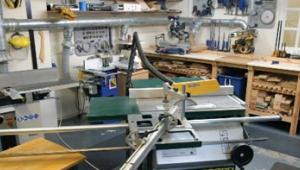
Pic 1. Peter has mobilised his machinery...
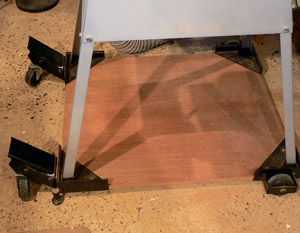
Pic 2. ...so that it can be wheeled out as needed
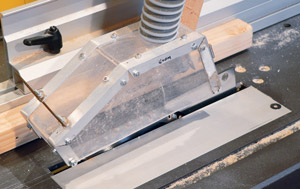
Pic 3. Dust control is very important;
this Perspex guard for Peter's tablesaw
attaches to the extractor
Andy King (Good Woodworking magazine) mentioned the advantage of pegboard, and I use it to hold my hand tools, which are arranged in relevant groups — tools for measuring and marking, tools for sawing, screwing, and cutting, etc. — so I know where to find them quickly.
Every machine has its place, and stands on a support that incorporates built-in storage. As Andy also suggested, machines that need more space when in use are mounted on wheeled stands so that they can be rolled into the central space when needed. The drum extractor is moved from one machine or area to the next on a wooden base fitted with castors.
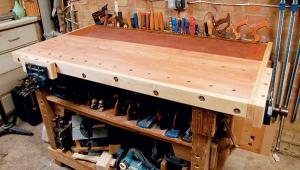
My timber supplies, meanwhile, are stored on shelves in the huge amount of useful space under the workbench, which is lent extra stability by the timber’s weight. The wood for my current project, however, is always stored under the bed in the spare room, so it can assimilate the humidity of the house.
When searching for storage space, don’t overlook the large amount of space in the rafters — if yours are open like mine, that is. However, before you start stashing away those long pieces of wood and rarely-used jigs, make sure you prepare a list of what’s where, or you’re bound to forget and might as well throw them away!
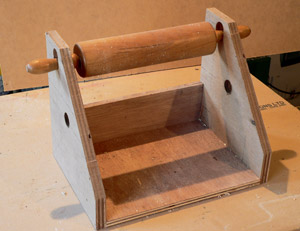
Pic 4. A rolling pin makes a great sawhorse aid
Pic 5. A box on the drill press deals with dust
Cutting sheet materials on the tablesaw can be difficult, but a sled helps with safety and accuracy. It also allows me to attach other accessories, like my tapering jig. I have a second, smaller sled made following one of Bruce Manning’s designs. This is used for thicknessing or sanding narrow workpieces, holding the contents in place with doublesided tape.
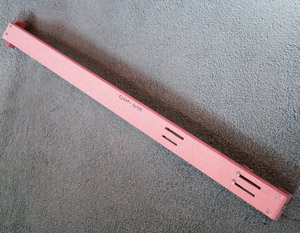
To support long pieces as they’re fed through the tablesaw, I’ve also built a handy device consisting of an old rolling pin in a cage that can be clamped to a sawhorse, Pic.4.
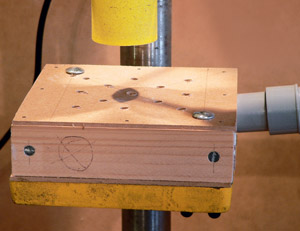
The sanding drums, which I use in the drill press, create a lot of dust, so I built a small box to contain the waste and take it straight to the extractor, Pic.5.
As for my router table (Pic.6), it has a guard with an extractor port, a screw for raising the router and a NVD switch from Charnwood. One of the most useful accessories for the router, however, is my ’shop-made guide clamp, Pic.7. When not in use, it hangs on the wall with my other jigs, labelled for ease of location.
One of the most useful items in my workshop is a set of shim samples, each labelled with their thicknesses. I have a small box for 2 x 3in slices of common materials from 1 to 5mm thickness; these are offcuts of pressure laminate (Formica), Plexiglass, plywood and the like.

Pic 6. The router table has several accessories...
Pic 7. ...including Peter's favourite, a guide clamp
It’s taken me four or five years to set up my workshop, but I’ve enjoyed collecting the recycled materials, and buying second-hand equipment from Good Wood readers’ advertisements or eBay. It’s not only been a rewarding task in itself, but the workshop allows me to create some great objects of which I’m really proud.
- Log in or register to post comments


| Articles | Articles | Articles | More | Subscriptions | Resources |