Plane and simple
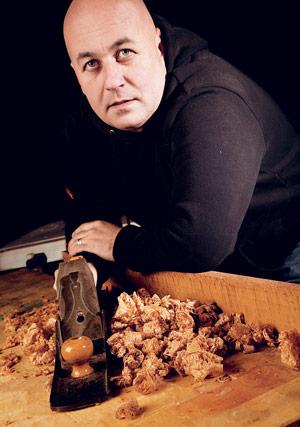
In order to make a living with woodworking, I find there has to be a compromise between power tools and elbow grease, and I’ll be the fi rst to admit that I couldn’t survive without power tools. Saying that, if there’s one thing that power tools haven’t been able to match, it’s the fi ne control of basic edge tools in skilled hands. The bench hand plane, for example, is certainly a tool that will be practically impossible to replace; although electric hand planes make life easier, you’ll never beat the crispness and fine control of a well-tuned hand plane.
There used to be a fair few manufacturers of planes, but Stanley was always the most prolific maker of the mass-produced metalbodied plane. As well as its eight basic lengths of bench planes (see table p91), Stanley turned out all manner of weird and wonderful types. This range has diminished, but we still regard Stanley as having been crucial to the woodworking world. Their spirit, however, lives on in the new quality planes from Clifton, Lie Nielsen and Veritas.
Having access to all the sizes of planes is certainly not essential, and depending on your woodworking, you can even get away with just one or two. So, as a fi rst-time buyer, which one should you choose? A jointer, try or fore plane are all unlikely candidates, as their lengths are too much to be of use in general terms. The most obvious plane to begin with is the No.5 or No.5 1⁄2 — the jack plane.
As its name suggests, it’s a Jack of all trades and suited to a wide range of tasks: it can be used for some straightening, initial preparation, and fi nal fi nishing work.
The No.5 1⁄2 differs from the No.5 in having an iron that’s heavier and wider by 3⁄8in, and in my opinion that extra width makes all the difference. For one thing, it means it will sit on the work better when cleaning up a planked tabletop. Meanwhile, the No.5 could be seen as the better option for initial fl attening of stock prior to truing up with a longer plane: it weighs less, and so requires less effort to drive it.
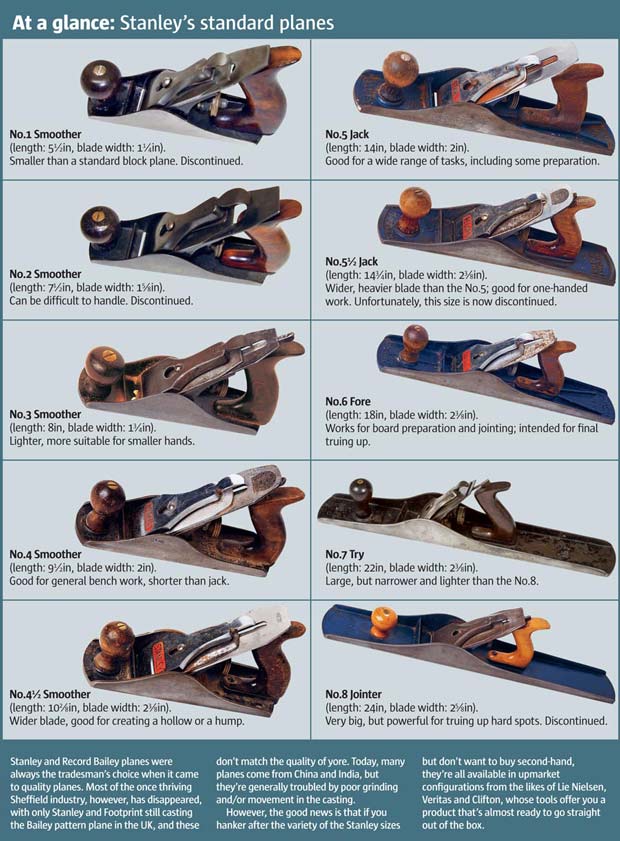
The smoother is my personal favourite. I used to use a No.4, which is good for general bench work, but now tend to use a No.41⁄2, especially for door-hanging when the wider blade sits well on thicker external doors. Being a shorter plane, it also works well in those situations when you’re fi tting a new door in an old frame, and may need to work small areas where you need a little more taken to allow for a hollow or hump. It’s worth remembering, though, that you can still plane small areas with a long plane by skewing the plane so that only a part of its length is in contact with the work.
To a certain extent, the longer planes have been made redundant by the relatively easy access woodworkers have to machinery that can straighten timber quickly. The No.6 fore plane is frequently sidelined, probably because it’s a touch too long for general jobs, but not significantly longer than the jack if you need a plane to straighten edges. It’s also a touch on the heavy side for initial preparation. However, if you’re going to do a lot of board preparation and jointing, it’d be a better bet than a No.5 1⁄2.
The No.7 and No.8, meanwhile, are try or jointer planes, though I tend to refer to the No.7 as the try and the No.8 as the jointer. Both planes are designed for truing up edges and bringing together two meeting surfaces, such as clapper board tabletops that are then simply glued and rubbed to form the top. They’re also used for flattening a board on the face, so rails, legs and other fl at stock can be trued up quickly and accurately. In the case of a jointed tabletop, for instance, the jack can be used to take out any high spots and irregularities after glue up, before moving onto the jointer to give it true flatness. Then the smoother, set very fi nely, can be employed to make a final pass and remove any marks left by the jointer.
Whether you choose to use a No.7 or No.8 is largely a question of personal preference. The No.8 is a beast of a plane, and requires more effort than the No.7, but its extra mass means that it can power through knots and hard spots once it gets going.
You’ll never beat the crispness and fine control of a welltuned hand plane
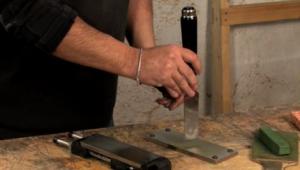
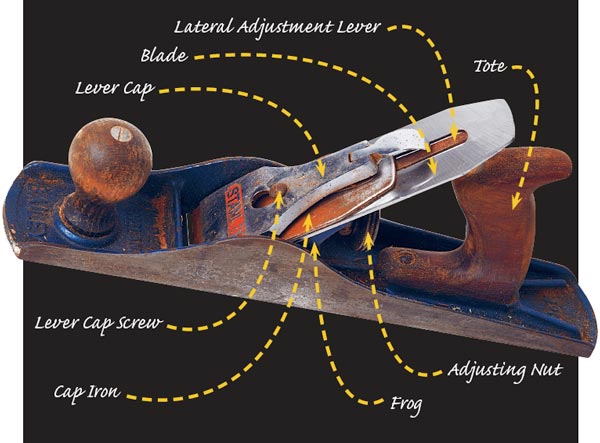
When it comes to fine-tuning their planes, many woodworkers begin by addressing the flatness of the sole. We’ll talk about this later, but we’re going to begin by looking at the plane iron, and how it works with the cap iron and the frog.
The irons on the newer top-end planes from Clifton, Lie Nielsen and Veritas are superb. They take and hold an excellent edge and need minimal work to achieve razor-like sharpness. Unfortunately, the same cannot be said for the irons in modern mass-produced planes, the quality of whose steel means that while they can be honed to a sharpness that’s suffi cient for softwood and some hardwoods, their edge retention is poor. They may also need a lot more work to get them flat on the back.
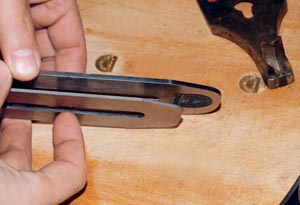
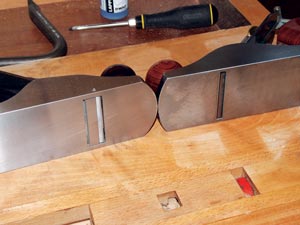
1. You can see the difference between a standard iron and a thicker Clifton replacement
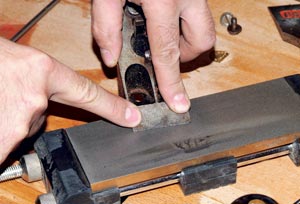
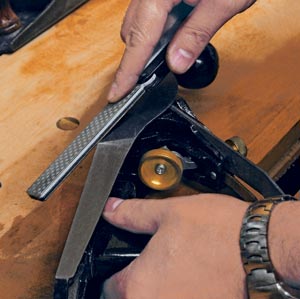
2. Any minor irregularities can be flattened on the underside of the frog with a sharpening stone
If you can track them down, then, older irons are the ones to have, as their steel tends to be of a better quality, and their extra thickness is a benefi t, too. You’ll fi nd it difficult to buy one that isn’t already fitted to a plane, and those that are for sale on their own are likely to be getting close to the end of their lifespan. You also need to check carefully that the replacement iron will fi t your plane, as the shape of the holes in the cap iron can vary from plane to plane, and some judicious filing of the mouth might be needed if the blade sits too far forwards and closes down the mouth too much. Buying a new iron is probably the easiest option, then, and while quality steel irons from the likes of Hock, Clifton and Lie Nielsen may cost almost as much as your plane itself, the price is usually justified by the increased performance of the tool.
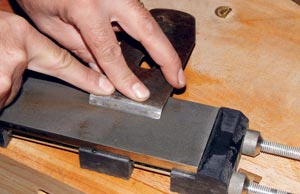
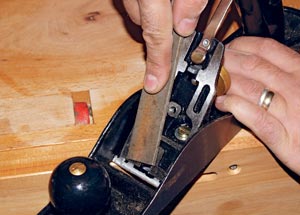
3. The cap iron can be sharpened on the stone
so that it fits tightly with the cutting iron
Your new bench plane iron will come ground square; to get the best out of it there are some variations that you can introduce to its profi le. You can, for instance, round off the corners to stop it leaving marks in the surface as it cuts. Alternatively, you can give it a curved profi le which, when fitted in a jack plane, will quickly flatten high spots in much the same way as a scrub but without producing the pronounced U-shape trough.
For the smoother and the jointer, the iron is usually kept either square with the corners eased, or with a very shallow curve, so that it doesn’t leave a pronounced scallop that only leads to more work. I prefer a very slightly rounded profi le, as this feathers the shavings on the edges when set for a full-width cut, though the effect is almost unnoticeable.
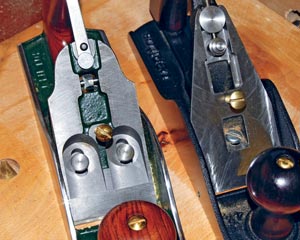
5. Quality planes like those from Clifton
and Veritas come with fully ground frog faces
When adjusting the cap iron, remember that the amount of backset will affect the cut: the further back from the edge of the cutting iron, the coarser the cut.
Once you have a plane that cuts true, you can fi nesse the performance for fi ner cutting. On trickier grains, for example, it helps to give the iron a steeper angle of attack so that it scrapes the timber rather than tearing the fi bres. Unfortunately, only Lie Nielsen offers a steeply pitched frog — the York pitch, or 50° frog — as an accessory. Meanwhile, increasing the honing angle on the blade from the common 30° angle will do nothing other than offer a little more support on hardwoods. David Charlesworth, however, has a neat solution that he refers to as ‘the ruler trick’, which increases the bevel angle of standard bench planes. The back of the iron, instead of being lapped fl at, is lifted by the thickness of a small steel rule on one side of the stone, backing off the honed edge on the other. This introduces a small bevel of a couple of degrees on the back, which effectively alters the blade pitch (it can also be used to dress blades that would otherwise need excessive work on the stone to fl atten them). Once you go down this route, though, it will need a regrind to get the blade back to flat.
. 
The alternative is to opt for a bevel-up plane from, say, Lie Nielsen and Veritas. To all intents and purposes these are oversized block planes and have irons ground at different pitches. They’re very effective, especially when you have the option of an adjustable mouth.
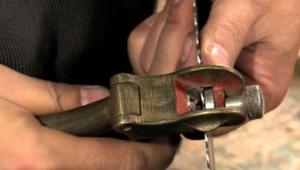
Even if your irons meet without a glimmer of light, the plane can still struggle to cut well if the iron and frog aren’t working together. If the iron doesn’t seat correctly, or the frog isn’t bedded down or in the correct position, then you’ll experience chattering and skittering as you try to cut.
The trick, then, is to remove the frog and check the meeting surfaces to ensure that they’re not being held apart by the odd glob of enamel or an area of rough casting; scraping and light fi ling should be enough to rectify these problems. Sadly, modern mass-produced planes aren’t as well-engineered as the older ones, whose larger bearing surfaces and superior machining produced better performing planes.
The face of the frog should be checked with a small straight edge which will indicate if there are any high spots that need to be relieved with a fine flat file. When refi tting the frog, it’s important that the frog is seated in a position that’s not so far back as to prevent the irons bedding properly. You should fi t the irons, then, and check how the frog sits in relation to the mouth of the plane.
Shunting the frog forwards closes the mouth down so the finish and shavings are finer, but if it’s too far forwards the end of the iron can lack support and become prone to chatter; thicker irons don’t suffer from this problem so much. Although the frog is there to be used, it’s very unusual that I’ll alter it once I’ve set it. This is mainly because the standard Bailey pattern planes need to be partly stripped in order to make adjustments, though if I were using a Bedrock style plane, whose design allows frog adjustments to be made with the plane assembled, I’d be more far more inclined to make alterations.
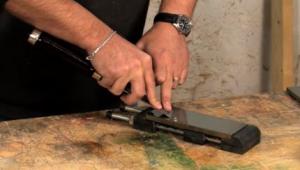
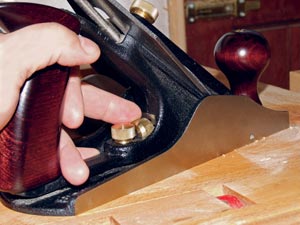
The lever cap has to be tight enough to force the irons against the frog to prevent chatter and stop the iron moving back as it planes, but still have enough give to allow the iron assembly to be adjusted easily. This is where it’s good practice to make any necessary adjustments, and then wind the adjuster forwards to take up the backlash to resist any shock forces from the cutter and so eliminate potential movement.
4. The face of the frog can be
sweetened up with fine flat file
Of course, the grip of the plane can be part of getting the most out of the tool, and the Stanley type knobs and totes — even the plastic ones (cue sound of hawking and spitting) — feel very comfortable. The totes on Veritas planes, meanwhile, for all that they’re high quality tools, always feel a little square to me. But, we’re not woodworkers for nothing, and it’s easy enough to adapt the handles to suit our own preferences. Alternatively, you can buy sets of knobs and totes for Stanley planes to replace any missing or broken ones.
6. The whole frog assembly moves as one by adjusting this small wheel on the Veritas frog
7. The unique Veritas frog (left) has a small cast foot that slides along to close the aperture
Performing the simple tasks I’ve described should lift your plane to a new level of performance. If you’re still having problems, though, you might have to shift your attention to the body’s casting. Providing that it’s actually fi t for something more than holding your door open, there are ways to fettle it, though I warn you now, when it comes to getting a plane to work, flattening the sole is likely to be the most controversial topic.
I don’t sit in the ‘check for fl at and fettle’ camp, and see little point in unnecessary labour. I prefer to try a plane fi rst and only do work if it doesn’t perform. The thing to remember is that a plane doesn’t necessarily need to be entirely fl at. The crucial registration points are the front and rear of the sole, and just in front and behind the mouth; if these are in the same plane and have no twist, you can discount any slight hollows. For general carpentry, joinery and some furnituremaking, then, the standard bench planes should hopefully be good enough to perform at the levels required.
It’s only when I’ve exhausted the easier tuning methods and still fi nd that a plane won’t take a uniform shaving that I will delve deeper. It is possible, for example, that a plane that started its life true can move over time, as cast iron is prone to distortion (This is part of the reason, by the way, why cast iron was traditionally left to settle before fi nal machining). Before you commit to surgery, however, you should be sure that you understand the mechanics of planing, and that it’s the plane and not you that needs the work.
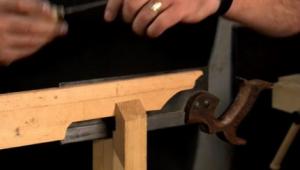
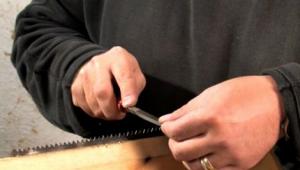
If you do need to resort to flattening your plane then, put engineer’s blue or a series of cross-hatched lines made with a permanent marker on the sole, and pass the plane over a piece of abrasive on a dead fl at surface to reveal the hollows and high spots. A suitable surface can be made from a thick piece of fl oat glass stuck to a stable surface like MDF. A 19mm MDF backer, for instance, with 6mm glass on top is the minimum, but 10 or 12mm glass is much better if you can get it. You can also use the bed of a saw or planer, but again, this needs to be checked for true or you’ll simply introduce more problems.
It’s important that the frog, cap iron assembly (with the blade retracted) and lever cap remain in place during this process as they affect the tension of the casting. If they’re removed during lapping, the casting may change shape, which will defeat the object of the whole exercise.
To lap the sole, you can use standard abrasives stuck down with spray adhesive, though engine valve grinding paste will do a similar job. Be warned though, this can cut very quickly, so don’t be overly enthusiastic on the initial lapping when using a coarser grit! A light touch and running through the grits is all that’s required when lapping. Shorter planes should be held over the frog as holding the knob and tote can lead to a slight increase in pressure at the front and rear of the tool and the removal of a fraction more metal.
If the sole is really bad, it may need surface grinding at an engineering shop, but care is needed not to remove too much meat as this will open up the mouth and the finer frog settings will be lost.
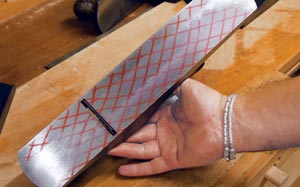
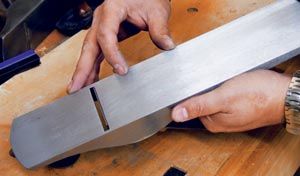
8. High spots can be indicated with a series of cross-hatch markings…
9. …which will disappear when you create a fl attened sole
It’s a rather sad reflection on what was a thriving British industry that the quality of finish on tools that were once the tradesman’s choice has declined to such an extent that, to get a modestly priced UK-made plane that will give you a good result out of the box, you have to look for an older model in your dad’s tool shed or at a car boot sale.
Hopefully, though, these tuning tips — when combined with a little elbow grease, of course! — will allow you to turn even a moderately effective modern plane into a polished performer.
- Log in or register to post comments