Saw Sharpening Masterclass - Part 2
The saw is more or less already prepared for a particular task by now, the shape established at the dressing stage with, say, a more aggressive hook for rip sawing. However, there are still various sharpening options available to adapt the saw even further.
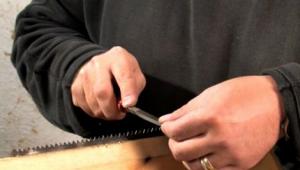
To start with, if it’s a crosscut filed tooth I usually make a very light jointing first with the flat file to give a very small shiner you’ll remove as you sharpen – just enough to give an indicator of where you are as you use the file. You can then simply count the strokes on each tooth, as it’ll usually only be two or three passes to get the bevel. I still prefer to work to a shiner though as you can see exactly where a tooth may need a little more or less and in doing so you should eliminate the need for full re-jointing too often.
On a rip file, the teeth are simply filed straight across and on bigger teeth where it’s simple to spot what you are doing, you simply have to apply a stroke or two of the file on the front of each ‘away’ facing tooth so that you aren’t working against the set.
The method is to work back to the handle for the first run, then swing the saw horse through 180° to work the fronts of the remaining teeth. A crosscut saw is done in an identical manner, but you have to swing the file across at an angle to introduce the point of the tooth. And, as mentioned earlier, altering the amount you angle the file, the more pointed it becomes but the fragility of it also increases. You don’t want to be excessively angled here; a 45° bevel will be best in softer timbers, but a blunter 60° bevel is a good general angle for the bevel in all work.
Although the jointing and topping procedures are needed to keep the saw in good nick, you should be able to file the saw for a number of times simply touching up the teeth as needed without the need for the first stages.
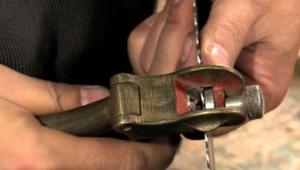
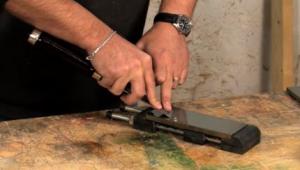
The set will need to be reintroduced, and you may find that you have overset the saw or it cuts a little rough. The burrs from the file can cause roughness, although they should snap away as the saw is used. By placing the saw on a flat surface, you can run an oil stone along the flat of the blade on the set teeth, spinning the saw over and repeating. This not only knocks the set back, it also hits any slightly overset teeth back in line, and touches up the points even more.
It’s frowned upon by some sharpening textbooks, but I’ve used the method since I was 16, and it works well for me.
On crosscut sharpened saws, a good test for sharpness is to lightly drag your fingers over the teeth. They should snag on the points if the saw is as sharp as it should be. Take care, though, as it can easily cut you if you press too hard as you drag.
A neat one if you have an audience is to also drop a needle between the set of the teeth. The V profile formed by the set and the bevel filing will cradle it, and as you tilt the saw, it should slide from one end to the other running along the gullet line if your filing is uniform.
Fine work
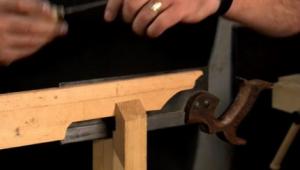
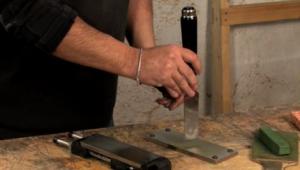
 Of all the things you need for good filing of a saw, good light and good eyesight are essential. Natural daylight is best if possible, but if you use a light, try and get it above or in front of you. If it shines over your shoulder it casts shadows making it harder to see what you are doing.
On a bigger saw it’s not such a problem if you are failing slightly in the optical department, but even good eyes can struggle on the finer saws. If you can get hold of a magnifying lens on an extendable or flexi arm, these help massively to see what you are up to allowing you to pick out any remaining shiners you may have missed.
I can still spot them pretty well, but I often touch the tips on finer backsaws in with a marker pen. After you’ve dressed a saw the gullets are shiny, so any sharpening you do can make it difficult to spot where you’ve been, but the marker pen gets removed with the file so you can see where you are as you go.
Holding the file needs a firm but light touch – the file shouldn’t need forcing, it has to cut smoothly. By resting the index finger of the hand holding the file handle along the top of the file, you can control the file angle for the rake, the index finger supporting and holding the angle.
The other hand is used to control the action as you push, keeping it tracking straight and true through the stroke. The index finger and thumb hold the file at the end and this can, after a while, start to become uncomfortable. As you do more sharpening the finger ends toughen up, however.
I’ve seen corks or blocks of wood used both to hold the file end for more comfort, or with a flat on them as a guide to indicate the file is still at the right angle. For me, the tactile feel of the file is where the control is, so I never bother with additional bits on the file ends. If my fingers do become sore, a couple of plasters usually takes the tenderness out while still allowing me to feel the file as I use it.
Alternative sharpening method
The traditional method is to sharpen alternate teeth each side at a time, but I usually sharpen all from the same side. This isn’t a method I’ve ever seen in any textbook and it’s only viable if you have a tooth style that has a file held at 90° to the blade – rip filed or standard bevel filing, in other words.
This isn’t appropriate when it comes to fleam filing. The file handle is lowered so you’re filing uphill as it were, along with a bevel as well. You can’t sharpen from one side only using this method, you have to sharpen in the traditional manner with alternate teeth worked, then swinging the saw round and repeating.
A college technician showed me how to file all from one face, working each tooth as you go, bringing each tooth up to its sharpened point and bevel, working both the forward facing and the away teeth. It does mean the file will work against the set as you file the teeth towards you and on a bigger toothed saw, it can jar as you do so.
This allows me to see each tooth as it forms and you can get every shiner back as you go – you don’t have to work one way and then the other to bring them in.
Once you get into a routine, the control of the file becomes more natural, you maintain the file pitch, you do have to swing the file for the bevel angle when crosscut filing though. The use of marks on the saw chops certainly help here, you can see exactly where you are going.
It’s not technically the correct method, but for finer rip saw filing it’s the preferred method in my mind. I’ve simply been taught an adaptation for crosscut filing.
- Log in or register to post comments


| Articles | Articles | Articles | More | Subscriptions | Resources |