Strawberry planter

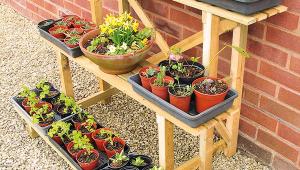
Strawberries are the most popular soft fruit grown at home. They can be grown in open ground among the vegetable plot or in containers standing on the patio or even the edge of the lawn. If you plant them during summer this year you will be enjoying your own home-grown fresh fruit in June or July next year. So why not get a head start and build this dedicated strawberry planter during spring.
There are several advantages to growing your own strawberries in a planter raised above the ground, not least of which is that it will help keep the ripe fruit away from the slugs and snails. The height of the raised planter also makes it easier to cultivate, reducing the amount of bending required to tend the plants a boon for the less able-bodied.
Exterior grade plywood 18mm (3⁄4in) thick is used throughout the entire project. The corners are joined with a water-resistant glue and zinc-plated 45 x 4mm (13⁄4in No. 8) screws. The cheapest way to buy plywood is in large sheets, typically 2440 x 1220mm (8 x 4 ft), but these can be heavy to handle and a problem to transport without an appropriate vehicle. I decided to pay a little extra and get my supplier to cut the sheet into three smaller pieces.
Some DIY stores may not have a cutting service, but you will fi nd they supply sheet materials in smaller sizes that are easier to handle. Although this is an expensive method of buying sheet material, it can be worth the extra when making a small-scale
weekend project such as this.
Cutting the sheet
Using a sharp pencil and steel rule, mark out one side piece and the front on one piece of plywood. Interlace the parts wherever possible to achieve the most economic use of the material. Rough-cut the parts to shape using a jigsaw, photo 1.
At this stage, cut well on the waste side of the line. The parts are only being separated at this stage, and it is not easy to get a straight cut with a jigsaw.
Using a conventional up-cut blade in the jigsaw will tear out the edge when cutting across the grain of the surface ply. To prevent this, fi rst score the cutting line with a marking knife. When the parts have been separated, cut them to just outside the line using a bandsaw. Then plane the edges to the line, ensuring a neat, square edge.
The first two parts are used as templates to mark out the remaining side and back, photo 2. Also mark out the base and cut all three parts to size as before, photo 3.
Fix the ends, front and back together using screws and glue. Bore clearance holes through the front and back panels. Apply glue to the joints and screw them together. Before the glue has cured fully, check that the assembly is square by measuring the diagonals. They will be the same if the glued-up planter is square; adjust it if necessary, photo 4.
Next, bore the clearance holes for the base and fix it in place. Apply a coat of preservative to the inside of the container.
Line the inside of the planter with heavy-duty polythene. I used some old rubble sacks for this as they are easily obtained from a builders merchant and are cheaper than buying a large polythene sheet. The plastic lining does not have to be watertight; it is there to prevent the wood from prolonged, direct contact with the damp soil. The lining is held in place using staples, photo 5. Turn the container upside down and drill some 12mm (1⁄2in) holes through the base so water will drain away.
Add a simple top frame made from strips of the plywood to conceal and clamp the edge of the plastic lining. The four parts for
the frame are cut to size and halving joints are marked on the ends. These are cut on a bandsaw before the four strips are fi tted to the top edge of the container with glue and screws, photo 6. Fit the ends first.
To finish and protect the planter, apply a couple of coats of preservative to the entire surface, taking extra care to ensure that the edges and especially the parts in contact with the ground are thoroughly covered. The preservative used is water-based and is sold for protecting sheds and fencing. It is available in various shades of brown and green as well as clearand occasionally in some other dubious colours.
- Log in or register to post comments
