Turning for beginners, Part 2

If you’re a confused newcomer to woodturning, the sheer variety and cost of the necessary tools may all seem a little off-putting, particularly if you’ve shelled out most of your budget on the lathe itself. However, don’t let this dishearten you. As with a lot of hobbies, woodturning can be as simple or complicated as you want to make it, and you can actually turn quite advanced work with no more than a basic toolkit
Five or six well chosen tools are all you need to get started. The others can come later as you develop your own turning technique, and find out what you need for yourself. In fact, it is probably a positive advantage to keep it really simple in the early stages. You’ll soon learn that there’s no strictly right or wrong way to make a cut. As long as you’re cutting the wood as cleanly as possible, and getting a good finish and the shape you require, it doesn’t really matter which tool you use.
First principles Always remember that turning techniques are highly individual, and what suits one person may not suit another. I can, however, recommend a very basic set of tools that are essential, no matter what technique you later develop. From then on you are theoretically on your own, although there is a huge resource of help out there in the form of books, videos, magazine articles, and even demonstrations at woodworking shows and clubs. Watch and listen to the way other people work, and then adapt their style and technique to suit yourself.
quality brands
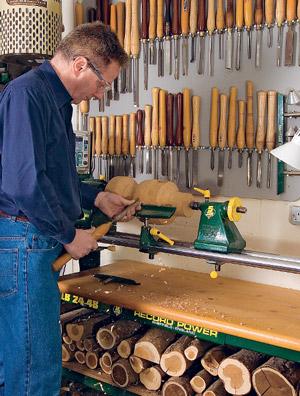
Photo 1. Stay with well-recognised brands
when you’re buying woodturning tools
Pay for quality There are several key players amongst the turning tool manufacturers, and while they all sing the individual praises of their tools, I think there is probably very little to choose between them, provided you stay with well-recognised makes, photo 1. Keep away from unbranded ‘market-stall’ tools that are inevitably poorly made from soft carbon steel. You will always get what you pay for in the world of tools, and as the edge-holding ability is more critical on a turning tool than any other, you are far better investing in fewer tools of better quality.

In fact, because the various manufacturers all produce slightly different tool profi les, only one of which may be suited to your particular technique, you will probably end up with tools from a variety of sources. It is sometimes diffi cult to stay loyal to one brand, even if you want to.

quality brands
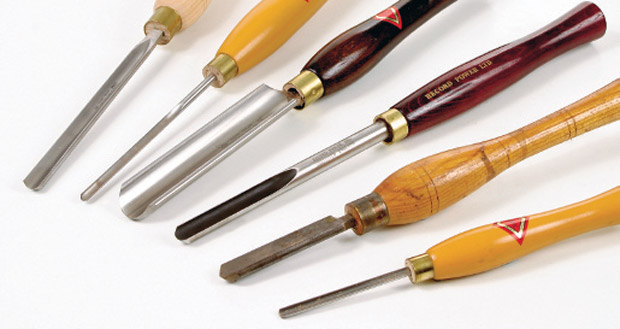
Photo 2. A wide range of different handle styles is available
Handle with care The only signifi cant difference between leading makes is in the handles, which often vary tremendously in style, photo 2. This variation in shape may not appear important at first, but as you have to hold the tool for lengthy periods of time it is essential to fi nd a design that is comfortable for you. Once again, experience tells here and you’ll soon recognise the style and feel that suits your technique. If you want bespoke handles, some manufacturers supply unhandled tools to allow you to make and fi t your own.
Blade parade As well as a vast selection of shapes and sizes of the tool, they are also made in a variety of different types of steel. However, the choice here is much easier. High-speed steel (HSS), with its superior edge-holding qualities, has virtually taken over – mainly because it is very diffi cult to damage by overheating during sharpening. The old carbon steel tools, while superior in the quality of edge they will take, are very easily ‘blued’ and damaged by heavy-handed grinding, and their edge will only last a very short time, particularly if you start turning some of the more abrasive exotic hardwoods, photo 3. New materials like powder technology steel, cobalt coatings and tungsten carbide have all found niche markets, but HSS remains the most popular.
Single or boxed The other dilemma you may face is whether to buy tools individually or in boxed sets assembled by the manufacturer. Many years ago sets were often a poor buy, as they always seemed to contain at least one tool that was totally useless. Things have changed nowadays, and most manufacturers now put together sensible sets containing a range of useful tools. Their attractive price means that this may be a very good way to start your tool collection, photo 4.

When you’re looking through the racks of tools at your local dealer, don’t get sidetracked into buying any of the specialized tools that have been developed for unique applications, photo 5. These are for buying when you need them, or more importantly, when you understand how to use them. Before you get to that stage, you will first have to master the basics.

signs of wear box sets specialized tools
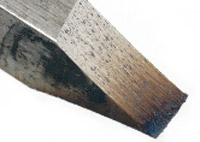
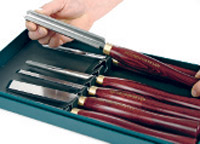
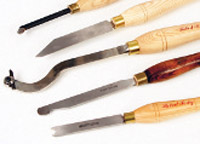
Photo 3. Carbon steel blades will soon start to show signs of wear
Photo 4. Boxed sets are often a good way to start your tool collection
Photo 5. Avoid buying specialized tools until you know that need them
The five essentials You’ll quickly realize that every woodturner has his or her own ideas about what constitutes a basic kit of tools. There is, however, almost universal acceptance of the five essentials, which are a roughing gouge, a parting tool, 3⁄8in spindle gouge, a skew chisel, and a bowl gouge. Some sort of scraper, probably a 3⁄4in or 1in round-nosed version, should be your next purchase, photo 6.
• Roughing gouges come in many sizes, photo 7, from the massive 11⁄2in versions for really heavy spindle work, down to a tiny version for miniature turning. The curvature of the gouge may also vary, but it’s well recognised that a 3⁄4in deep-fluted gouge is most useful, photo 8.
selection of tools roughing gouges using a roughing gouge
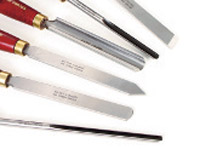
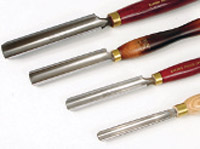
Photo 6. There are a few tools you need to start with
Photo 7. Roughing gouges come in a wide range of different sizes
Photo 8. A 3⁄4in deep-fluted roughing gouge is the most useful size
• Parting tools are the next essential, being used for cutting right through or forming shoulders, photo 9. They vary in width from 1⁄16in to 1⁄4in, and the more elaborate versions may have a flute ground into one edge, or a diamond section, photo 10. For starters, a parallel section 1⁄8in parting tool will do all your parting work with a minimum of waste, photo 11.
parting tools cutting edge using a parting tool
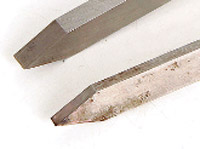
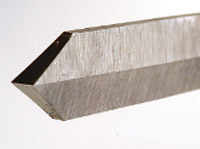
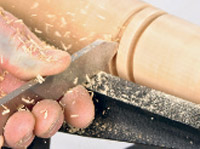
Photo 9. Parting tools form shoulders and separate finished work
Photo 10. Some parting tools have a diamond-shaped cross-section
Photo 11. A parallel-section 1⁄8in parting tool is a good starter
• Spindle gouges not only vary in size, but there are two distinct manufacturing methods used to produce the tools. Until relatively recently, gouges were always forged by hand from a fl at bar, to form uniformly thick tools characterized by a tang that fits into the handle, photo 12. The advent of HSS has meant that a lot of tools are now ground from solid bar, which is a much quicker and cheaper process. These round bar tools are quite satisfactory and, in fact, most spindle gouges are now of this section, photo 13. Popular sizes are 1⁄4, 3⁄8 and 1⁄2in, and you will eventually need one of each, but start with the 3⁄8in size for now, photo 14.
gouge end profile gouge cutting edge using a spindle gouge
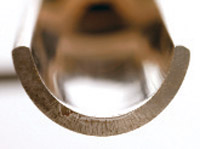
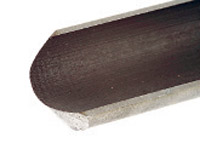
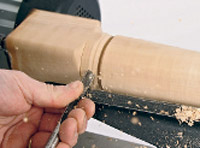
Photo 12. Gouges used to be forged by hand from flat bar steel
Photo 13. Most gouges are now ground from a solid round bar
Photo 14. Your first spindle gouge should be the 3⁄8in size
• Skew chisels have also had something of a modern update. The traditional fl at skew chisel, so feared by most beginners because of its undeserved reputation for digging in, now has more a more user friendly brother in the form of the oval skew, which has a curved profile and rounded edges that slide much more easily along the tool rest, photo 15. They all work in the same way, and size is not really so important. My preference would be for a 3⁄4in or 1in skew, photo 16.
gouge end profile using a spindle gouge
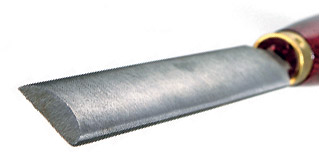
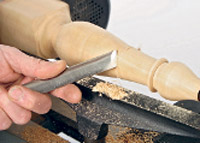
Photo 15. Oval skew chisels slide easily along the tool rest
Photo 16. Choose a 3⁄4in or 1in skew chisel to begin with
• Bowl gouges are similar to spindle gouges in that they too are ground from round section bar. However, in this case the internal profile is different and is much more U-shaped than that of a spindle gouge, photo 17. Bowl gouges are also much longer and stronger than spindle gouges to withstand the greater forces generated during bowl turning. Like the spindle gouges, a 3⁄8in version is the most useful size to start with, photo 18.
bowl gouge profile using a bowl gouge scraping tools
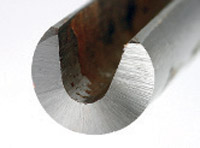
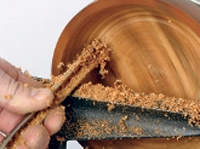
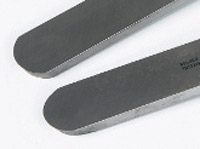
Photo 17. The bowl gouge is more U-shaped than the spindle gouge
Photo 18. A 3⁄8in bowl gouge is a useful size to start with
Photo 19. Scrapers are viewed with contempt by some woodturners…
Photo 20. … but give most acceptable
results if they’re used properly
• Scrapers are always looked upon with some contempt by professional turners, photo 19. This is mainly because although they’re very simple to use, they have been misused over the years either to perform either the wrong function or to work on unsuitable timbers, resulting in torn out or massively bruised fibres that are almost impossible to finish. However, scrapers do have a place in your tool kit, and provided they are used properly, the results are quite acceptable, photo 20.
Sharpening your tools Of course, any cutting tool has to be sharp for it to perform properly, and woodturning tools will require more sharpening than any others. Imagine how much wood is passing over the edge when the timber is revolving on the lathe at 2000rpm. It has to stand up to miles and miles of continuous use. A grinder of some sort is therefore essential, and most woodturners use a standard double-ended version for the majority of sharpening, photo 21.

The good news is that nowadays you don’t need to spend a fortune to get a very serviceable machine. You need one with wheels of at least 6in in diameter, and as wide as possible. This is where the cheap machines differ from the more expensive ones. Budget grinders often only have very narrow wheels that make the grinding process a bit trickier to control, photo 22.

Better quality grinders will have much wider wheels, and the composition of the wheel may also be better. White wheels are renowned as being more suitable for sharpening HSS tools, photo 23.

double ended grinder narrow grinding wheels white grinding wheel fitted to grinder
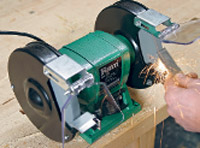
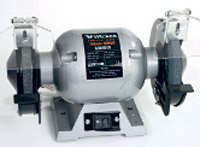
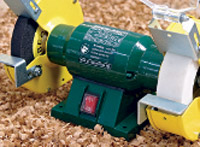
Photo 21. A standard double-ended grinder will do most of your sharpening
Photo 22. Narrow grinding wheels make the tool difficult to control
Photo 23. White grinding wheels are best for sharpening HSS blades
Good Practice As you’ll have to use the grinder regularly, it’s important to locate it near the lathe, or you’ll spend a lot of time wandering about the workshop. However, just having a convenient location isn’t the end of the story. For it to work effectively, the wheels must be cleaned regularly by ‘dressing’ them. For this you need a dressing stick. Holding this against the revolving wheel cleans off all the impregnated metal, and exposes a fresh surface that will grind more quickly and without overheating. You can’t use a grindstone without a dressing tool, so make sure you buy one with the grinder.
Sharp advice Unlike most other wood-cutting tools, it is unnecessary to hone woodturning tools. The edge formed by a fine grinder is sharp enough for most purposes and, in fact, you often do more damage to the edge trying to sharpen it further with an oil stone. Certain tools like the skew chisel may benefit from a little light honing with a fine slip stone, but don’t overdo this, and be prepared to regrind them regularly.

Many professional turners will sharpen their tools freehand on the grinder, and whilst this may look simple, it will have taken them some years to perfect their technique. It’s actually quite simple once you get the hang of it, but do your practicing on some old tools first!

Handy jigs If you’re still struggling with sharpening, there are all sorts of jigs available to help you get a professional-looking grind. Some of these are easier to operate than others, so try to arrange for a demonstration of a particular jig before you buy it. Many of them are very fiddly to operate and take ages to set up, which means you end up not bothering to use them, and therefore defeat the purpose.

There are, however, some jigs that are so simple to operate that even the seasoned professionals find them useful – particularly with the more involved grinding profiles required on some of the latest tools, such as the Ellsworth gouge profile.

X