In your own time
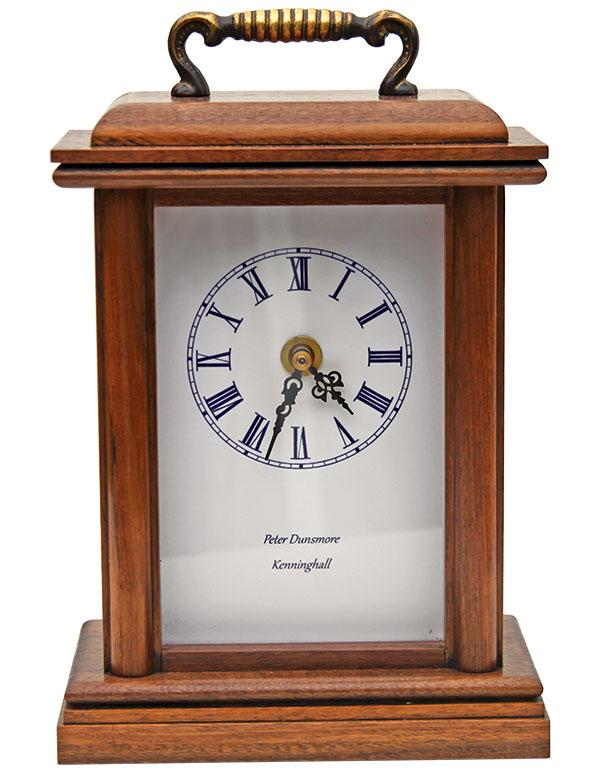
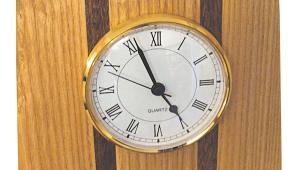
There’s something very elegant about a carriage clock. The simple lines and smaller size makes it suitable for most rooms, knowing that the quartz movement will just carry on ticking away requiring little more than resetting twice a year in line with British Summer Time, and the occasional wipe with a duster.
Very little material is needed to complete this project, and to simplify it even further, I’ve designed the main components to be made from one thickness of readily available timber throughout. Obviously access to a small table saw will speed up construction as well as the use of a router for the mouldings, but equally good results can be achieved using a hand saw and wood plane.
Regular readers will know that I’m a big fan of a disc sanding machine and its ability, when properly set up, to produce the accurate butt joints used for some of this project. Timber choice is a matter of preference and availability, but for this version, I used walnut, obtained from Hobby’s – www.hobby.uk.com – in 6mm thick boards, which were glued together to produce the 12mm thickness required.
PARTS LIST
The below components can be found on the Hobby’s website: www.hobby.uk.com
Five pieces of walnut – Pt No.164WAL
6mm plywood Butt hinges – Pt No.12004
Screws – Pt No.12019
Clock hands – Pt No.106/7
Quartz movement – Pt No.738/12
Brass latch – Pt No.LS1
Fixed handle – Pt No.1695/78
25mm brass rings – Pt No.2 @ 403/1
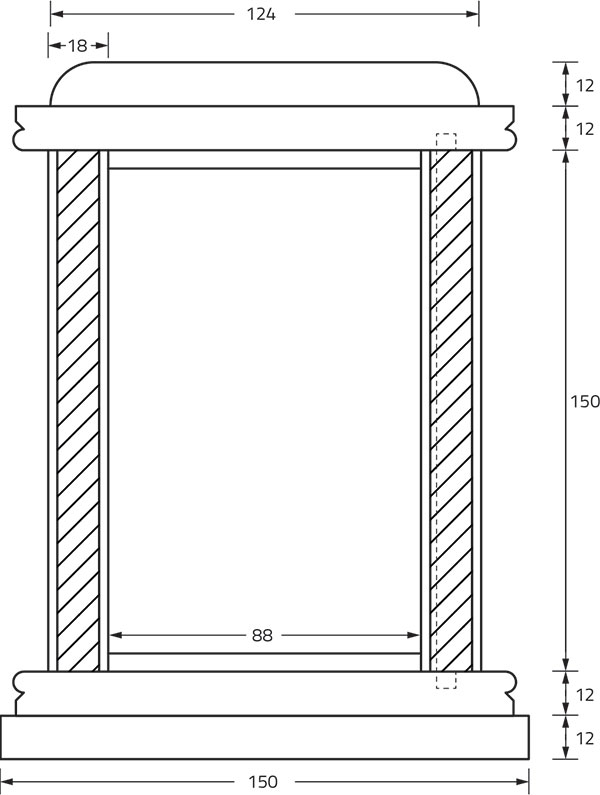
CUTTING LIST FOR MAIN COMPONENTS
2 sides @ 160 × 60 × 12mm
1 lower base @ 150 × 80 × 12mm
1 upper base piece @ 146 × 78 × 12mm
1 lower top piece @ 146 × 78 × 12mm
1 upper top piece @ 124 × 72 × 12mm
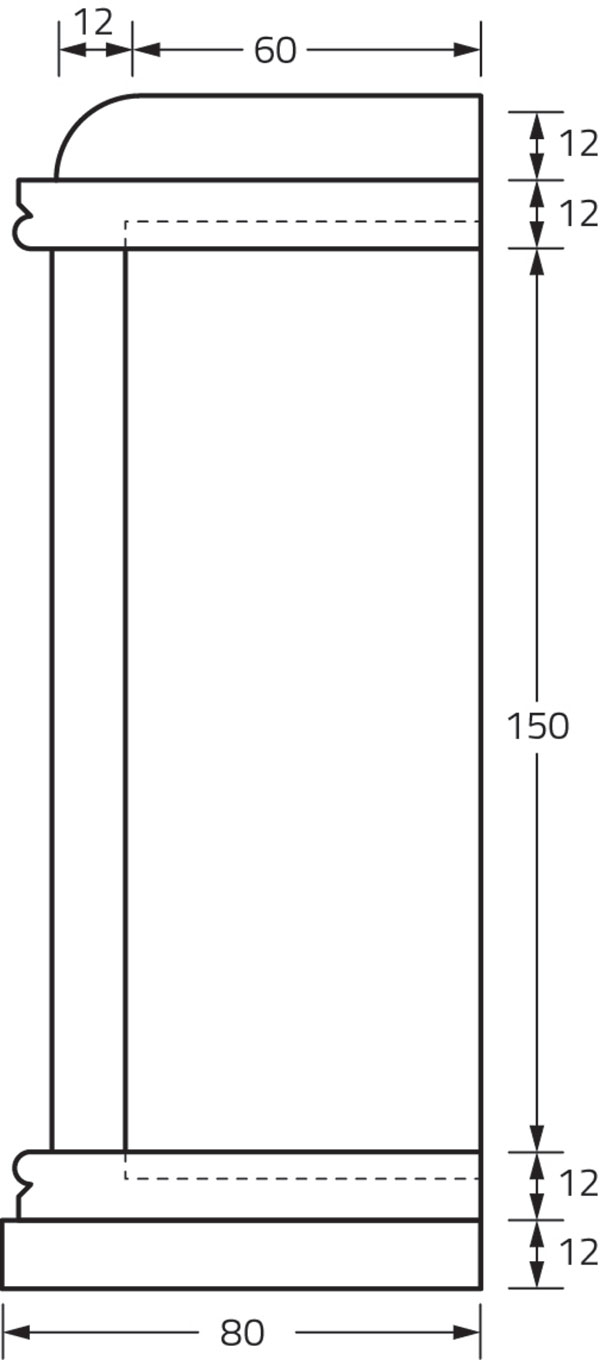
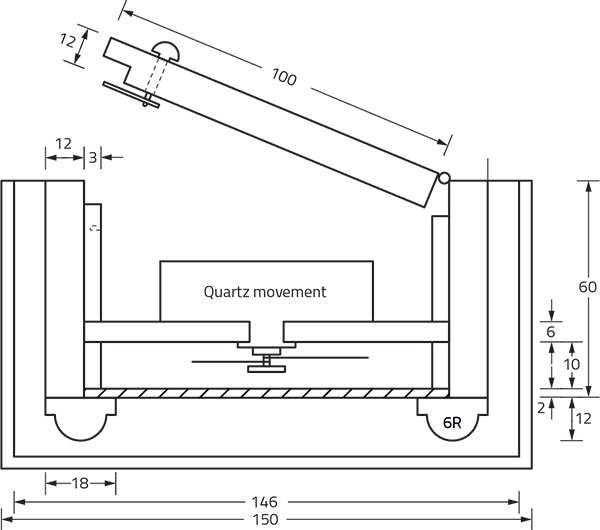
DRAWINGS
Making a start
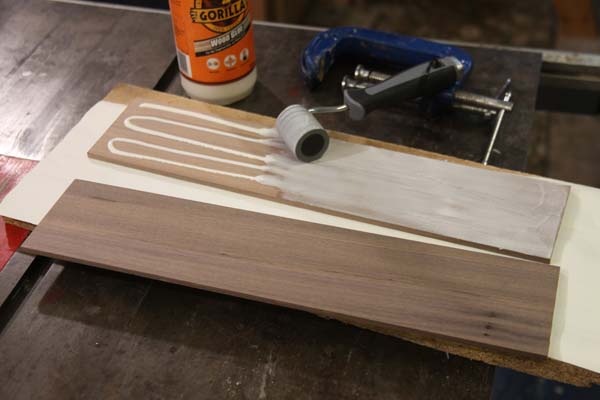
The entire clock requires five 100 × 6mm walnut boards for its construction, which are available in just over 450mm lengths, and if care is taken in the cutting, there’s very little wastage. Begin by gluing together two pairs of boards, ensuring to spread the adhesive evenly over the surface.
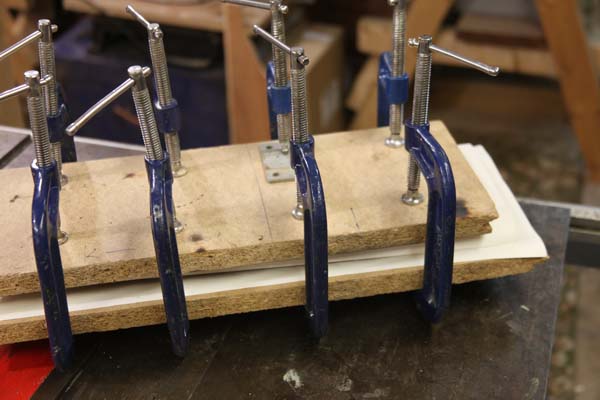
A method that I find works very well is to spread this using a wallpaper seam roller, remembering, of course, to wipe the roller clean before the glue dries (photo 1). Clamp both together between some flat boards and allow to dry thoroughly. Some paper between the chipboard and walnut will prevent any squeezed-out glue from bonding these materials (photo 2).
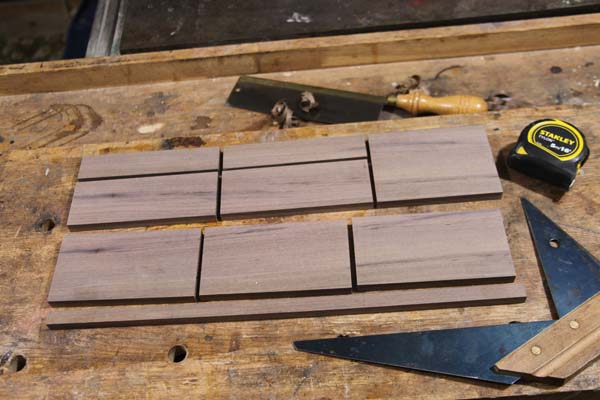
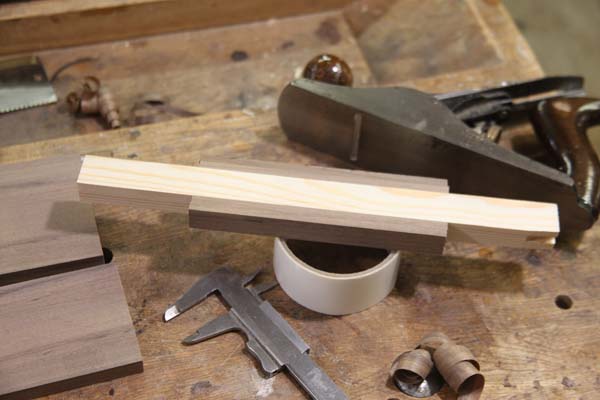
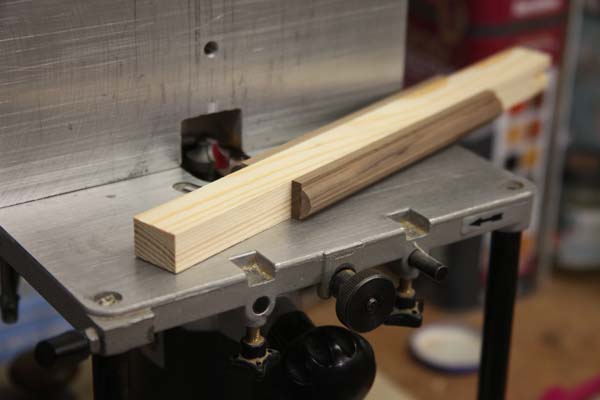
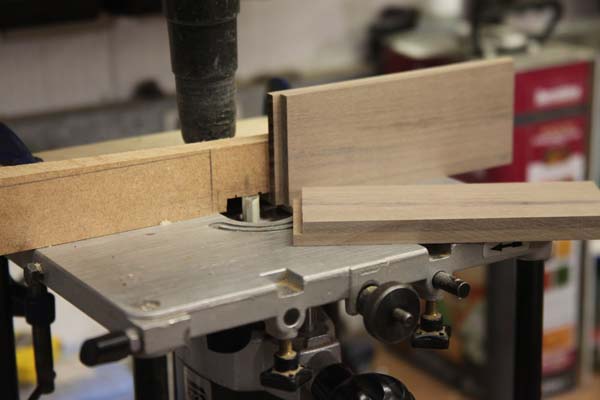
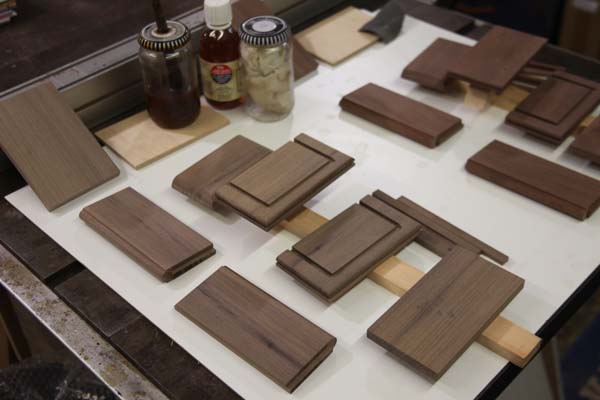
The main components can all be cut from both boards, with very little wastage, if you ensure to follow the plan layout (photo 3). The two pillars at the front of the case sides are made in the following way: take some timber a little over 18mm thick and use double-sided tape to secure both walnut pieces on either side of it (photo 4), then plane to 18mm thickness.
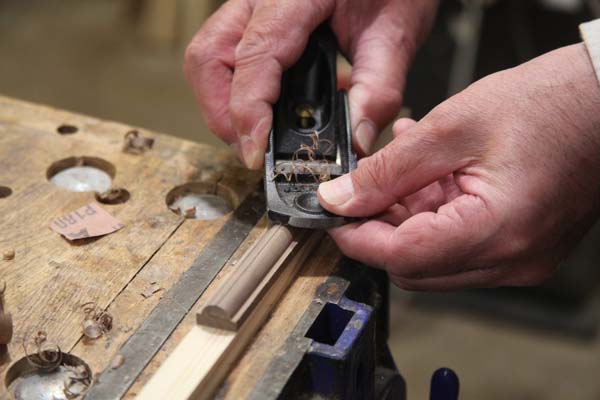
Using a 6mm rounding-over cutter, form the bead on the walnut’s front face taking progressively deeper cuts for a better finish. I leave a tiny ridge along the bead’s centre, which provides extra support as the wood is pushed along the fence. Err on the side of keeping the cutter a whisker behind the fence rather than too far forward, otherwise you risk losing the curved shape.
Assembling the timber in this way gives the block extra support on the router table as well as keeping your fingers further from the cutter (photo 5). Finally, use a chisel to prise the moulding off the scrap and remove the shallow ridge before sanding to a smooth finish (photo 6). Once complete, put aside for the time being.
Making the floor & roof
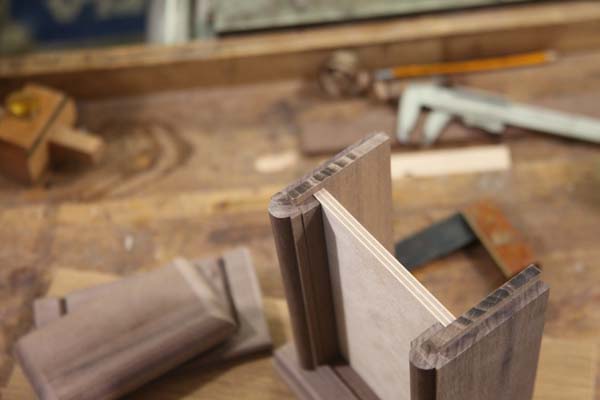
The floor and roof pieces are identical to each other and are made in the same way, using a router table fitted with a 6mm straight-fluted cutter and setting the fence to produce 5mm deep grooves. As you can see, the two grooves don’t run right the way through the width of the timbers but are stopped short, the ends being ultimately covered by both front pillars.
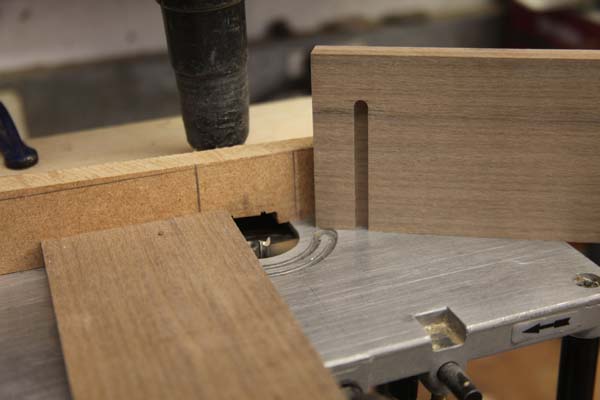
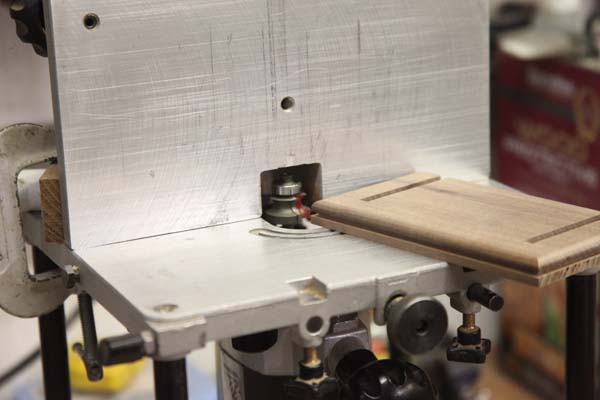
Cutting one groove is straightforward as the timber is simply pushed right to left against the fence in the normal fashion. The challenge arises when cutting the second groove as it’s not safe to push timber left to right on the router table. To overcome this, secure a piece of MDF against the fence (photo 7), mark a pencil line on the MDF where the timber will stop and make a mirror image of this line to the left of the fence. Create the first groove by pushing the timber right to left, stopping when it reaches the first line.
The second parallel groove is a little trickier, but the idea is to marry up the end of the timber with the second line to the left of the cutter, push the timber down onto the revolving cutter, then push the timber right to left. This is quick, accurate and both grooves are the same distance from the edges. Repeat for the second piece of timber.
You need to cut the sides 10mm longer to allow for the 5mm tongue into the grooves previously cut into the floor and roof part. This is relatively simple and only requires a straight cutter set to the correct depth of cut and distance from the fence, to ensure a sliding fit into both roof and top pieces (photo 8). The disc sander comes into its own here, ensuring the ends are finished square. A couple of shallower passes makes for a far better finish.
Add a decorative edge to the top and lower edges of both floor and roof, which will visually soften the clock’s attractive lines – a 6mm diameter bearing-guided bead cutter makes light work of this (photo 9). When setting up the cutter, ensure the bearing is level or just proud of the fence and set the depth of cut to avoid cutting a ridge along the top edges.
Test on a scrap piece first and remember that only three sides are grooved as the clock’s reverse is left flat. Finally, for this stage, cut two rectangular pieces for the base and roof top. Finish the base with the edges square, but add an overhang of 2mm or so on the front and both sides. Cut the top rectangle so the edges, when viewed from the front and sides, visually line up with the lower case.
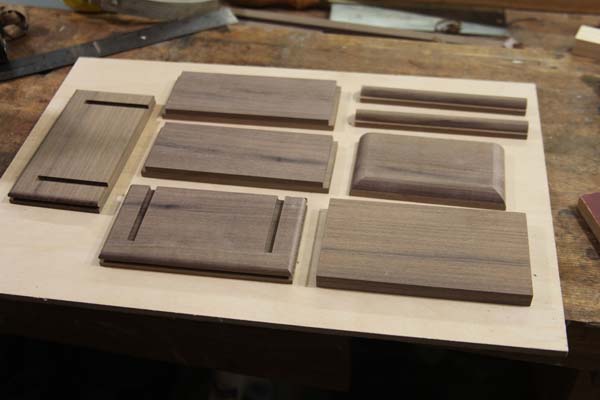
Once cut, use a 12mm rounding-over bit to shape the roof top’s front and both sides. In the absence of this, a satisfactory result can be obtained using a small plane and some abrasive wrapped around a cork block. The main components for the clock case can be seen in photo 10.

Build up time
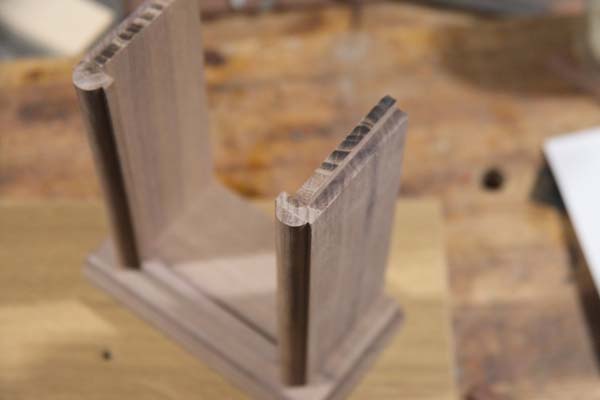
Cut the two front pillars, then trim to length and glue in place on the front of both side pieces, ensuring that the overhang lies on the inside of the clock case. Use abrasives to smooth the sides level and ensure to remove all traces of adhesive.
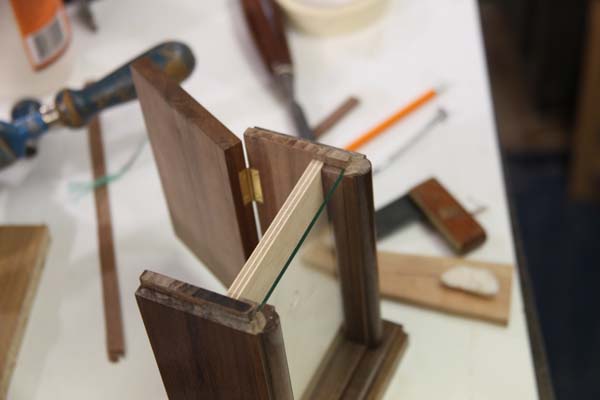
Once dry (photo 11), carry out a dry assembly of the main components and make any adjustments as required. Cut small glass retaining strips so they fit inside the case (photo 12); these act as spacers between the back of the glass and clock face. Cut a plywood panel so it’s a snug fit into the case – the clock face will later be stuck onto this (photo 13).
Next, cut two small pieces of timber to fit between the pillars on both the floor and roof piece. Although these can easily be glued in place, I cut a groove in the floor and roof component after carefully setting the distance on the router table. Once you’re satisfied that all goes together, consider applying a finish of your choice to the various components before final glue-up. I used double-sided tape to secure the components to some scrap and taped this to a baseboard (photo 14).
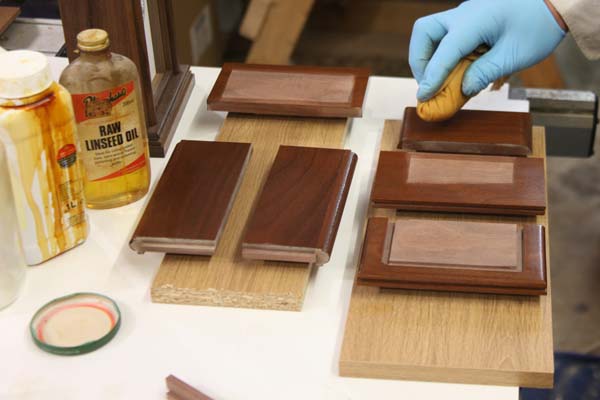
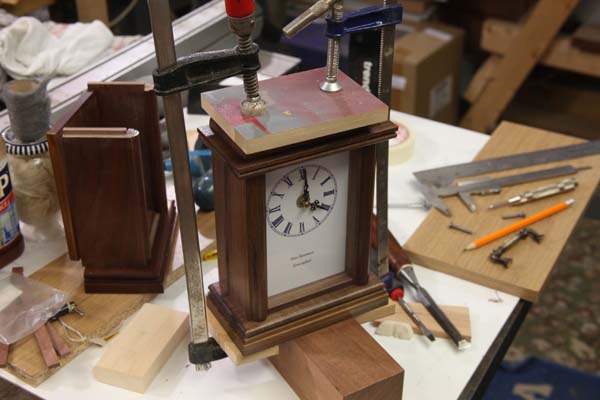
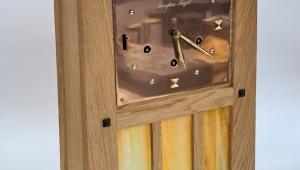
In the case of this clock, I used a pale shellac polish to seal the wood as it retains the walnut’s colour prior to applying a clear wax polish. Button polish works very well on the English walnut used for the second clock (photo 15). Although the main clock case components are now complete, we still have to make a rear door.
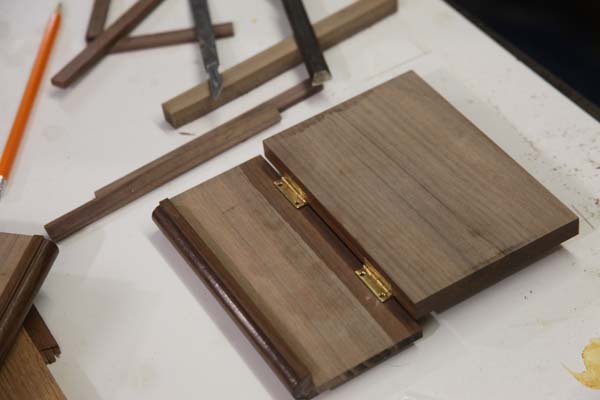
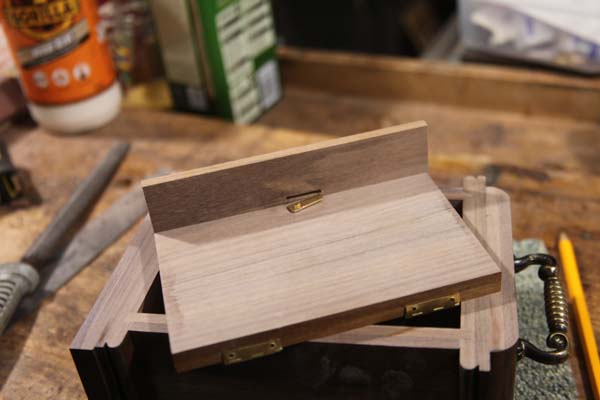
This uses a similar method to the sides: glue two pieces together to make up the thickness, and cut the timber to fit the opening. Use a sharp chisel to cut out the shallow rebates required to fit the hinges used (photo 16) – these are easier cut prior to gluing up the case (photo 17).
Next cut a rebate along the door’s edge to fit the slip that holds the clock face in place (photo 18). Once you’re happy that everything fits as it should, apply adhesive sparingly, clamp up and put aside to dry. I found it easier to screw the base and top parts together prior to gluing the sides, which prevents the slippage that sometimes occurs when the clamps tighten (photo 19).
Also, if you intend to fit a carry handle, it’s easier to drill the necessary holes before gluing and ensure the sides are flush with the back of the floor and roof pieces. Remove the plywood panel and keep aside for the face.
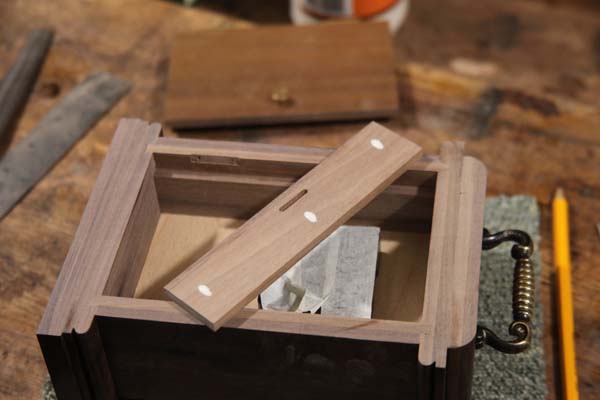
Either screw or spot glue the slips in place, so they can be removed easily should the glass require replacing in future (photo 20), although they shouldn’t be fitted until you’ve made the clock face. Note that a small slot also needs to be cut into the slip to suit the catch fitted to the door.
Making the face
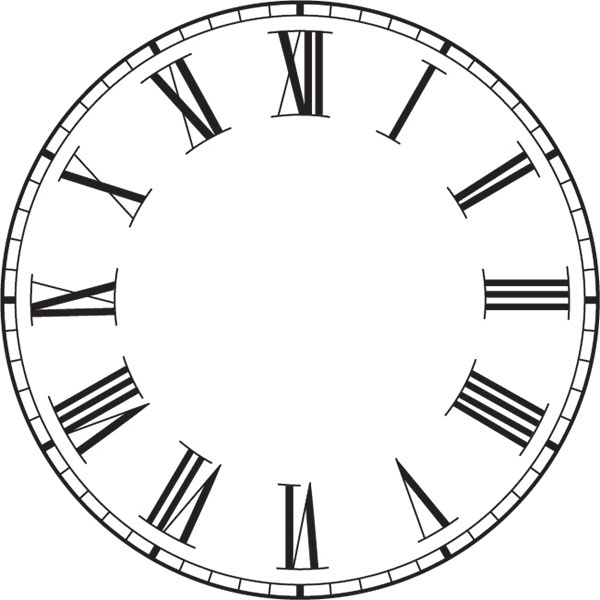
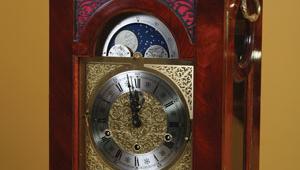
What are the Roman numerals for number four? most people will say ‘IV’ but look at any clock older than the internet and you may be surprised by what you see. My youngest even tricked her school teacher during a history lesson with this little known observation. It’s something we all look at every day, but don’t really notice. It actually reads ‘IIII’ and, visually, this looks far more balanced than ‘IV’. Perhaps the old clock makers did know a thing or two?
Having made the case, you can now move on to the face. Unless you’re really lucky and able to purchase an old carriage clock face of the correct dimensions, you’re ultimately going to end up making your own. The method I came up with worked really well and involved searching on Google Images for a clock face template.
The tricky part was finding one that was correctly numbered. Most seem to be ‘IV’, which looks really odd. Surprisingly, several also have the ‘V’ upside down and what’s supposed to be the ‘9’ and ‘11’ in the wrong places. The numbers should read correctly as though you’re looking outwards from the centre of the clock face. So, pay attention to this and ensure to download a template with the correct configuration. I transferred the one I used (Fig.4) to a word document, so I could tweak it to give a 70mm diameter; this will suit the minute hand and any other embellishments added as desired.
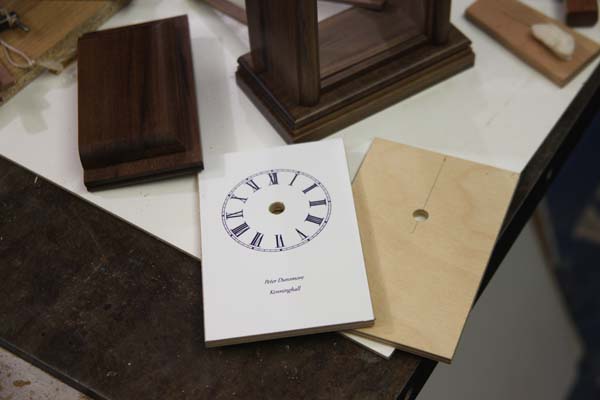
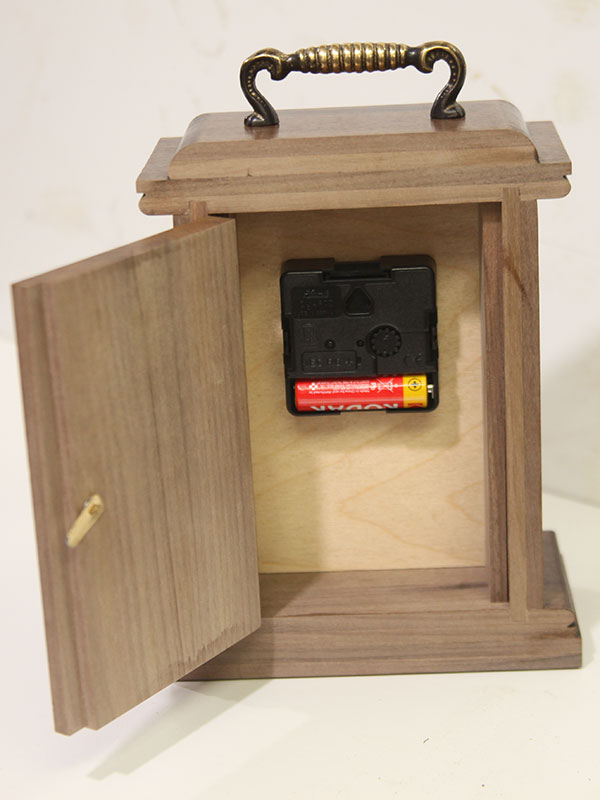
After printing this on photographic paper, I glued it to the piece of plywood previously trimmed to fit into the clock case (photo 21). Drill a 10mm diameter centre hole and secure the quartz movement in place using the supplied bush. Next, spot glue four 3mm thick pieces of timber, 10mm wide, in place to securely hold the 2mm glass. Fit the clock face into the case and hold in place using the previously cut slips. Finally, fit the carry handle or a couple of ring pull-type handles on the case sides. A good look through the Hobby’s website will reveal a variety of useful items to suit this clock.

- Log in or register to post comments


| Articles | Articles | Articles | More | Subscriptions | Resources |