Cutting Housing Joints
A well-made housing is a strong and reliable joint that’s simple to make. There are several variations that have evolved to suit different situations. The simplest is the through housing, where the joint runs the full width of the workpiece, and is clearly visible at both ends. A more refi ned version is the stopped housing, where the front edge of the joint is concealed, resulting in a neater appearance. Where maximum strength is needed, the dovetail housing is employed. This is the most demanding of the housings to make, as accuracy is critical to its strength.
Follow these steps to make a stopped housing joint. Before you begin, make sure that your cutter and shelf thickness match. The easiest way to do this is to make a trial cut in a piece of scrap wood, then to thickness your shelf until it’s a snug fi t. Alternatively, you may have to make several passes with your cutter to achieve the desired width.
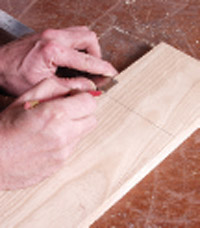
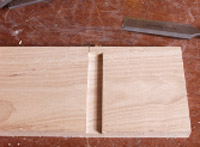
1] Take a try square and mark out the position of the housing on one side of your workpiece
2] Mark the end of the joint. It should be set about 8 to 12mm in from the front edge of the wood
3] Make sure the marked lines are clear; if necessary, go over them with a marking knife
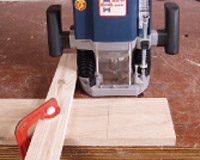
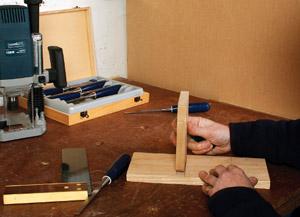
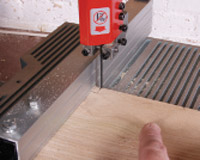
4] Clamp a batten across the workpiece to guide the router, and use your try square to set it at 90° to the edge
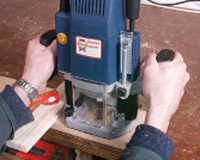
5] Set the depth of cut and make several shallow passes. The depth should be no more than a third of the wood’s thickness
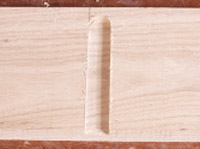
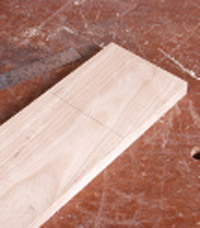
6] The routed housing. Be careful not to overshoot the end mark
7] Square off the round end of the housing with a sharp chisel
8] The completed housing, ready to accept the end of a shelf
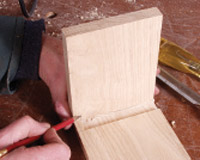
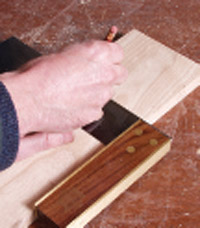
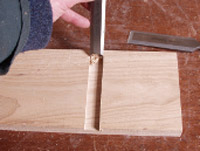
9] Hold the shelf member beside the housing and mark off the width of the notch to be removed
10] Hold it against the end of the housing and mark off the depth of the notch. Check that the marks line up
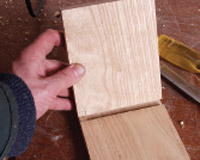
11] Cut away the notch with a bandsaw or a tenon saw. Apply glue and assemble the joint
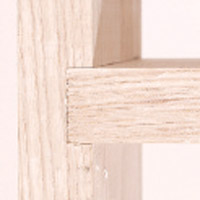
12] From one side of the joint, the open end of the housing is clearly visible
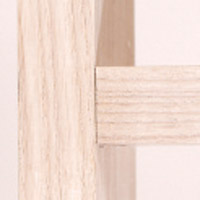
13] From the other side, the joint is completely and neatly concealed
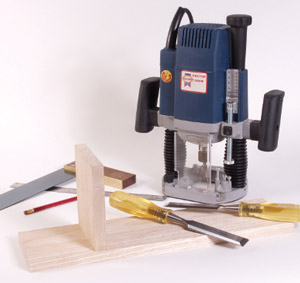
■ straightedge
■ pencil
■ try square
■ chisels
■ mallet
■ router
■ straight cutter
■ bandsaw or tenon saw
■ abrasive paper
- Log in or register to post comments


| Articles | Articles | Articles | More | Subscriptions | Resources |