Flat & Square

You’ll also need a straight edge and a pair of winding sticks. I tend to cheat here, and use the body of my jointer plane as a straight edge or in combination with my jack plane to form a pair of winding sticks. This will only work if the sides of your planes are straight and at right-angles to their soles. If yours aren’t, then a pair of winding sticks is easy and cheap to make (Note to self: I really must do it one day!) Alternatively, you can buy machined winding sticks from Lee Valley, but where’s the fun in that?
The final ingredient is a sturdy bench. It’s important that the bench surface is flat, of course, as you’ll be using it to prepare a reference surface.

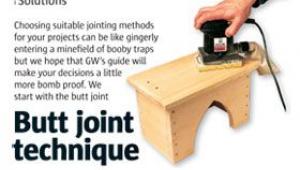
1: Back to basics: the whole process of stock preparation can be carried out using hand tools.
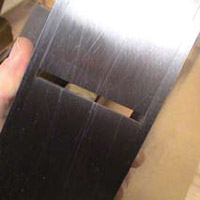
2: Grit or silica embedded in the timber will damage the sole of a plane
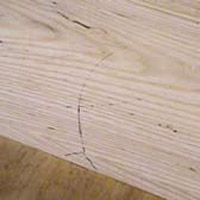
To begin, then, you need to prevent the workpiece from rocking or flexing, so decide which side of the board will be the reference face, and place it face down on the bench against a planing stop. If the board is cupped, it’s easiest to have the convex side face up to prevent it from rocking as you work on it; it also means removing less wood.
You now need to remove the high spots from the board so that it no longer rocks when placed face down. This means looking at the board, looking for light between it and your straight edge, planing away the high spots, and regularly testing the board for stability.
If the board rocks when you turn it over, try placing your fingers at diagonally opposite corners and moving them towards one another while rocking the board. When the board stops tipping, the high spot will be between your fingers. Another method is to rub the face of the board on the bench top which will burnish the high spots and make them easier to see. There is no shortcut to this unfortunately; the board must be made to lie still before moving on, or we won’t be able to make the opposite side flat when we prepare it as the face side, and it’ll be no use as a reference face.
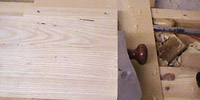
When you’re ready to start preparing what will become the face side, fix the board to the bench top firmly enough to stop it moving, but not so firmly that it’s deformed by clamping. There are several ways to achieve this. I use a planing stop and rely on the downward force of the plane to hold the board in place. Again, the aim is to remove any bumps that may be present, and the quickest and easiest way to do this is with the jack plane, usually skewed across the grain to bring any high spots down to a uniform level. Alternatively, you could use a scrub plane, though there’s a danger of removing too much wood through over-enthusiastic scrubbing. It’s very easy to be caught up in a scrubbing frenzy as the chips fly past your face…
Once the worst of the bumps have been removed, put the scrub or jack plane aside and reach for the jointer. The longer sole of this plane won’t follow the contours of the board in the way that the jack plane does, and so is more effective at knocking off the high points. One of the pleasures of this process is listening to the plane and hearing the change in sound as the jointer starts to take longer shavings as the board gets flatter.
When you’re able to take fulllength shavings with the jointer, check that the board is flat. You should be continually checking for light under a straight edge when held against the surface, both across the board at various points and along its length. This is why I use my plane as a straight edge, because moving from planing to laying the plane on edge is easy to do; there’s no need to put the plane down and hunt around under the shavings for another tool.
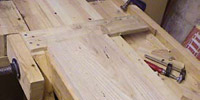

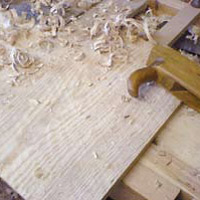
3: With a planing stop, you can rely on the downward force of the plane to hold the board in place
4: Check for twist with your winding sticks. If all’s well, the top edges of each stick will be parallel…
5: …unfortunately, it’s more likely that the sticks will indicate some amount of twist
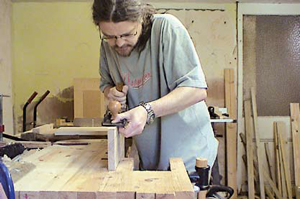
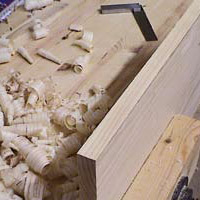
6: Successful edging: I hold the front of the plane body with my left hand, curling my fingers under the sole of the plane to act as a fence.
7: You’ve heard it before, but mark prepared surfaces to indicate that they’re reference faces and edges
Again, start by fixing the board to the bench. There are as many ways of doing this as there are people doing it, but I clamp the board in my shoulder vice so that it is held firmly to the front side of the bench. If it’s a particularly long board I will place another batten under the unclamped end to help support it.
The jointer plane is the tool for preparing the edge, as its length allows it to ride over any valleys in the board’s length. Some more experienced practitioners advocate preparing the edge of a board with a curved iron. I might try it one day, but for now I get perfectly good results with a straight iron.
My approach is to check the wood with a straight edge and identify what the high spots are; it’s sometimes helpful to mark them with a pencil. After taking a couple of light passes over the edge with the aim of removing the pencil marks, I check the edge for squareness with a small engineer’s square referencing off the face edge. I do this at several points along the length of the edge and again mark any areas that need attention with a pencil, though usually they’re glaringly obvious. I continue to take light shavings from the edge until the pencil marks are gone and I can take a full-width, full-length shaving, constantly checking for squareness and addressing any deviations as I go.
The secret of successful edging, I think, is partially in the grip and partially in keeping the plane body horizontal. You can tell whether it’s horizontal by the tote, which should be upright not tilted. As for the grip, I hold the front of the plane body itself with my left hand, with the thumb on top of the plane and central to the body, usually just in front of the knob. I curl my fingers under the sole of the plane and keep them pressed to the face of the wood so that I’m pinching the plane sole and using them as a fence to keep the plane straight. Make sure your board is high enough in the vice to avoid driving your knuckles into it. That hurts.
The best way to check for squareness of the edge to the face side, meanwhile, is to press the stock of a square tightly against the edge you’re working on and look for light between the blade of the square and the face side at points along its length. There should be none, and when this is the case you can mark the edge as your reference edge. Now that you have two well-prepared reference sides, you can use them to accurately measure and mark off the other four sides.
Winding sticks If poor eyesight makes it difficult to focus on both sticks at once, try making a small hole in a piece of paper and looking through it; the hole acts as an artificial iris and increases your depth of vision.
You can square and true this edge using the same methods you used on the first edge, continuing to take light shavings from the edge until you’ve just shaved away the gauged line.
When it comes to the ends of the board, you’ll need a square, a shute board, and a plane. Now, there are different types of plane that can be used for this job; I tend to use my low-angle jack set for a very fine cut, and with its adjustable mouth closed right down. Another plane that could be used is the iron mitre plane which is designed specifically for this purpose. Whichever plane you choose, the iron must be fiendishly sharp; we’re aiming to create shavings here, not scrapings and dust.
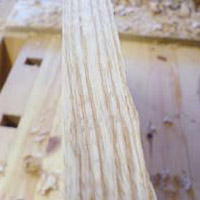
8: Use a scrub plane diagonally across the board to take down almost to the required thickness…
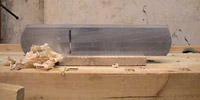
9: …leaving this distinctive scalloped surface
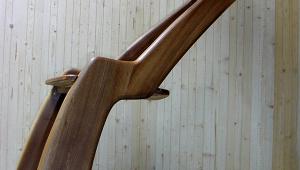
10: Flat. Square. And not a power tool in sight
11: A shute, or shooting board, and a fiendishly sharp plane iron…
12: … are essential for preparing the ends of a board
…and develop a feel for them You have to learn how these tools feel when they’re working for you. This is a case of building up muscle memory through practice. I think that the modern requirement for instant gratification, for having everything now, is partly to blame for the prevalence of machinery in small workshops, as the machinery produces usable results without the requirement for us to commit time investment in practicing hand skills.
Don’t make work for yourself This might seem an odd thing to say given that I am talking about preparing wood by hand, but don’t do unnecessary work. Don’t leave boards hugely over-length thinking that you can come back and cut them to length later. The dimensioning is part of the preparation.
Don’t make waste Don’t waste time using the scrub plane to reduce a board’s thickness by half. Break out a frame saw or rip saw instead, and resaw the board into two pieces. Where once there were six sides now you have 12. Just think of all the hand tool practice you can get while making that flat and square!
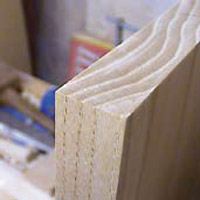
The required thickness of the board is marked by pressing the fence of a cutting gauge against the face side and scribing a line around all four edges. With the board secured to the bench, waste away wood until you’ve reduced the thickness of the board almost to the gauge mark. I prefer to use a scrub plane for this as it’s by far the fastest method and because the scrub plane satisfies my inner hooligan. I plane diagonally across the board in one direction and then back the other way. This method means that I am able to take a heavy cut without causing tear-out; the scalloped surface that the scrub plane leaves is a kind of controlled tear-out in itself. If the board is tearing out, increasing the angle of attack can help; some boards may need to be approached at up to 90° to the surface grain.
Just before reaching the thickness mark, I swap to the jointer plane and take the board down as far as the marks around the edges, checking periodically with the edge of the plane that I‘m keeping the surface flat, and stopping just as I reach the marks on the edge. If you do this evenly all around the board, you can be confident that the two sides will be parallel to each other, and that the face itself is flat.
Now move on to the final step of the process, which is to take very fine overlapping passes across the board with a smoothing plane. With care, it’s possible to achieve a standard of finish with the smoothing plane that can’t be bettered by sandpaper.
- Log in or register to post comments


| Articles | Articles | Articles | More | Subscriptions | Resources |