Making lapped dovetail joints
It’s a demanding joint to cut. It’s similar to the through dovetail, but the added complication of the lap makes the waste considerably more diffi cult to clear from the pin member. For an elegant appearance, try to keep the pins as narrow as possible. Before starting to make the joint, prepare your timber carefully, ensuring that the ends are square and the thickness uniform.

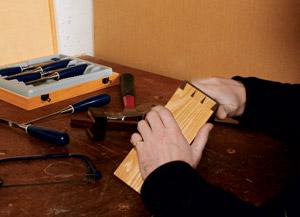
1] 1 Start by marking the thickness of the lap on the end of the pin member. Don’t make it too thin, as otherwise it may break out; aim for a minimum of 4mm. Run the gauge along the inside face of the workpiece
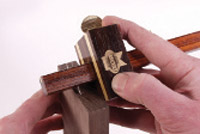
2] Using the same setting on the marking gauge, mark the end of the tail member. Then set a sliding bevel to a slope of 1 to 8 for hardwood and 1 to 6 for softwood
3] Use the sliding bevel to mark out the tails. Mark a line 4 to 6mm from each edge, then divide the space between these two by the number of tails. Mark the tails down to the line gauged in step 2
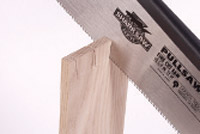
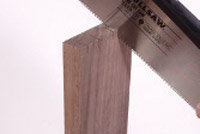
4] Fix the tail member vertically in a vice and use a fi ne-bladed saw to cut out the tails. Keep on the waste side of the line as you cut, and be careful not to overshoot the gauged line
5] Use a coping saw to remove the remaining waste from between the tails, and clean up the slots with abrasive paper
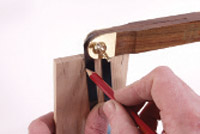
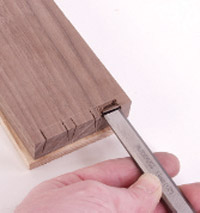
6] Use the tails to mark out the pin member. Be careful to align the boards exactly, with the tail member up against the lap. Use a scalpel or a sharp scriber to make the marks


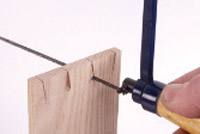
7] With the pin positions marked, take the marking gauge and mark the thickness of the tail member onto the pin member. Use a try square to carry the ends of the tail lines down to the gauged line
8] Fix the pin member in a vice and use a fi ne-bladed saw to cut carefully down the edges of the tails. Hold the saw at an angle to so you can cut down to the gauged line and up to the lap
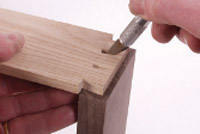
9] Remove the rest of the waste with a chisel. Before you start, hone your chisels to razor sharpness so that you can take the fi nest cuts. Pare out the waste in stages. Cut across the grain along the baseline to start with
10] Then lever the timber out along the grain. Work your way down, taking shallow cuts. Don’t be tempted to cut too deep as you risk breaking out the joint
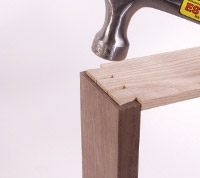
11] Once the pins are finished, gently tap the tail board into position with a hammer. Remove it and make any necessary adjustments. Finally apply a little glue and assemble the joint with a hammer and hardwood block
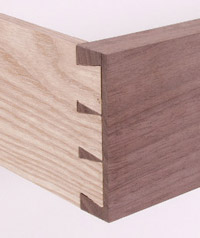
12] The assembled joint shows off its well-proportioned tails and narrow pins. Clean up the ends of the pins if necessary with fi ne abrasive paper for a perfect finish
• Marking gauge
• Sliding bevel or
• Marking template
• Dovetail saw
• Coping saw
• Scalpel or scriber
• Bevel-edge chisels
• Hammer
- Log in or register to post comments


| Articles | Articles | Articles | More | Subscriptions | Resources |