Mistakes & how to fix 'em ~ Part 2 ~ Dovetails

Whether the problem comes from the tails being too narrow or the recesses being cut too wide, the solution is the same. This involves making up a wedge insert to drive into the gap. Once it’s trimmed and cleaned up, the end grain will merge into the end-grain of the dovetail pin. If you're careful in your selection of timber for the insert, it can be virtually invisible.
Wedging and trimmming dovetails
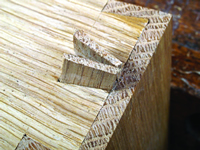
The sequence of photos shows the process for fixing a badly fitting half blind drawer dovetail. In this case, the recess in the drawer front had been over-cut. The dovetail shape on the drawer side was cut correctly. If the dovetail in the side had an uneven cut, it should be evened up before preparing the end-grain inserts. Try to get inserts that come from the same timber stock used for the job - this will give the best colour match. And pay attention to the grain direction - match this as closely to the pins in the joint as possible, for the best results. Trim the insert to fit the gap - I find careful cutting with a chisel to be the best way, followed up by fine tuning against a sheet of sandpaper held flat on the bench. Once you're happy with the fit, put a dab of glue in the gap and lightly tap the insert wedge into place. It doesn't need to be driven hard, as it's not a structural component.
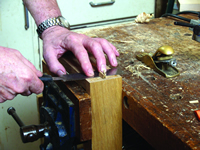
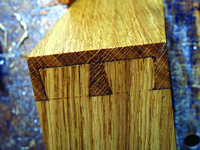
When the glue is dry, the wedges can be trimmed off. I use a dowel trimming saw for this - it has a set on only one side of the blade and so can be held flat against the work without scratching. After sawing, clean up with a block plane and abrasives.
Sometimes, if you're lucky, you will still have the chip. In that case the best fix is to carefully glue it back, using superglue (cyanacrolate). You need to be careful if you don't want to end up gluing your fingers to the work-piece. Its best to use latex gloves for protection when using super-glue.
However, in my experience, it’s most common to have lost the chip. Either it has been pulverised by the router, or lost in the sawdust and off-cuts on the workshop floor. In this case, more drastic action is needed. My basic approach here is to cut out a recess around the damaged part and then glue in a carefully selected patch. It's best to avoid rectangular patches, because these stand out in the finished piece. I usually opt for lozenge-shaped patches, or triangular patches if the damage is on a corner or an edge.
Try to orientate the grain of the patch in the same way as the workpiece for the least obtrusive result. Ensuring the timber grain and colour matches the repaired piece is also important for good results. Let's go through this with an actual patch I had to use in an oak filing cabinet (The Woodworker, May 2005). In raising a moulding round the edge of a panel, I had 'acquired' two nasty chips. They needed to be fixed or the work would be spoiled.
I still had matching timber, left after trimming of the panel to final size, so I was able to get a good match of grain and colour. The process involved cutting out triangular shaped recesses around the chips and then gluing in matching slivers of timber. Although the stock was the same, you need to take care that the grain direction is running in the same direction for an unobtrusive fix.
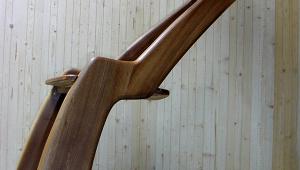
After planing down the patches, trimming up the edges of the raised moulding and final finishing, the repair was virtually invisible.
- Log in or register to post comments


| Articles | Articles | Articles | More | Subscriptions | Resources |