Put your phone to work
Before I got into woodturning, I was an award-winning professional photographer and graphic designer, working at a studio in Alton, Hampshire. Since I moved into woodturning, I’ve brought those previously learned lessons into my new businesses and use them almost every day.
It saves me a fortune of course, but I rarely use the old equipment for my day-to-day photography needs. Instead, I have embraced mobile technology and discovered that you really don’t need a posh camera and expensive equipment to take great shots of your work.
Smartphones have become the go-to camera for most people in the 21st century. They are the perfect tool for capturing anything from a fleeting moment of a baby’s first steps to a major disaster. They are small, lightweight and incredibly powerful. You can pick up, grab your shot and walk away – job done.
As convenient as it is, using your smartphone to capture images can make us complacent with the most important part of a picture: composition. Most of the time, you don’t need to rush it. In this article, I’ll share my top tips for taking great product photos with a few inexpensive pieces of kit and the smartphone you may well have within arm’s reach right now.
A quick note before we go on: the photos here use the popular square format. The majority of E-commerce sites prefer them as do the social media platforms of Facebook and Instagram. This is the only thing you may need to set on your phone before using some of these tips.
TIP 1: Use a tripod & phone mount
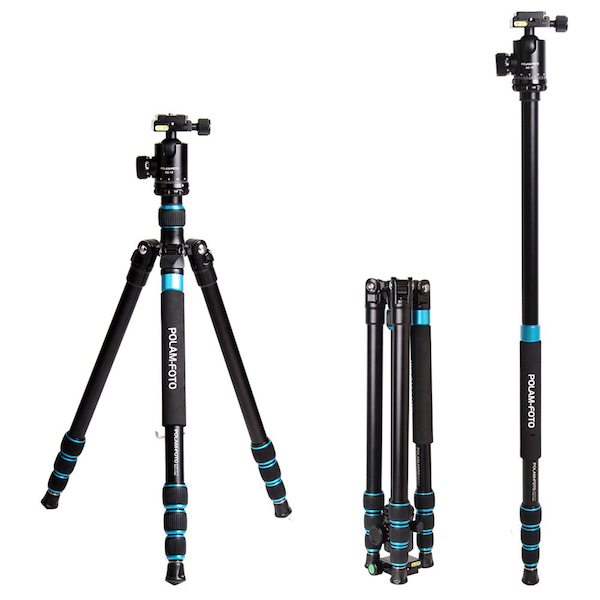
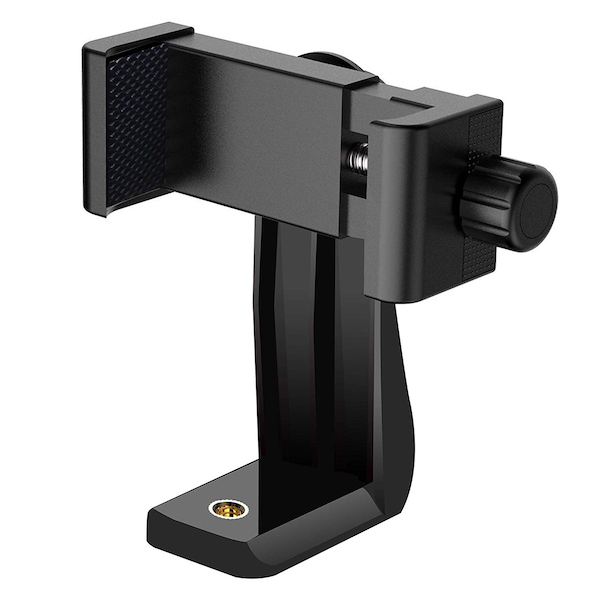
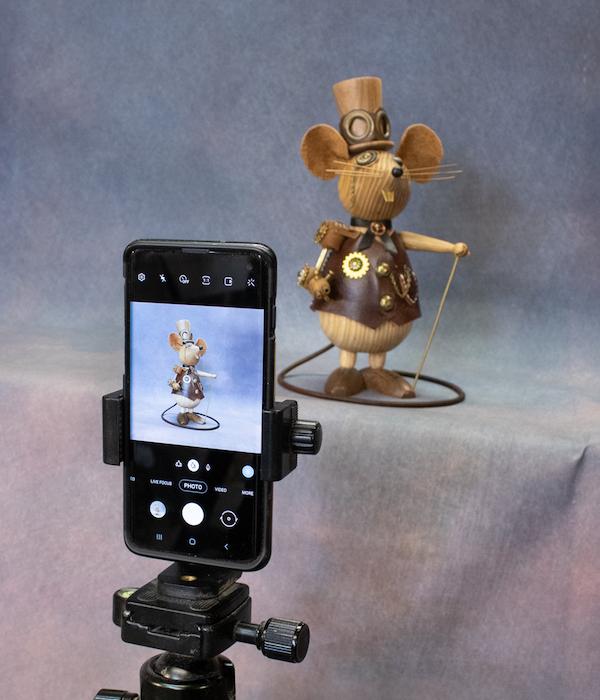
Using a lightweight tripod will help to slow you down when taking your photos (photo 1). It forces you to consider the shot and frame it nicely before committing the image to film (or pixels). Combining the tripod with the use of a dedicated phone ensures everything is held securely for the shot. Both of these items can be found online and don’t have to be expensive. Decent tripods range from £20 upwards. Make sure the tripod extends up to the height of your workbench. The phone mount I use cost me about £6 (photo 2).
TIP 2: Use an uncluttered background

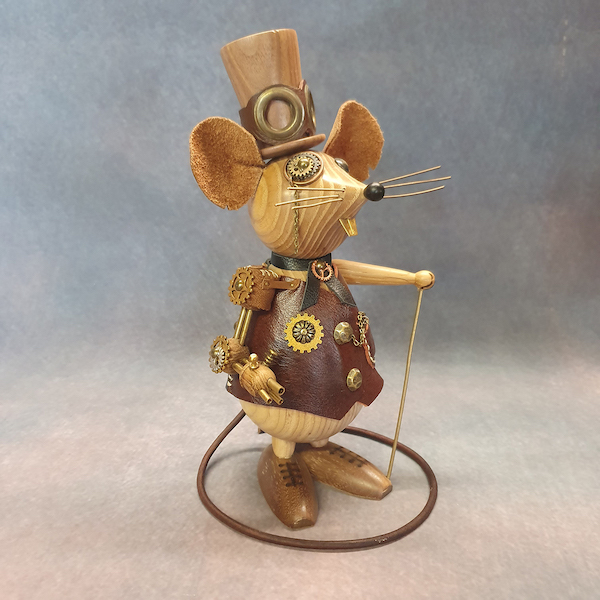

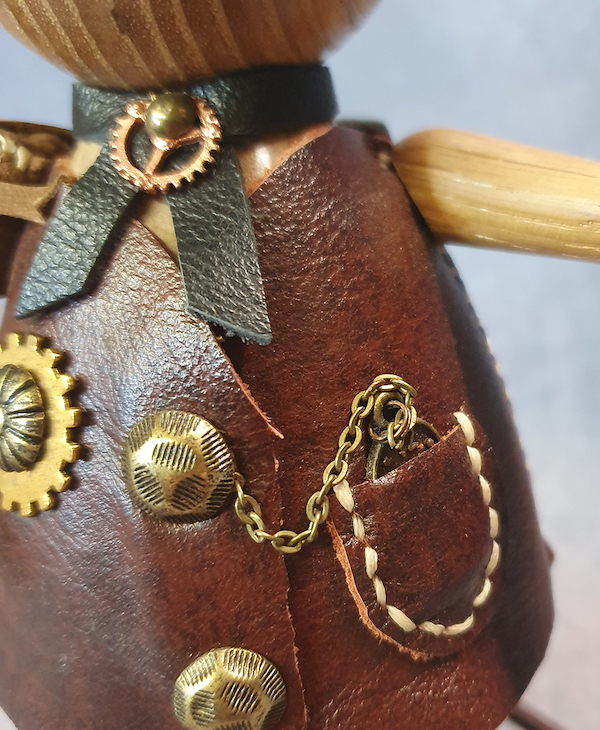
Take the two shots of the fantastic steampunk mouse turned by Stuart Ingrouille on Guernsey (photos 3 & 4). The shot on the bench gives the piece some context and tells a story with the inclusion of an array of tools used to make it. Everything behind the piece is distracting, however, and makes the shot messy. The photo lacks impact as the viewer’s eye is drawn all round the piece, detracting from the impact of the work itself – see tip 9 for story ideas.
Now, look at the mouse when it is placed on a simple and uncluttered background (photo 4). The difference is huge – your eye is drawn to the piece immediately (as there is nothing competing for attention), which makes it a much easier photo to look at. Background choice can be as simple or complex as you want it to be, but the less busy and cluttered it is, the better. The focal point of the shot should always be your piece.
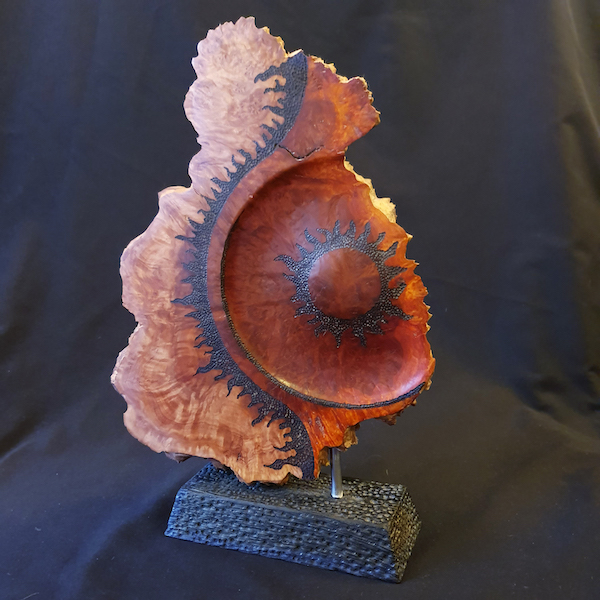
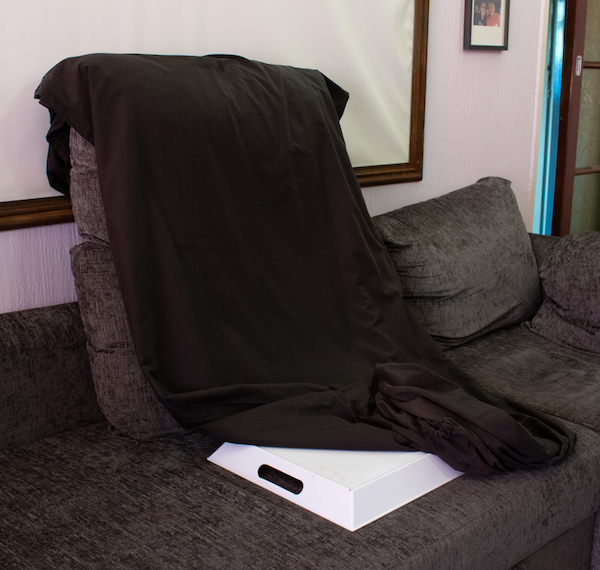
A photographer’s background, like the one in the nice mouse shot, is perfect and doesn’t have to be huge. They are available in a variety of widths and lengths, colours and patterns. They are not very expensive either and are readily available – and not just from specialist photography shops. If you don’t want to buy a background, then use a bed sheet. The sculptural piece in photo 6 was photographed on the background set-up pictured here, too. The result is acceptable enough as the piece is clearly visible with nothing in the background clambering for attention.
When setting up the sculptural piece, it took much longer than those shots on the ‘proper’ background. I had to iron the bed sheet, move the coffee table, stack the cushions and then smooth out the background for the shot (photo 7). So, from a time perspective, an inexpensive photographer’s background would certainly be the way forward for me.
Or, if you’re handy with scissors and a sewing machine, cut up a sheet to about 4-5ft square, put a hem around the edges and make your own ready-to-use background. It may be wise to double the thickness of the sheet as cotton can be see-through in some instances. As nice and fluffy as towels are, they don’t make for great backgrounds and can look a little ‘amateur’. When setting up the background, make sure there is a curve where it turns up behind the piece. This ensures a smooth transition from the bottom to the top of the shot.
TIP 3: Reduce shadows
In a nutshell, direct light (particularly sunlight) causes harsh shadows, and in most cases will spoil your shot. Ambient light is much more forgiving and produces even illumination for your work. If you are shooting outside, wait for the sun to go behind a cloud, or wait for a bright but overcast day. For the majority of my photos, I just use the ambient light in my workshop with perhaps a couple of inexpensive Anglepoise-style lights if I feel I need to. Most of the time, the ambient light set-up works perfectly well, however.
To avoid shadows as much as possible when using ambient light or a couple of spotlights, stand your piece away from the background. The mouse is about 30cm from the background. Doing this ensures that any shadows cast by ambient light are as diffuse as possible.
TIP 4: add lights where necessary

Occasionally, I’ll decide to use additional lights to push some extra illumination into the piece if it is dark wood or the ambient light isn’t as bright as I’d like. I use inexpensive spotlights from a well-known Swedish shop and chose Anglepoise models for flexibility. As these are spotlights, they will cast fairly harsh shadows, so I place away from the phone and choose the angle carefully to avoid them as much as I can.
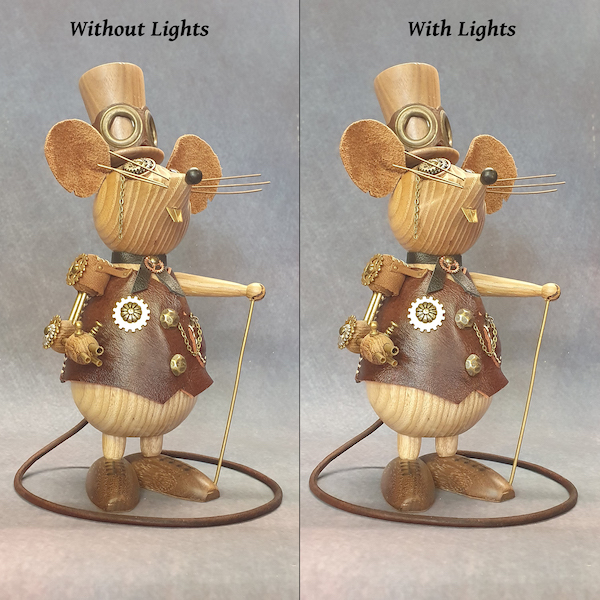
See the lighting diagram in photo 8, which shows how the lights are used to keep the background clear. I may also angle the lights slightly up towards the piece so that any shadows are cast up and away from the background. Play with a set-up that suits you.
Look at the comparison shot of the mouse (photo 9). The left image was taken with ambient light only, and the right-hand shot was taken with the addition of spotlights, as per the diagram. You can clearly see the right-hand shot has highlights not visible on the left shot. Notice too that the background only shows the diffuse shadow from the ambient light.
TIP 5: Perspective: compose your shot at, or just above, the level of the piece
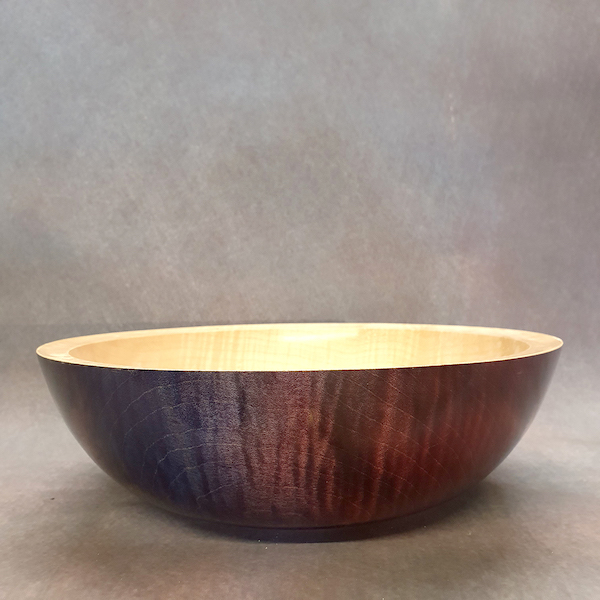
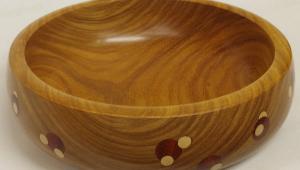
Look at the shot of the mouse again, and the coloured bowl I turned in a demo some time ago (photo 10). Both the photos have been taken at, or slightly above, the same level as the pieces. You can see all the mouse, and get a great view of the shape of the bowl as well as the colours and detail on the rim.
Consider how the viewer will be looking at your photo. 99% of the time, they will be looking at it with their device opposite their eyes, not from the top or bottom of the screen. So, if your photo is taken from the same perspective, the image will be easy to look at. A shot from too high will subconsciously make the viewer want to look under the piece, and from too low, they’ll want to look from a higher perspective.
TIP 6: Think ‘Goldilocks’ when framing your shot
Look at the mouse again, there is room at the top of his head, and beneath his feet. He doesn’t feel like he’s been squished into the frame. The bowl is sitting towards the bottom of the photo – the natural place for it to be. Higher in the shot and the bowl would feel like it is above the eye-level of the viewer.
‘Overcropping’ or cropping in too close is when the subject doesn’t have enough space around it to make it look natural and the resulting photo makes the piece look squeezed into the frame. A shot like this can make a piece feel claustrophobic. And the same the other way – if a shot is undercropped, the subject can look lost and swimming in the frame. You’ll also miss out on some of the details in the piece. So think ‘Goldilocks’ – not to close, not to far, not too high, and not too low.
TIP 7: The devil’s in the detail
Whether you’re shooting for an E-commerce site, or your social media accounts (Facebook, Instagram, Twitter, Pinterest, etc.), don’t forget the details. Each piece of wood is packed full of interesting details that you will not be able to capture well in one shot. Close in on these and capture the essence of the piece. Focus on novel grain patterns, for example, where two colours blend, or a feature you’ve turned into it – these are the things that other woodturners and woodworkers want to see, so don’t leave them wondering.
There are plenty of potential shots you can take to help with a sale or show the piece off to your Facebook friends. Be careful when using a background, though, and keep the detail shots against the background – don’t let anything else creep into the corners and background of the shot.
TIP 8: Let the phone do the work
If you’re not comfortable changing the white balance on the phone, or using camera modes other than the fully automatic mode, DON’T. There’s no point playing with something if you just want to get some decent shots of your hard work. Most of the shooting scenarios you will come up against will be easily handled by your phone’s automatic settings. The photos in this article are shot after simply opening my built-in camera app.
The biggest problem in photography (to my mind) has always been white balance and how various light sources render as different colours when committed to film (or pixels). If you remember shooting on film, then you’ll know that indoor tungsten lights leave photos with a reddish, orange hue and fluorescent lights leave anything from a pink to a green hue (depending on manufacturer and age of the tube). These days, though, cameras (and in this case, phones) are excellent at figuring out a near-correct white balance in the majority of situations.Let the phone do the legwork, use the automatic settings and instead concentrate on setting up the bits the phone can’t do for you.
TIP 9: Tell a story

While standalone piece-shots are great, a photo-story really adds to the, well, story! To be able to see the transformation in a handful of photos adds a level of depth missing in a single shot. A single shot of a completed piece with some tools around it on a decent background gives a hint at the process and also lends a sense of scale to the finished work.
For greater impact, however, document the making of it from start to finish, taking photos each step of the way (photos 11A, B, C, D & E). Your phone is too convenient not to do this. Then, complete the story with your finished piece on a nice background – and don’t forget the detail shots. Even if you don’t post all online for the world to see, they could turn out to be great reference shots later, and for your family to look at, too.
TIP 10: Shoot to sell
Even though you may not be putting your work up for sale in a gallery or E-commerce website, such as Etsy, for example, taking a good photo of your work that is of a high enough quality to use to sell it is, to my mind at least, more important. Take the best photo you possibly can of your work. If the piece took you five hours to make, what’s another 10 minutes or so spent to make it look its best in a photo?
If you’re sharing your work on social media, a good photograph will attract more attention, comments and likes, which is always a bonus. Likewise, on selling sites, such as eBay, good photos help to sell products. A good photograph will reflect the work and care you put into the piece in the first place. If you are charging a sensible price for your work, ensure the photo oozes quality and makes the piece look as much as the price.
Tell the story of your work on websites like Etsy. Use the photos of the steps you went through to complete it – potential customers love to see how things are made, it gives them a better idea as to how long it took to make and assures them that the price tag you’re charging is worth it.
Conclusion
To conclude, none of the accessories mentioned here cost a huge amount and some of them you may already have at home. You could even do without a tripod if you remember the other tips! Remember, though, that executing a decent photograph of your work really doesn’t require much work. For ease, take photos using the full automatic mode on your smartphone’s camera app; slow down; consider the background, the composition and details of the subject piece.
Take as much pride in the photo of the piece as you took in making it in the first place. Ensure the photo reflects the time and effort you put into it. There is a lot more I could go into here, but those tips are more expensive and time-consuming, and best left for another article.
- Log in or register to post comments


| Articles | Articles | Articles | More | Subscriptions | Resources |