Turning for beginners, Part 1
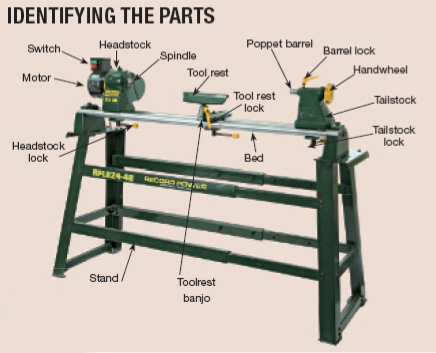
The lathe today
Woodturning has progressed enormously in recent years and is now no longer just a means of producing functional items, but is fast approaching the status of an art form. To fuel this massive increase in popularity and demand, many woodworking machinery manufacturers have hurriedly added lathes to their range, but a good machine requires a number of essential features that are often overlooked in the rush to get new equipment onto the market.
For this reason, it’s better to buy a lathe that is cast rather than fabricated, but this inevitably often involves greater cost. However, do remember that unlike a lot of other machines, you will often spend hours working at the lathe. Consequently it needs to be as smooth and quiet in operation as possible, so always think carefully about the quality and buy the best you can afford.
Photo 1. Cheap lathes appear to
give you a lot for your money
Photo 2. You need a distance
between centres of at least 30in…

Photo 3. …and a swing of at least
9in between spindle and bed
Another useful measurement of size is the ‘swing’ of the lathe, photo 3. This is the height of the main spindle above the bed and therefore determines the maximum diameter of work you can turn, unless the head rotates round. For anything remotely approaching serious work, you need a swing of at least 9in (230mm), but in practice the bigger the better.
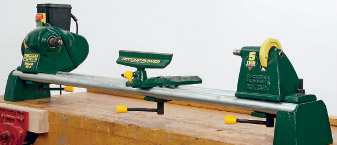
Photo 4. A bench-mounted model
like this will suit most woodturning beginners

Photo 5. Some more rigid leg-stands
include provision for a tool shelf
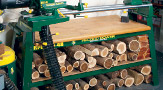
Photo 6. Under-bench storage helps
to give a stand useful extra mass
Whatever the construction, it must be strong enough to support both the tailstock and the tool-rest without any flexing, and allow free and easy movement of them both. It must also permit shavings to fall through unobstructed and should sit well clear of the bench, so you can slide the tools underneath it without banging the sharpened edges.
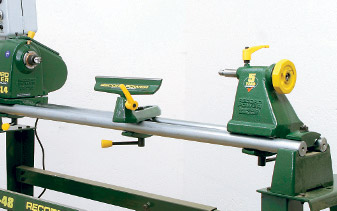
Photo 7. The lathe bed is made
from heavy metal bars or tubes
Photo 8. More expensive beds are solid
castings that are almost a work of art
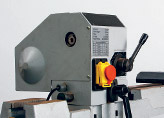
Photo 9. Some imported models have
what looks like a huge headstock
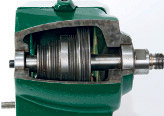
Photo 10. The bearings should be
good quality heavy-duty ball races
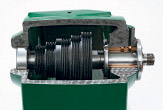
Photo 11. Tapered bronze-sleeved bearings
give greater support than ball races
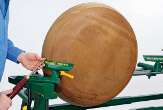
Photo 12. The headstock may have the
facility to swing round through 90°

Photo 13. Swinging the head off-centre
keeps tool handles clear of the bed

Photo 14. You need an additional tool rest
for turning big-diameter bowls
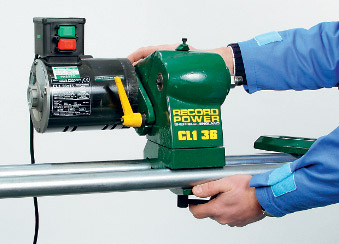
Photo 15. A headstock you can
move along the bed is a big advantage

Photo 16. A spindle thread size of
¾in x 16 tpi is the industry standard
Some imported models have what looks like a huge headstock, , photo 9, but when you remove the belt cover the two spindle bearings are actually quite close together. A small bearing spread like this will causes problems with rigidity, particularly on large diameter work, so always look for a machine where there is plenty of distance between the bearings.
The bearings themselves should be good quality heavy-duty sealed ball races, photo 10. Some machines have a tapered bronze sleeved bearing which gives much greater support than ball races, although it does require occasional adjustment. However, when set up correctly this arrangement supports the spindle over a much greater length and provides totally smooth and vibration-free running, photo 11.
I would rate this swinging head as an essential feature on a lathe; the real advantage is not only for bowl turning, but also for any turning where you have to work over the bed. Swinging the head just a few degrees off-centre allows you to work with the tool handles clear of the bed, photo 13. Although you can still work off the standard tool-rest with the head swung a little, for big diameter bowl turning you will need an additional bowl rest to maximize the capacity, photo 14.
If you are restricted with regards to space, many of the swinging head machines also allow you to move the headstock bodily along the bed, which is a great advantage if the end of the machine has to be up against a wall, photo 15.
This which means that you can then take all your threaded accessories with you, rather than renewing them with the lathe when you upgrade it. This is an important point, as you will often have a substantial investment tied up in chucks and other accessories.
There is a huge range of Morse taper kit on the market, but if you buy a lathe with only screw-on fittings you are very restricted as to what you can use. Morse tapers are commonly No 1 or No 2 on the smaller lathes; the bigger the number the thicker the taper. The tapers just push into the headstock and are then knocked out afterwards with a bar that runs through the main spindle.
If the spindle is solid, there needs to be a centre ejector which screws onto the spindle nose before you insert the taper, photo 18. Take great with these tapers and keep them clean and undamaged, or they will start spinning inside each other, which as well as causing them damage, will lead to inaccuracies when you are using fittings such as drill chucks.
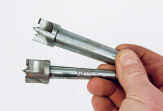

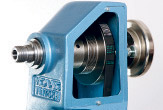
Photo 17. Morse tapers are a universal means of installing centres
Photo 18. A solid spindle needs a centre ejector screwed onto the spindle nose
Photo 19. A three-or four-step pulley gives a speed range of 400-2000rpm
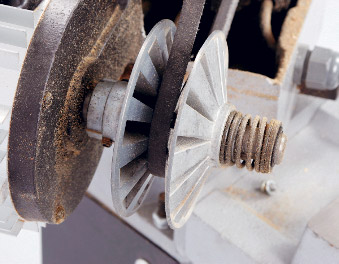
Photo 20. Some lathes use cone
pulleys to change the lathe speed
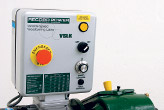
Photo 21. Modern electronic control
offers infinite variation of speed

Photo 22. Memory functions can
remember your favourite speed settings
Some lathes achieve the speed variation in other ways. This may be mechanical, where a lever operates two cone pulleys, so changing their diameter and therefore the speed, photo 20. This system does work, but it is prone to wear belts very quickly and is rather noisy. Also, you can only change the speed whilst the lathe is running. So if you finished the last job at top speed and now want bottom, you firstly have to switch the lathe on and reduce the speed before you can mount the work, all of which is a bit fiddly and time consuming.
State-of-the-art electronic speed controls have memory functions that can remember a selection of favourite speeds. They can also sense incidents such as dig-ins and then instantly shut down the power, photo 22.
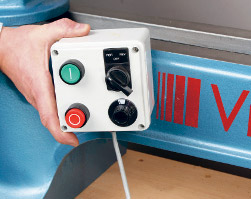
Photo 23. A magnetic switchbox can
be fixed wherever you’re working
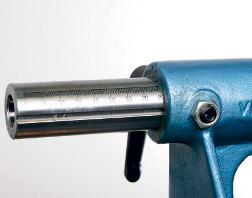
Photo 24. The tailstock barrel needs
plenty of travel for drilling work…
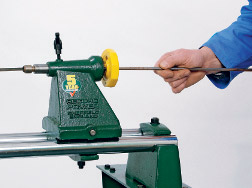
Photo 25. …and should be drilled
through to allow for long hole boring
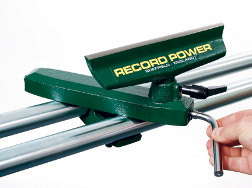
Photo 26. A cam lock on the tool rest
is easily accessible from the front
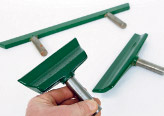
Photo 27. Tool-rests are available
in a range of different lengths
The tool-rest itself needs some vertical height adjustment and should lock into the holder with a simple handle that works effectively; there must be no movement possible once it’s locked. For general use the rest needs to be about 10in (300mm) long, and made of heavy cast construction so that there’s no vibration when you are working at the end of it.
Alternative length rests are available, photo 27. You will probably need a shorter one at some stage. For very long work there is a rest with two stems, but this requires an additional tool-rest holder.
where Alan introduces the basic woodturning tool kit, and explains how to separate the wheat from the chaff
Firstly, consider the type of turning you will be doing. If you will mostly be turning spindles, then there’s perhaps no need for a swinging head model, but rigidity of the bed and good between-centres capacity are important features.
On the other hand, if you think your main interest will be bowl turning, a swiveling head is vital but between-centres capacity is less important. You’ll also need plenty of motor power for big-diameter bowls.
If you want to do a bit of everything, try to decide on the biggest diameter you want to turn and choose a lathe accordingly.
Think also about how often you will use the machine. If you anticipate being an occasional user making a few simple furniture parts, then a basic model is all you’ll need. But if you think you will spend a lot of time at the lathe as your skills and ambitions grow, then you will need the extra power and weight of a larger machine.
As you go further up the range you will find this extra power and solidity allows you to turn more quickly and confidently. You can take deeper and more ambitious cuts, and the ease of use of features such as electronic variable speed control make turning more intuitive and enjoyable.
Above all, bear in mind that woodturning is an addictive hobby, so try to buy in as much spare capacity as you can afford now to save expensive upgrades later on.
- Log in or register to post comments


| Articles | Articles | Articles | More | Subscriptions | Resources |