Turning for beginners, Part 3
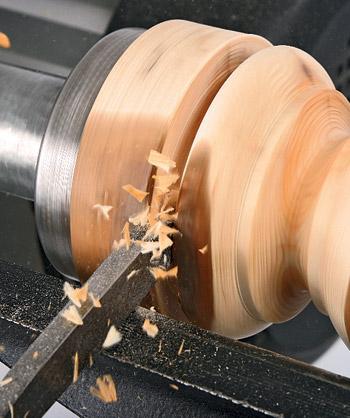
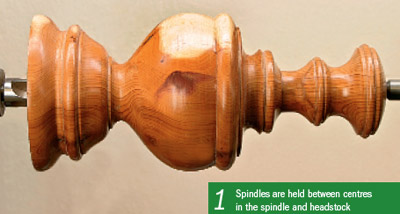
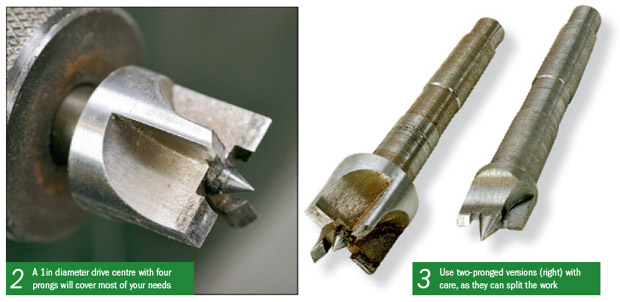
Holding spindles is relatively easy, as these are just held between centres which fit into the Morse tapers of the main spindle and tailstock, photo 1. The drive centres for the headstock are available in a variety of sizes and patterns, depending on the diameter of work you are turning. One with four prongs and a diameter of about 1in will cover virtually all your needs, photo 2. For smaller section material, a 5⁄8 or 1⁄2in diameter centre might be needed, but don’t bother buying one of these unless you actually need it. There are some two-pronged versions available, photo 3, but these should be used with care as you can split the work if you’re too heavyhanded with them.
That’s all you need for working between centres, but there are many situations where you can’t hold your work like this – for example, when you need free access to one end of the workpiece – but in this case there is a much wider range of options available for mounting the work securely.
Fortunately, things have moved on and there’s now a whole variety of very versatile chucks that provide instant solutions for virtually every holding situation. I’ll cover these in detail in the next issue.
Advanced chucking systems are now a necessity rather than a luxury, and most serious turners will have at least one. However, there are still situations where a simple faceplate, or its close derivative the screwchuck, provides the easiest and most efficient method of holding work. In fact, a faceplate may be the only way of getting the initial hold whilst you turn some sort of spigot or recess for subsequent gripping with a chuck.


Although a faceplate is apparently very simple, it’s important to buy a good-quality one. I would prefer a machined steel faceplate with a short boss, as this will run true and is less likely to distort than the aluminium versions. As well as distorting as you screw them onto uneven workpieces, the aluminium ones also tend to chew up round the fixing holes after only a little use. This doesn’t happen with steel, photo 9.
Remember that if you have to screw the faceplate on to a very uneven surface, strength is very important, though you may still have to pack it out in some situations if you need to adjust the orientation of the blank. Plenty of screw holes is an advantage here; try to put a screw through each packing wedge as well to stop them flying out, photo 11.
If jammed faceplates are something you regularly struggle with, and you’re sure they are up tight before you start each time, then try fitting a washer of some sort between the plate and the headstock spindle. Any material will do for this as long as it is soft, photo 13. Cork, fibre, leather or cardboard are all fine and a washer always eliminates the problem.
Do also remember to clean out the threads of the headstock spindle occasionally, as this can stop the faceplate screwing right up. Take great care not to cross-thread it, particularly when loading very heavy workpieces, as the spindle is difficult and expensive to replace.


A standard screwchuck should take normal woodscrews so you can replace them as they wear. The only snag with this is that they are usually No 14s, which can be very difficult to find unless you know an old-fashioned ironmongers. If you try and use thinner gauge screws, they never seem to lock in securely. Beware of screwchucks with permanently fixed screws.
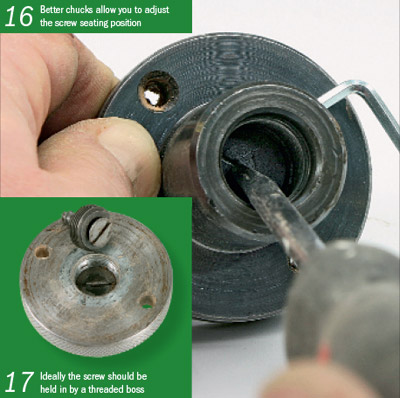
If you’re buying a screwchuck, try to find one where the screw is held in by a threaded boss and the head is retained by a spline in the screw slot, photo 17. This sounds very complicated, but all it means is that the screw cannot then turn as you twist it in or out of the work. Screwchucks that rely on holding the screw just with an Allen key into the side are rarely successful, and become very frustrating to use – either the screw keeps turning, or the work becomes loose as you are working.
If you’re on a limited budget and it’s a toss up between buying a faceplate or a screwchuck, then buy just a 21⁄2in screwchuck which has additional screw holes. Then you can remove the centre screw and use this as a small faceplate as well, photo 18.


Firstly, it’s important that you make the pilot hole the correct size and drill it to the right depth, photo 19. Forcing the screwchuck in without a pilot hole will not give a stronger grip but will actually work in reverse, as the thread crumbles and strips as it struggles to form.
Secondly, be aware that the action of screwing in the chuck will throw up a burr around the hole, photo 20. This will stop the timber seating firmly, leaving a gap between the screwchuck and the end of the timber, photo 21. A tiny amount of play at the chuck end becomes greatly magnified at the other unsupported end, and any attempt to turn with it like this results in the timber being torn off the screw, which is when most people give up!


If you take this much care, it should be possible to hold a piece of sound 3 x 3in timber about 6in long with just a single screw into the end grain, photo 25. If the timber is soft or much longer, use the additional screw holes as well, photo 26.
Sometimes, no matter how careful you are, the screw will not hold in end grain. In these situations, try drilling a hole through the blank and putting in a dowel at right angles to the grain. Once the screw gets hold of this, photo 27, there’s no way it will come off! If you’re attaching to cross-grain work such as a bowl, then a single screwchuck will hold surprisingly large pieces providing it seats flat, photo 28.
Nevertheless, both faceplates and screwchucks are essential lathe accessories and you’ll need to use both of them at some stage, no matter what type of woodturning you are doing.
- Log in or register to post comments
