Full steam ahead
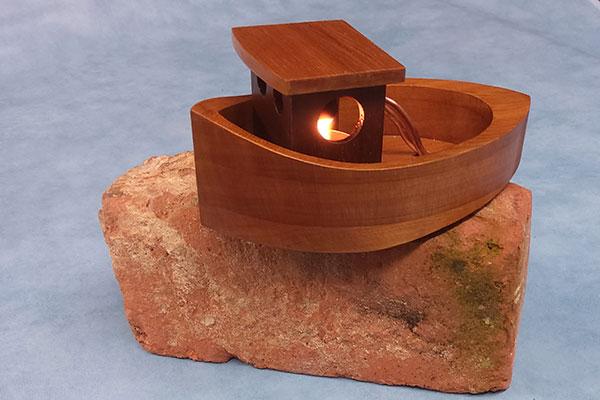
Imagine making a model boat that runs on candle power and only stops when the flame is extinguished. For many years, this model has been known as a pop-pop boat owing to the sound it makes when fired up. Once primed with a little water in the boiler, the heat generated by the candle boils the water, turning it to steam, which is forced out of tubes at the rear of the vessel. This, in turn, creates a slight vacuum in the boiler, sucking up a small droplet of water and turning it to steam once again, and so the cycle is repeated.
Don’t expect speed and power, but seeing the boat chug along in the bath, powered by just a candle, is a wonderful sight. It’s also a terrific way of getting children to investigate some key scientific principles. The project is made from scrap timber plus some basic metalwork; it’s great fun to make and easily adapted depending on tools and materials available. My local timber merchant had a 20mm thick offcut of cedar, too short for him to make use of, but owing to its light weight and the fact it can be easily cut, this was ideal. Before we get going, it’s worth mentioning that most of the original boats were made from tin. As this project uses timber, however, it’s important to point out that extra vigilance should be taken when operating the toy and any young children should obviously be supervised during play. Let’s make a start.
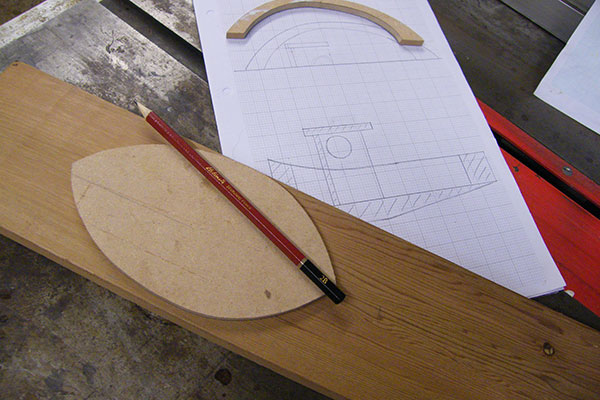
MDF template
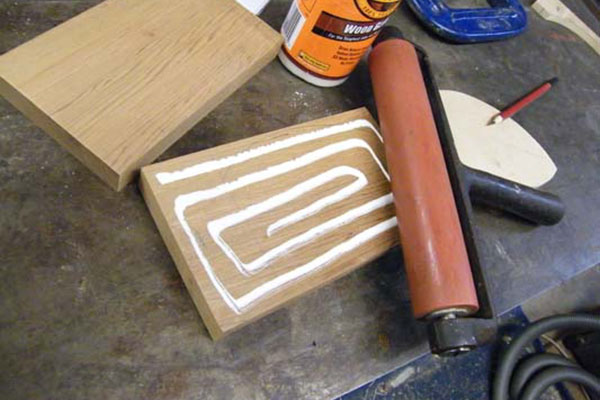
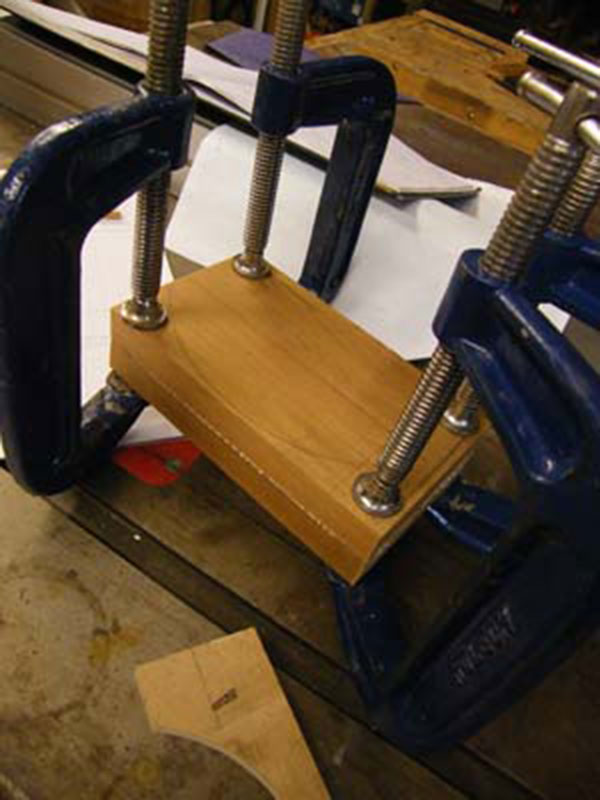
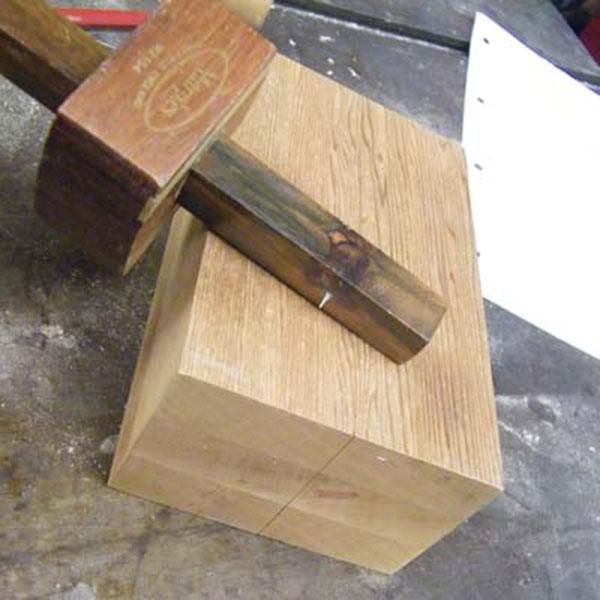
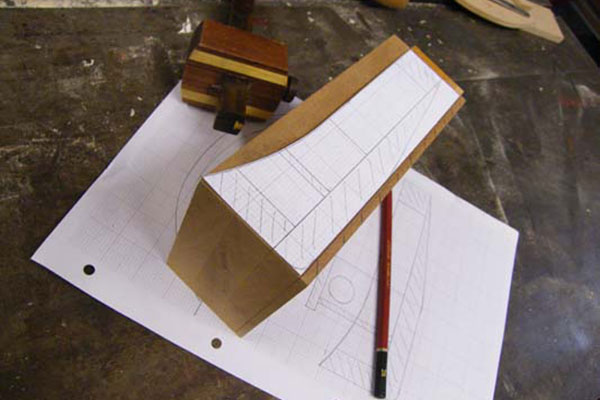
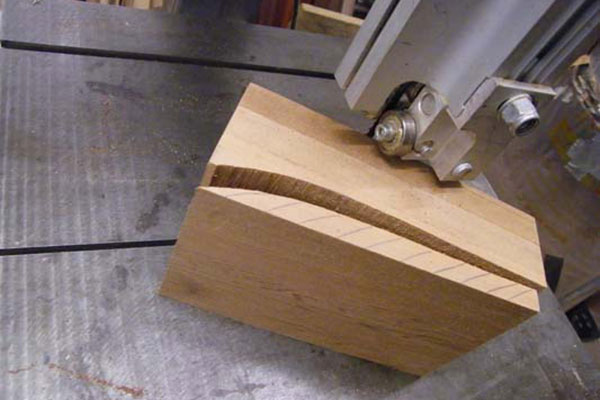
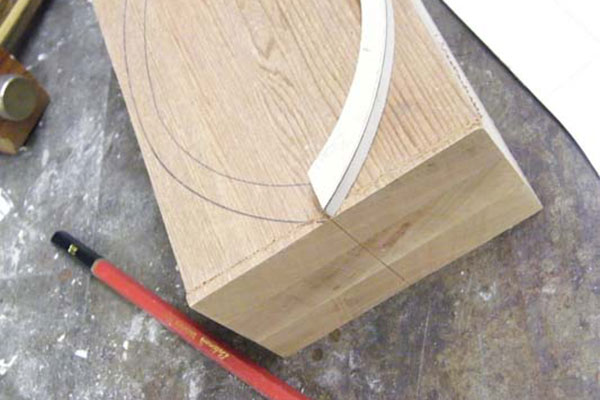
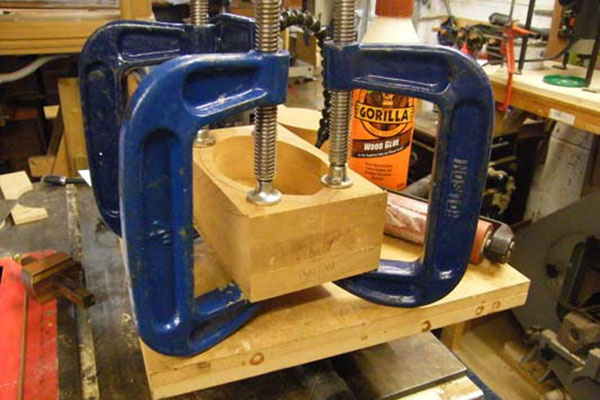
I’ve made a few of these boats in the past and an MDF template allows the project to be easily repeated, although the outline could simply be drawn onto a piece of card and used to mark the wood. I started by preparing three pieces of timber, each 100mm wide x 180mm long, marked a centreline along the length and drew a plan view outline onto the timber (photo 1). I glued two of the pieces together, spreading the adhesive thinly (photo 2), then clamped up and left to dry (photo 3). I secured the third piece in place with double-sided tape and used a marking gauge to mark the centreline down both ends (photo 4). I made a cardboard template of the side view, which is used to draw the side profile onto the block (photo 5). Next, moving to the bandsaw (photo 6) I cut the profile to the line drawn on the side of the block.
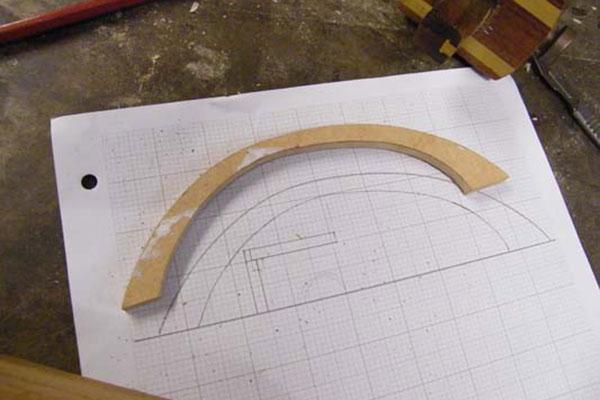
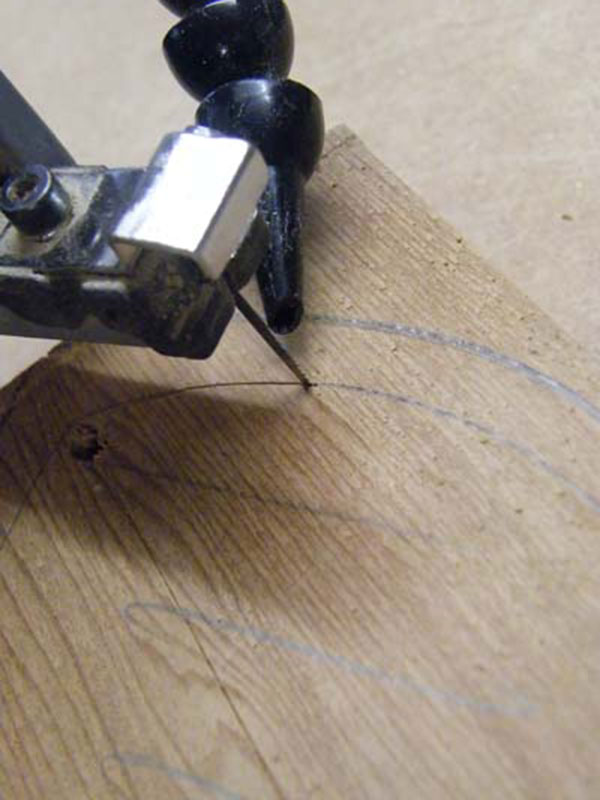
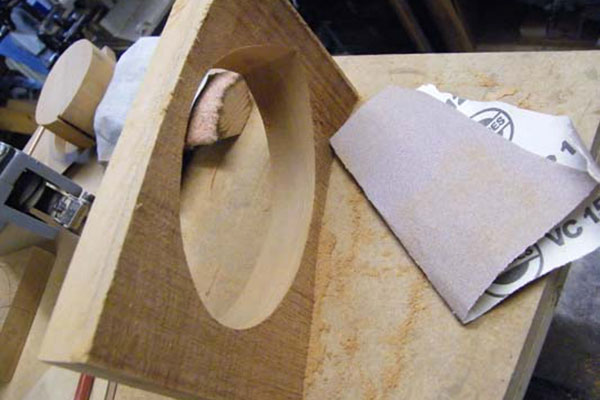
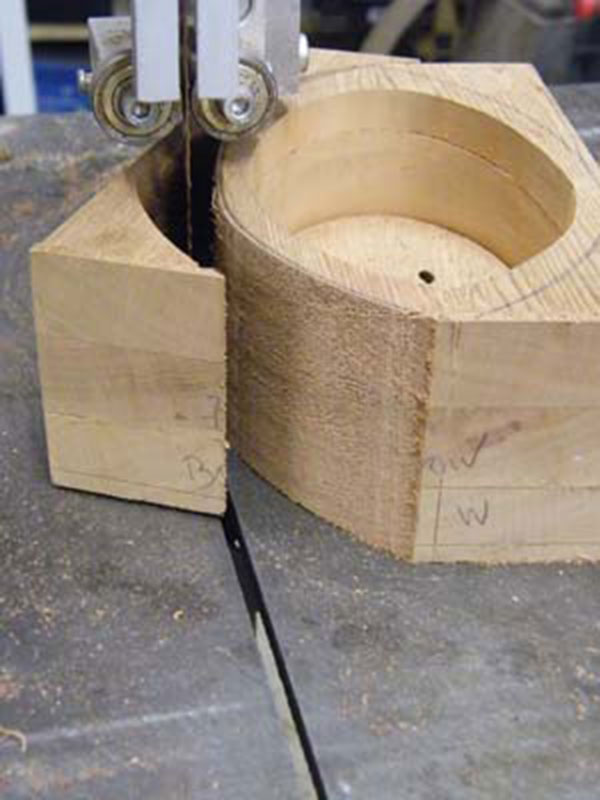
In the absence of this piece of kit, however, a hand-held fret saw can be used but isn’t as efficient. Try to make the cut in one steady line and reposition the waste piece back onto the block with double-sided tape. Make an MDF template of one half of the boat’s sides (photo 7) and use this to draw inside and outside lines on the top of the block (photo 8), ensuring to align the centrelines. Don’t forget to remove the floor of the hull previously held in place with double-sided tape before cutting out the middle of the boat (photo 9). A pilot hole will be required to let the blade into before cutting out the waste. Remove the waste piece from the top, then clean up the saw marks on the inside faces of the hull using various abrasive grits while you still have easy access (photo 10).
Making the floor piece
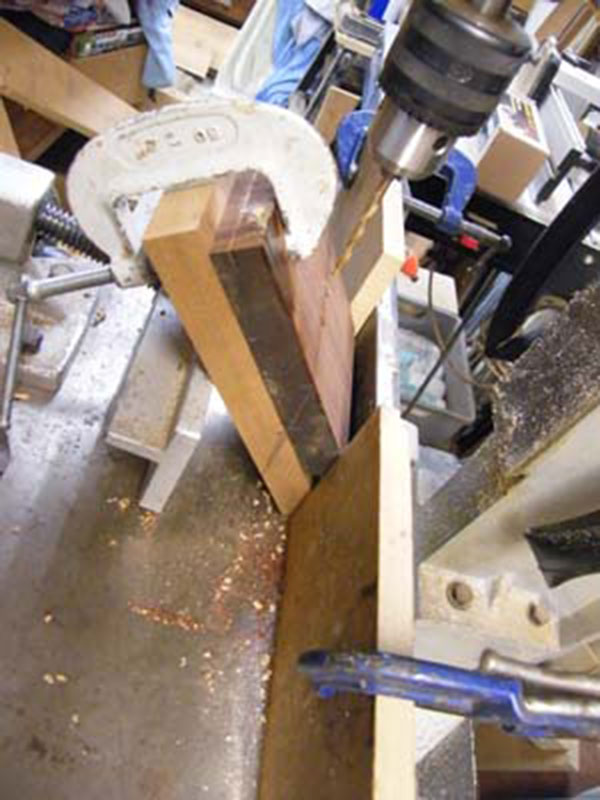
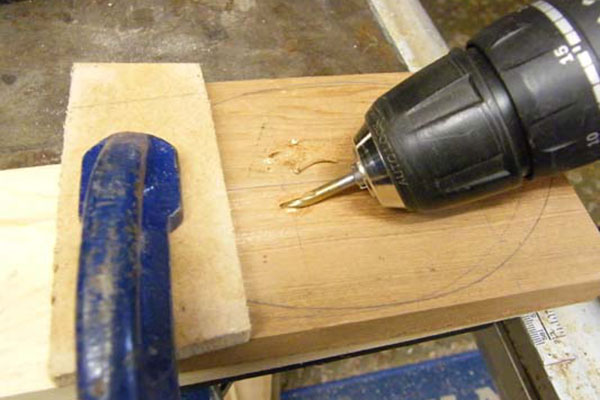
Drill two 4mm diameter holes at an angle in the floor, either side of the centreline. For a neater hole, drill through a scrap piece of wood clamped to the base, which guides the drill bit. If you’re fortunate enough to own a small mortising machine, make a simple jig to secure the timber as you drill the hole (photo 11). Failing that, use a drill fitted with a smaller bit to first cut a pilot hole (photo 12). Don’t forget that this is just a simple toy, which is both entertaining to make and fascinating to watch in action.
Finishing the hull
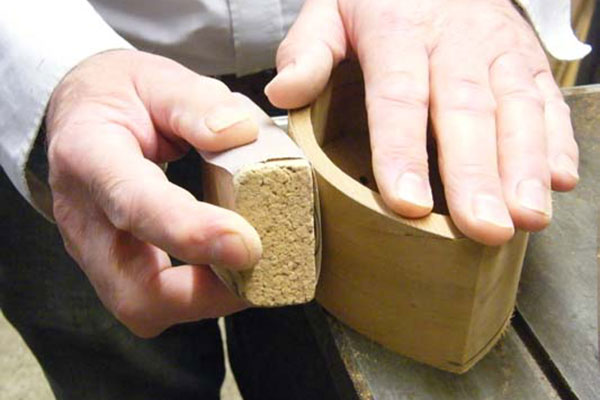
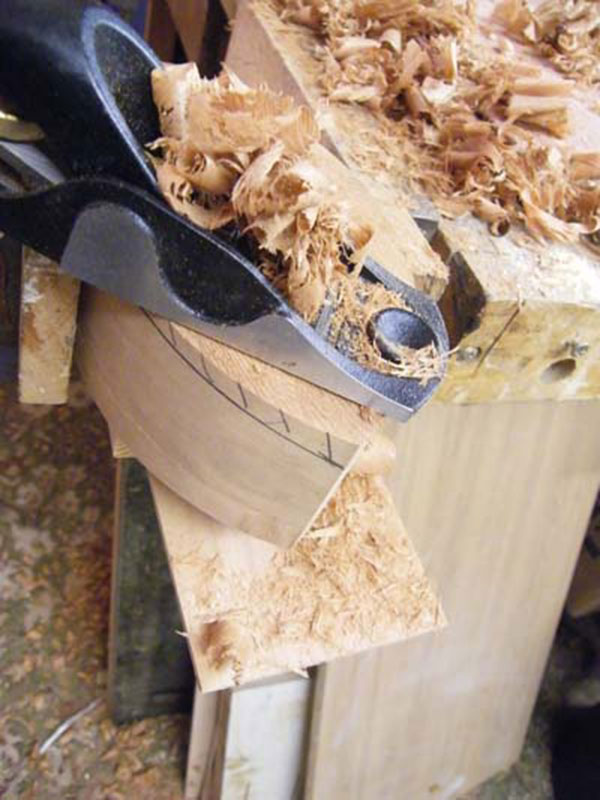
The next step is to glue the floor to the sides and clamp in place until dry (photo 13). You can then cut the outline of the boat to the lines previously drawn (photo 14) on the top of the block, using abrasive to smooth the sides until you achieve a satisfactory finish (photo 15). Looking at the side view of the drawing, you’ll notice that the rear of the hull’s underside slopes up to an angle. Using the cardboard template as a guide, mark this in place and remove the waste using a small block plane before finishing with abrasives (photo 16). Finally, prise away the top waste piece secured with double-sided tape, then smooth the top edges of the sides and round the lower edges of the hull. You should now have a nice, smooth hull, ready to be fitted out (photo 17).

Making the cabin
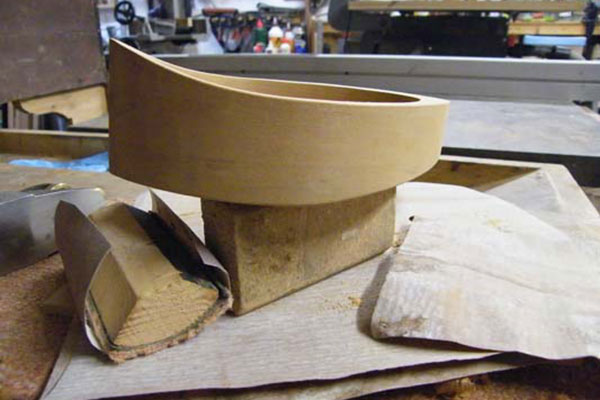
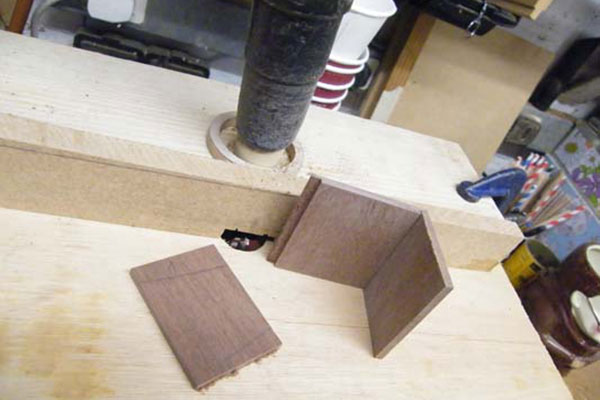
The cabin can be made using a small offcut of timber around 4mm thick. The edges can be simply butt-jointed, but if you have access to a small router table, to produce a stronger joint, cut a small rebate along the edges (photo 18). Before gluing these together, drill some holes to represent the windows. I used 20mm and 13mm Forstner bits to cut neat holes (photo 19). Another source for the cabin timber is to use the otherwise redundant block previously discarded from the hull’s body. To protect the inside of the cabin and make it a little more fireproof, curve some copper sheeting so that it surrounds the candle but stops just below the window line. Use Araldite or similar to hold it in place. For the cabin roof, you’ll need a rectangle of 6mm timber, slightly curved at the front edge, which softens the outline a little. This, too, can then be glued in place.

The engine room
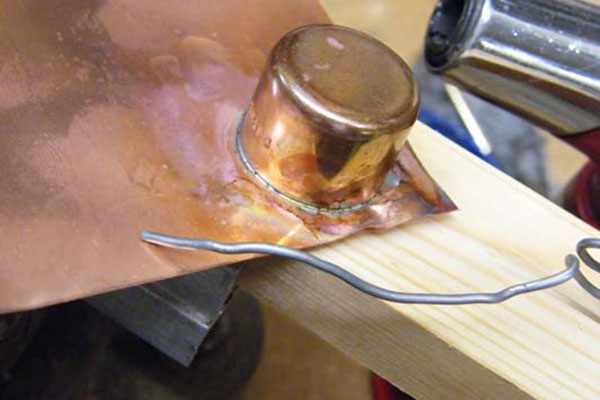
This must be the simplest of steam engine as there’s no moving parts to make, but it does require a little soldering work using either a small blowtorch or soldering iron. For the actual boiler part, you need a 22mm end stop, which can be purchased from a plumbing merchant. I found that this diameter accommodates the flame underneath when lit whereas anything smaller would let the flame spill out to the sides. Solder the end stop to a piece of copper, which you may be lucky enough to have in your scrap box. Failing that, Hobby’s is a good source for copper tubes and sheet as well as small sections of timber. As you probably know, the secret to successful soldering is cleanliness. Put the parts to be soldered together and scrub clean using wire wool or emery paper, then wipe with flux to remove any oxidation on the copper. Apply some heat until the reel of solder melts and is drawn into the joint by capillary action (photo 20). Once cooled, cut round the copper plate and file until level with the edge of the end stop. Secure this part in a vice and drill two 4mm holes a little apart from one another (photo 21).
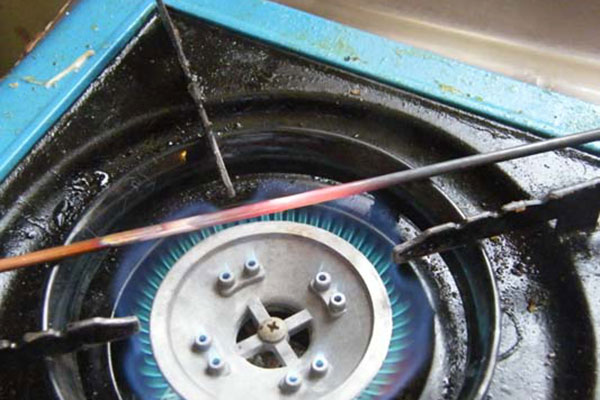
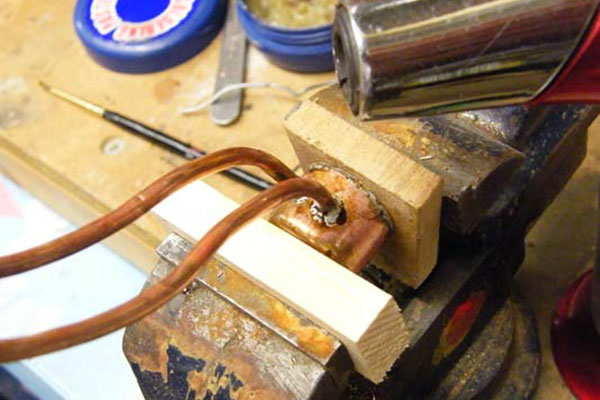
When drilling into metal, use a 4mm HSS drill bit set to a slow speed. You’re looking for a sliding fit into the end tube; you can use a needle file to open this out a little if required. Next, the tubing needs to be bent in order to fit it satisfactorily into the boat. To make this easier, start by annealing the tube. This is a simple process but care should be taken to avoid any potential burns. Annealing is the process of heating the copper in a flame until it reaches a cherry red colour (photo 22), then leaving it to cool naturally. Once cooled, the metal can be easily curved to the desired shape without kinking the tube. The 300mm tube can then be cut in half and cleaned with wire wool. Apply a little flux to the openings and end of the tube, then solder the two tubes to the end cap (photo 23), taking suitable precautions if using a naked flame.
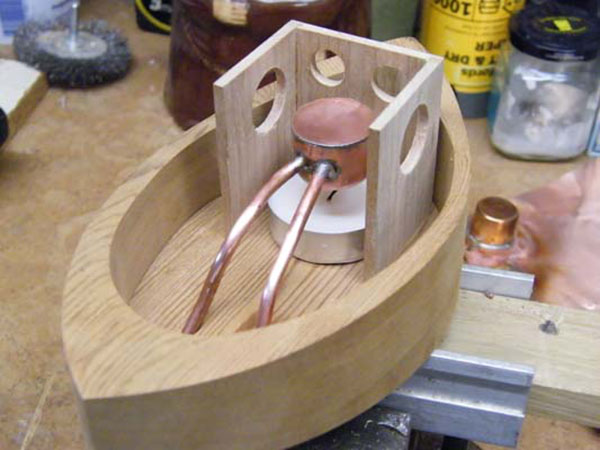
Gripping the copper in a vice between scrap wood acts as an insulator between the copper and metal of the vice, which would otherwise take the heat away and make soldering a little more difficult. Soldering on an old house brick or similar is also a good idea. Once everything has cooled, wash any remaining flux off the metal and burnish with wire wool and metal polish. Now the tubes can easily be bent to shape, allowing them to be slid into the openings made in the floor of the hull and the boiler positioned just above the candle. You want to ensure the wick is situated directly underneath the centre of the boiler; a little adjustment and tweaking will allow you to achieve the correct position (photo 24). Just in case you were thinking brass would look better – yes it would, but brass can’t be annealed and bent in the same way as copper, and copper is also far easier to work with. If the thought of soldering puts you off, just anneal a length of tubing, wrap the centre part round some dowel to make a coil, and fit into the hull in exactly the same way.
Once completed, the protruding tube ends can then be trimmed level with the end of the hull. Now on to the finishing stage, which begins with protecting the hull using your preferred method. In my case, I chose to apply three coats of polyurethane matt varnish to give a smooth finish. To obtain a better result, thin the first coat a little, allow to soak into the wood and leave to dry thoroughly before adding any further coats.
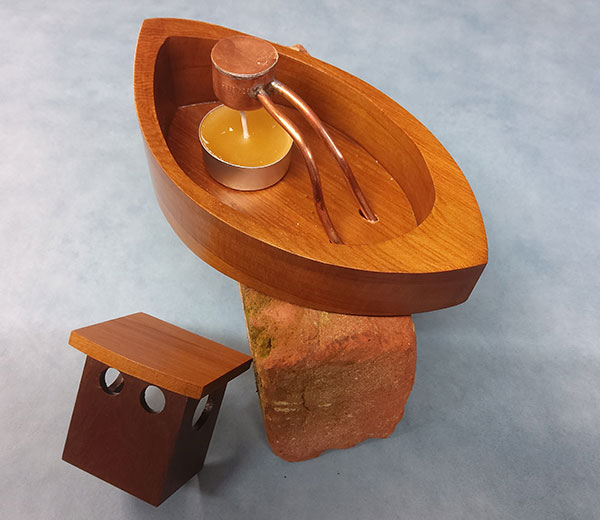
In terms of operating the boat, put a small tealight under the boiler and place the cabin into the boat. Paraffin-based candles give off a surprising amount of smoke due to incomplete combustion, so use beeswax tealights if possible – not only is the flame hotter, but it also produces less soot, thus helping to keep the boat clean. A hotter heat source will improve the performance of the boat. Firstly, prime the boiler by blowing a small amount of water up one of the tubes – before lighting the candle – then watch what happens. After a few moments, the boat will start chugging along quite nicely and continue to do so until the candle expires.
Requiring just a few hours of workshop time, this little project makes a fantastic gift for a youngster with an enquiring mind. One thing I can guarantee is that once you’ve made one of these wooden toys, you’ll very quickly be asked to make another!
Further information
Hobby’s – www.hobby.uk.com – for copper tubes/sheet and timber sheet material. You can also purchase other pop-pop boat plans and the required materials
|
|
||||
- Log in or register to post comments


| Articles | Articles | Articles | More | Subscriptions | Resources |